How to Set Default Profile in Windows Terminal
Setting the default profile in Windows Terminal ensures your favorite command-line tool, like PowerShell or Command Prompt, opens automatically every time you launch the application.
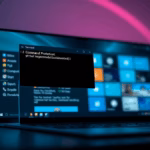
Windows Terminal is a modern app that brings all your command-line shells, such as PowerShell 7.4 and Command Prompt, into one easy-to-use window with tabs.
By default, Windows Terminal opens PowerShell. You can easily change this starting shell in just a few clicks. This simple change makes your workflow smoother because your most-used shell, like Command Prompt (cmd.exe) or Ubuntu, will be ready instantly.
Open Windows Terminal, click the down arrow, select Settings, then choose Startup. Select your preferred shell from the “Default profile” dropdown and click Save. This sets the shell that automatically opens when you launch Windows Terminal.
Why change your default profile?
You might prefer Command Prompt or a specific Linux distribution for your tasks. Setting a custom default profile saves you time. It ensures your favorite environment opens every time you launch the app.
What happens when you are done?
Method 1Using the Settings UI
You can set your default profile in Windows Terminal using the Settings UI. This makes it easy to choose which app opens automatically when you start Windows Terminal, without needing to change any text files.
- Open Windows Terminal from your Start menu.
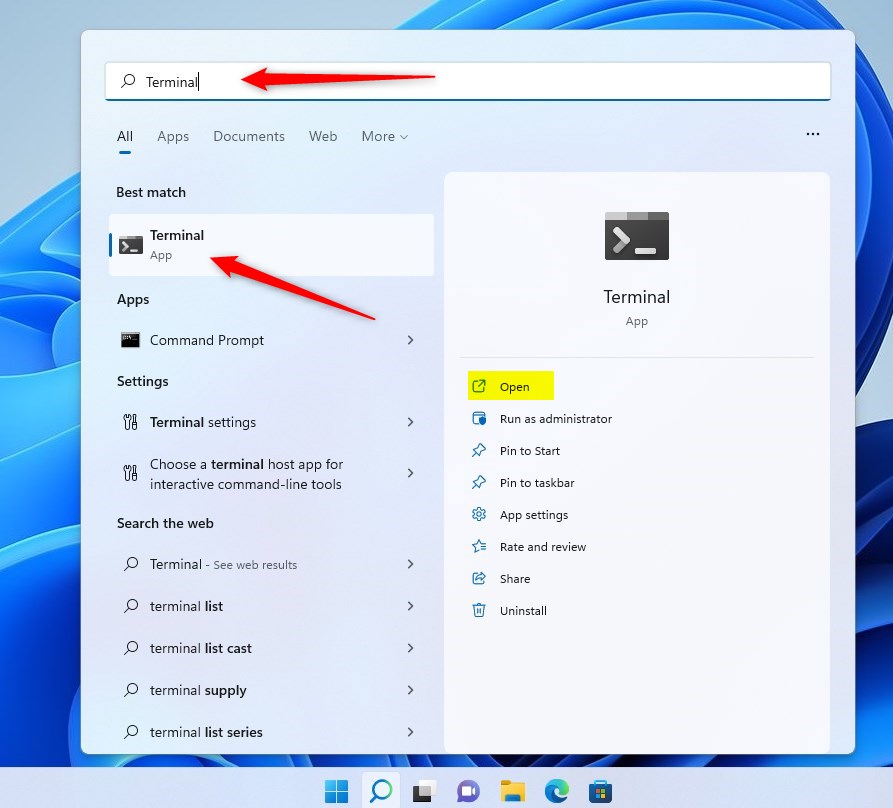
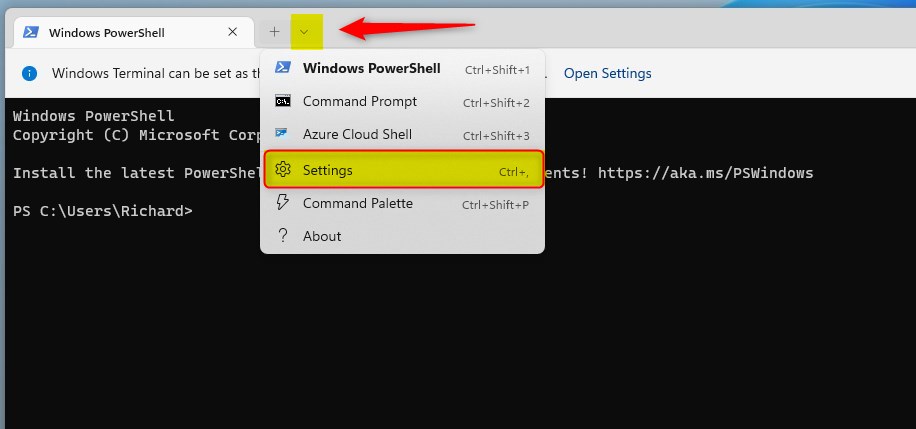
windows 11 open terminal app - Click the down arrow in the top tab bar.
- Select Settings or press Ctrl + , on your keyboard.
windows terminal settings context menu - In the left sidebar, click Startup.
- Find the Default profile dropdown menu.
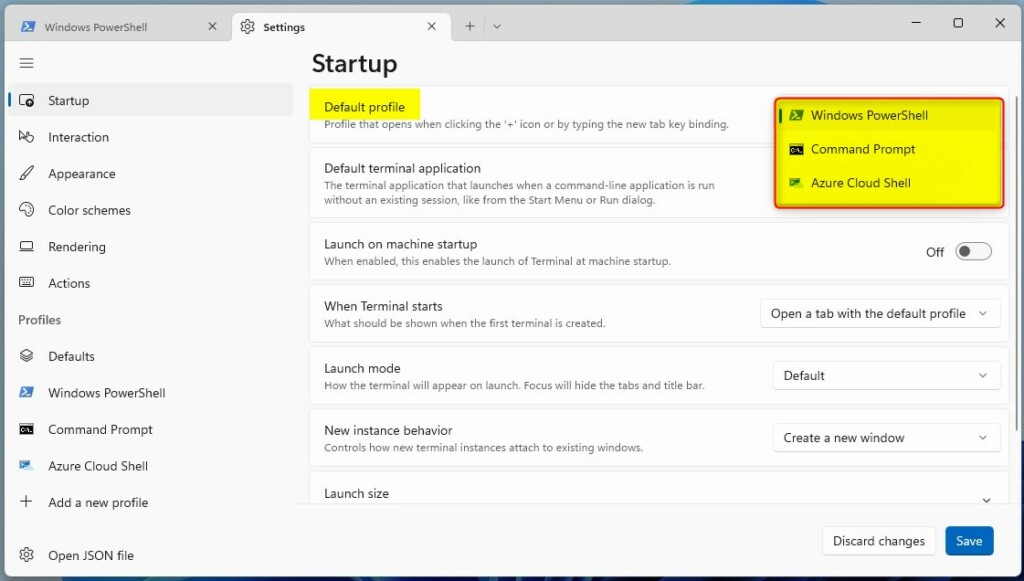
windows terminal default profile - Select your preferred shell from the list.
- Click Save at the bottom right.
Method 2Using the settings.json File
You can set your default profile in Windows Terminal by directly editing the settings.json file. This method gives you more control and allows for advanced customization, but remember to back up your file first.
Back up your `settings.json` file before making changes. You can find the `settings.json` file at `📂%LOCALAPPDATA%\Packages\Microsoft.WindowsTerminal_8wekyb3d8bbwe\LocalState\settings.json`.
- Open Settings in Windows Terminal.
- Click Open JSON file at the bottom left.
- Look for the defaultProfile line.
- Replace the existing GUID with the GUID of your desired profile.
"defaultProfile": "{00000000-0000-0000-0000-000000000000}"You can find the GUID for each profile listed under the profiles section in the same file.
Troubleshooting Common Issues
If your default profile in Windows Terminal isn’t changing, the most common reason is an incorrect save or a syntax error in the settings.json file.
Summary
Customizing your Windows Terminal startup settings improves your productivity. Whether you use the simple Settings UI or the advanced settings.json file, you can control exactly how your terminal environment behaves. For more advanced configuration, visit the official Microsoft Learn documentation.
How do I find the GUID for a specific profile?
You can find the GUID by opening the settings.json file in Windows Terminal. Scroll down to the profiles list. Each profile block contains a unique identifier string labeled as “guid”. Copy this string exactly to use it as your default profile setting.
Can I set different default profiles for different startup actions?
Windows Terminal currently supports one global default profile for new tabs. However, you can create custom shortcuts or use command-line arguments to launch specific profiles. You can also use the dropdown menu to quickly switch between different shells without changing your global default.
Was this guide helpful?

About the Author
Richard
Tech Writer, IT Professional
Richard, a writer for Geek Rewind, is a tech enthusiast who loves breaking down complex IT topics into simple, easy-to-understand ideas. With years of hands-on experience in system administration and enterprise IT operations, he’s developed a knack for offering practical tips and solutions. Richard aims to make technology more accessible and actionable. He's deeply committed to the Geek Rewind community, always ready to answer questions and engage in discussions.


[…] can make to the Terminal app in Windows. You can change the language, adjust the launch size, set the default profile, change the startup behavior, open the admin window, open Terminal automatically at […]
[…] app in Windows allows many customizations. You can change the language, adjust the launch size, set the default profile, change the startup behavior, open the admin window, open Terminal automatically at […]
[…] How to Set Default Profile […]
[…] Linux (WSL). You can customize many settings in the app, such as language, adjust the launch size, set the default profile, change the startup behavior, open the admin window, open Terminal automatically at startup, add […]