How to View All User Accounts in Windows 11

Viewing all user accounts in Windows 11 lets you see every active profile, hidden administrator account, and old login on your PC. A standard Windows 11 setup holds at least 1 personal account and 1 built-in administrator profile.
User accounts are separate profiles on the same computer that keep your personal files, desktop settings, and app data away from other people. Checking who has access to your machine helps keep your private files safe and frees up disk space by letting you delete old profiles you no longer need.
Access the “Family & other users” section in Windows Settings for a basic list, or use Computer Management, Command Prompt (type “net user”), or PowerShell (type “Get-LocalUser”) for a complete list including hidden accounts. These methods show all profiles on your system.
View accounts using the Windows Settings app
The Windows Settings app lets you view user accounts Windows 11 easily by showing everyday profiles currently set up on your device. You can check who has access to your computer in just a few clicks by heading to the main account menu. This method works best for finding standard and family profiles without needing advanced tools.
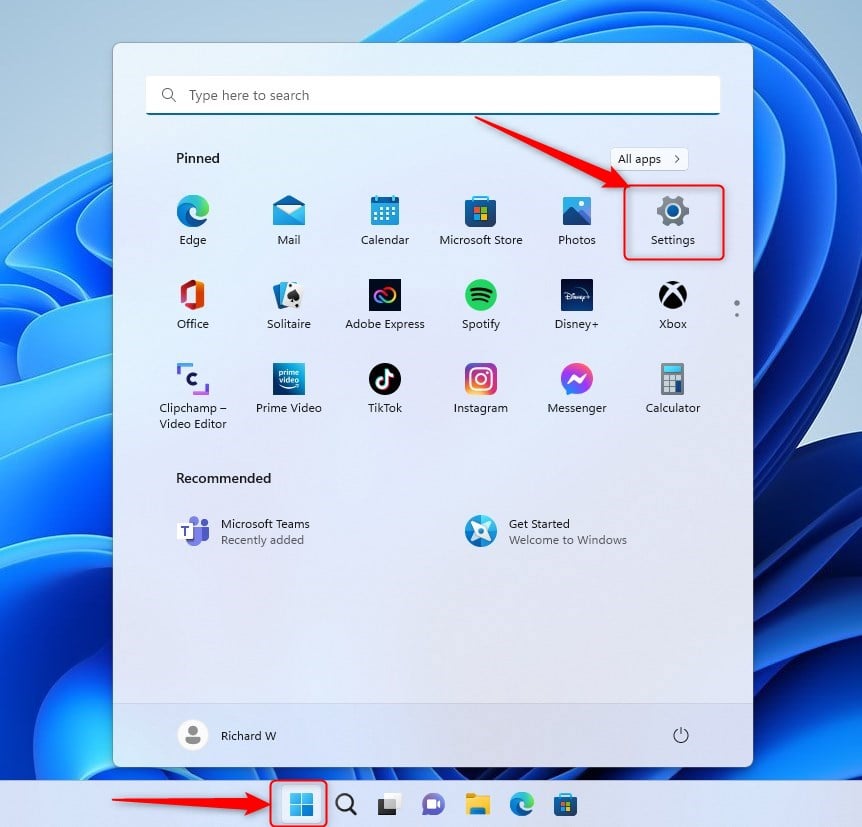
Click the Start menu and select Settings. You can also press Win+I on your keyboard.
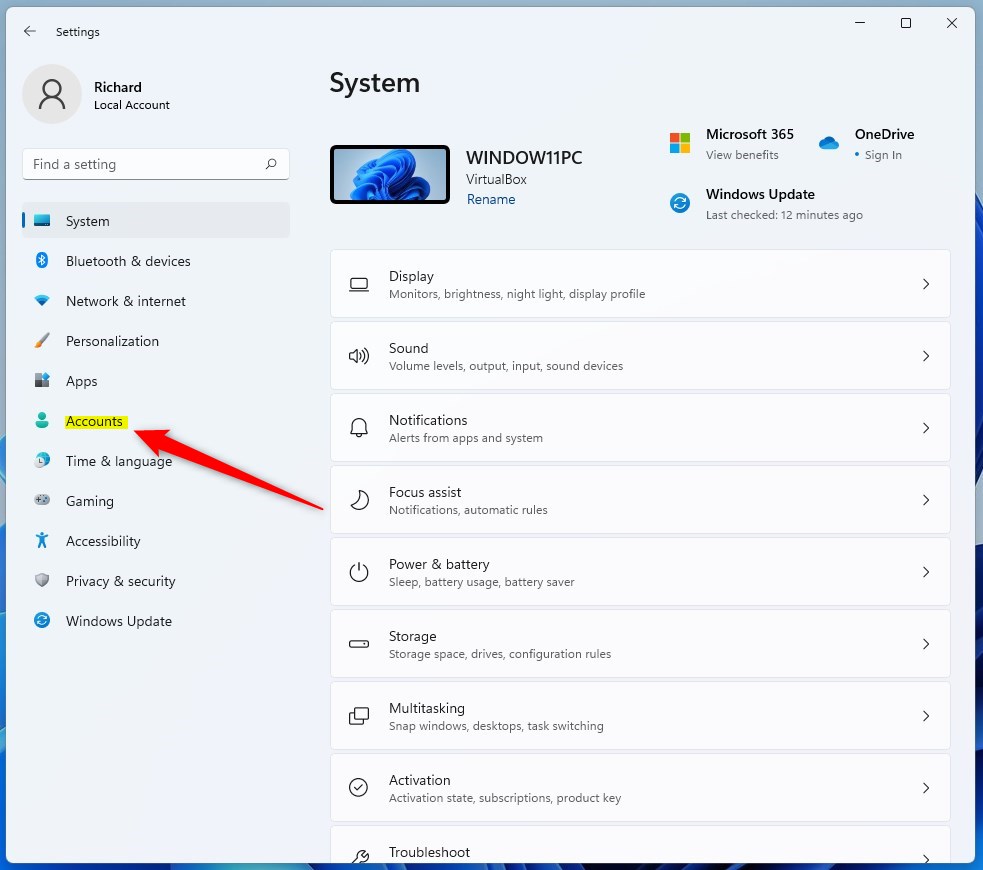
When the app opens, click the Account button on the left side.
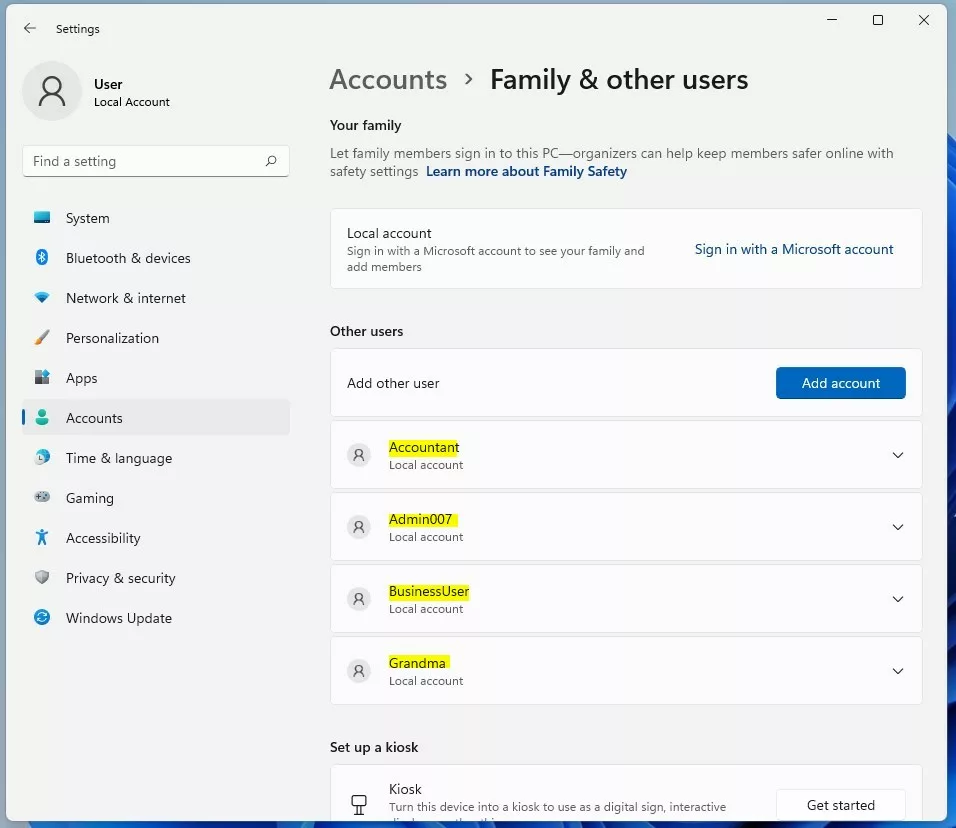
On the right side, select the Family & other users tile to see more options.
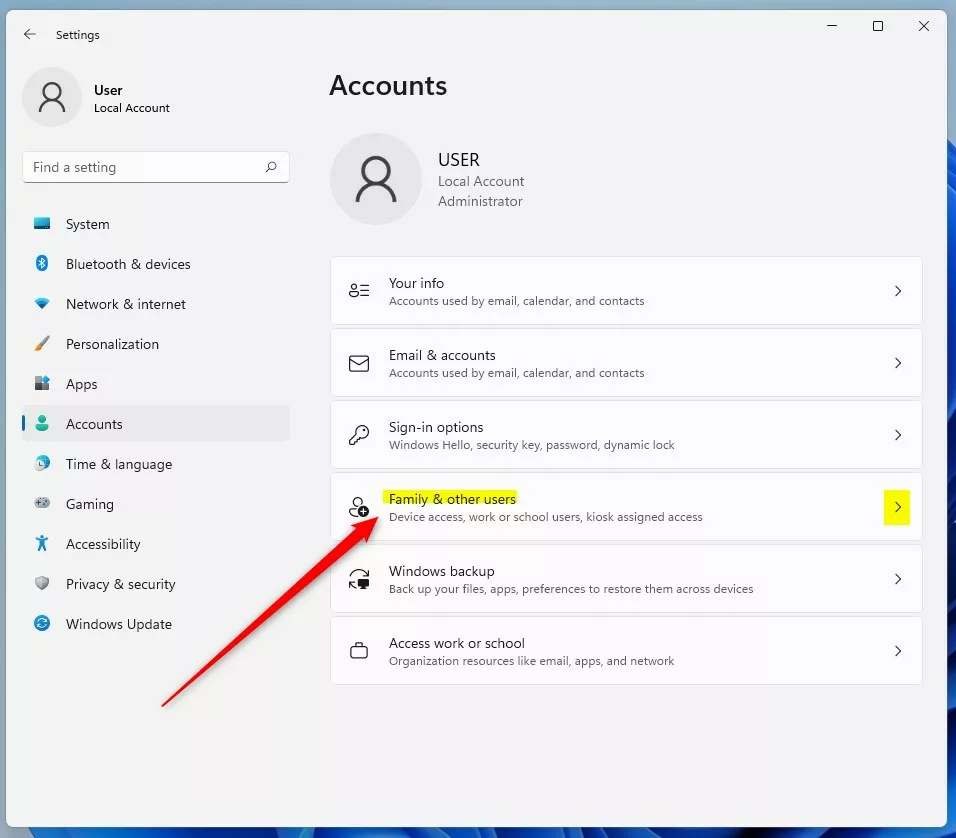
Look under the "Other users" section to see a list of accounts on your system. Accounts that use a Microsoft account appear under "Your family." Note that this method does not show hidden system accounts.
See all user accounts using Computer Management
The Computer Management tool helps you see all user accounts on your Windows 11 computer, including hidden or built-in accounts that do not show up in the standard settings menu. This built-in utility displays a complete list of every profile on your system along with their current status. Use this tool when you need a deeper look at system permissions.
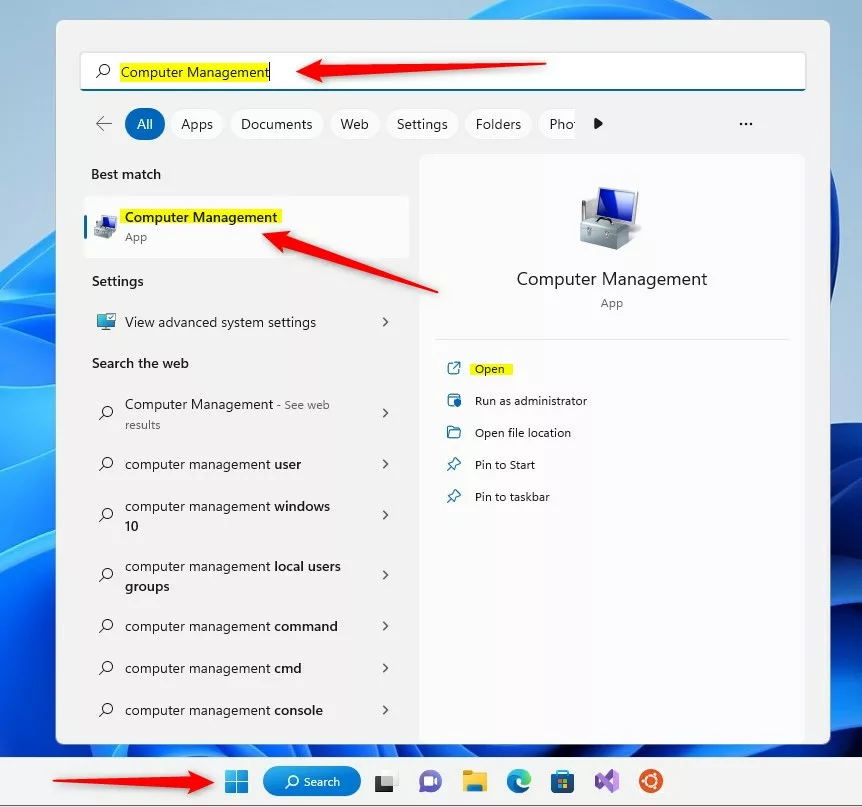
Click the Start menu and search for "Computer Management." Open the app from the search results.
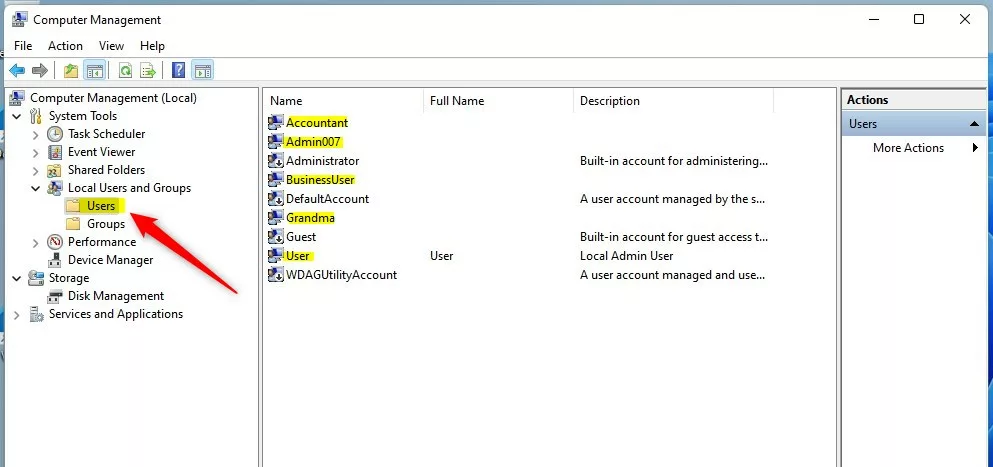
On the left sidebar, click the arrow next to "Local Users and Groups," then select the "Users" folder. You will see every account currently on your computer listed on the right.
List all user accounts using Windows Command Prompt
Listing all user accounts in Windows 11 is possible using the Command Prompt with the following command.
net user
This command shows you a list of all accounts on your system. Alternatively, you can use this command for a cleaner list:
wmic useraccount get name
View all user accounts using Windows PowerShell
Windows PowerShell gives you a detailed way to view all user accounts in Windows 11 by running a quick command that shows every profile and whether it is enabled or disabled. This text-based method pulls data directly from your system to display active and inactive accounts in a clear list. You need administrator rights to run this command.
Get-LocalUser
This table shows you a detailed list of all user accounts, including whether each account is enabled or disabled. You need administrator privileges to view this list, meaning you must be logged in as an administrator or have admin rights to make changes.
Understanding Account Types and Troubleshooting
Windows 11 user account types, such as Microsoft accounts and local accounts, differ in how they connect to the internet. Understanding the difference between these account types helps you manage them better.
Summary
You can view user accounts through the Settings app for a basic overview or use Computer Management, Command Prompt, and PowerShell for a complete list that includes hidden or disabled profiles.
Why can't I see all user accounts in 🪟 Windows 11 Settings?
You can't see all user accounts in Windows 11 Settings because it's designed for basic management and hides system or disabled accounts to prevent accidental changes.
How do I check if a user account is disabled?
Checking if a user account is disabled in Windows 11 works using the PowerShell command Get-LocalUser, which shows the account's status.
Was this guide helpful?

About the Author
Richard
Tech Writer, IT Professional
Richard, a writer for Geek Rewind, is a tech enthusiast who loves breaking down complex IT topics into simple, easy-to-understand ideas. With years of hands-on experience in system administration and enterprise IT operations, he’s developed a knack for offering practical tips and solutions. Richard aims to make technology more accessible and actionable. He's deeply committed to the Geek Rewind community, always ready to answer questions and engage in discussions.




No comments yet — be the first to share your thoughts!