How to Rotate Images in Windows 11’s File Explorer
Windows 11 File Explorer lets you rotate images directly within the app, saving you from needing extra software. This built-in feature allows you to fix the orientation of your photos, making them upright or sideways with simple clicks.
You can quickly turn an image 90 degrees clockwise or counter-clockwise right from the preview window. This means you can easily correct how a picture is positioned without opening a separate editing program.
Just open an image file in File Explorer, and the tools to rotate it appear in the preview pane.
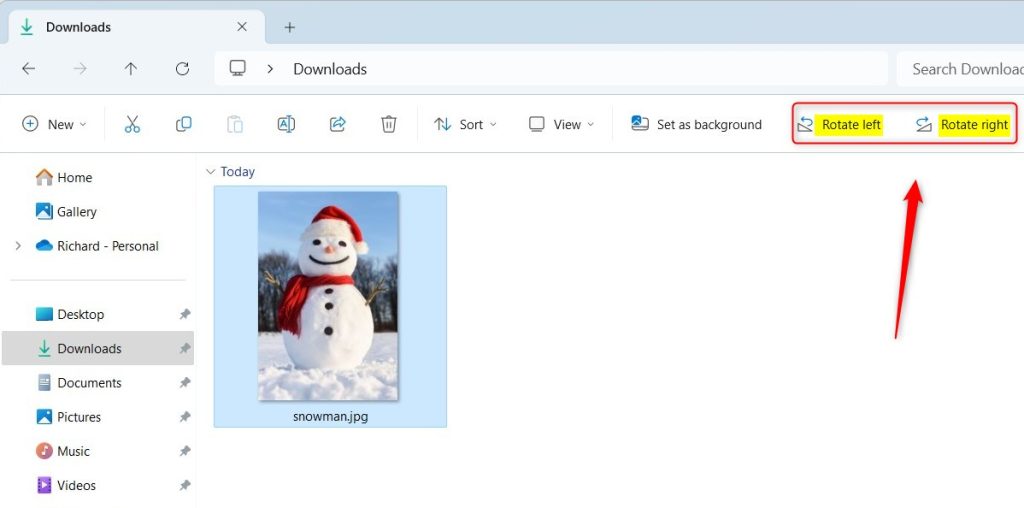
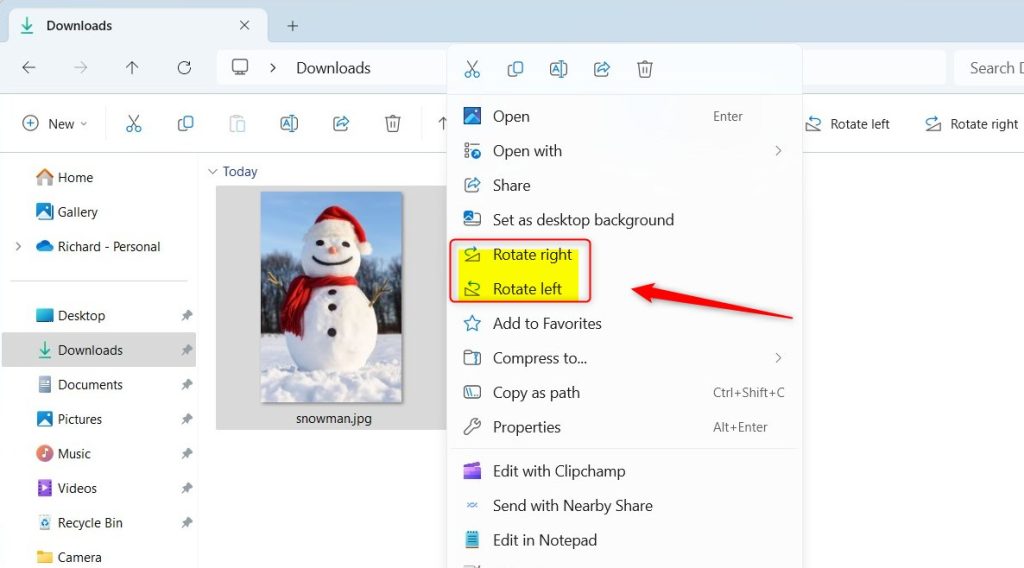
Open the image in File Explorer and click the Rotate right or Rotate left buttons in the preview pane. Alternatively, right-click the image file and select Rotate right or Rotate left from the context menu.
What is File Explorer?
What is File Explorer? It’s the program built into Windows that helps you find and organize all your files and pictures.
Learn more about File Explorer here: How to Open and Use File Explorer on Windows 11
How to Rotate Images in File Explorer
Now, let’s look at how to do this using the Photos app. Windows 11’s File Explorer allows you to rotate images without extra software. Find the picture you want to fix, click the picture to select it, and then use the rotate buttons that appear. This lets you quickly turn your pictures 90 degrees clockwise or counterclockwise directly from the file browsing window.
- Find the picture file you want to rotate.
- Click once on the picture to select it.
- At the top of the File Explorer window, look for buttons called Rotate right and Rotate left.
- Click Rotate right to turn the picture 90 degrees clockwise.
- Click Rotate left to turn the picture 90 degrees counterclockwise.
Another Quick Way
- Right-click on the picture file.
- From the menu that appears, choose Rotate right or Rotate left.
Rotate Images Using the Photos App
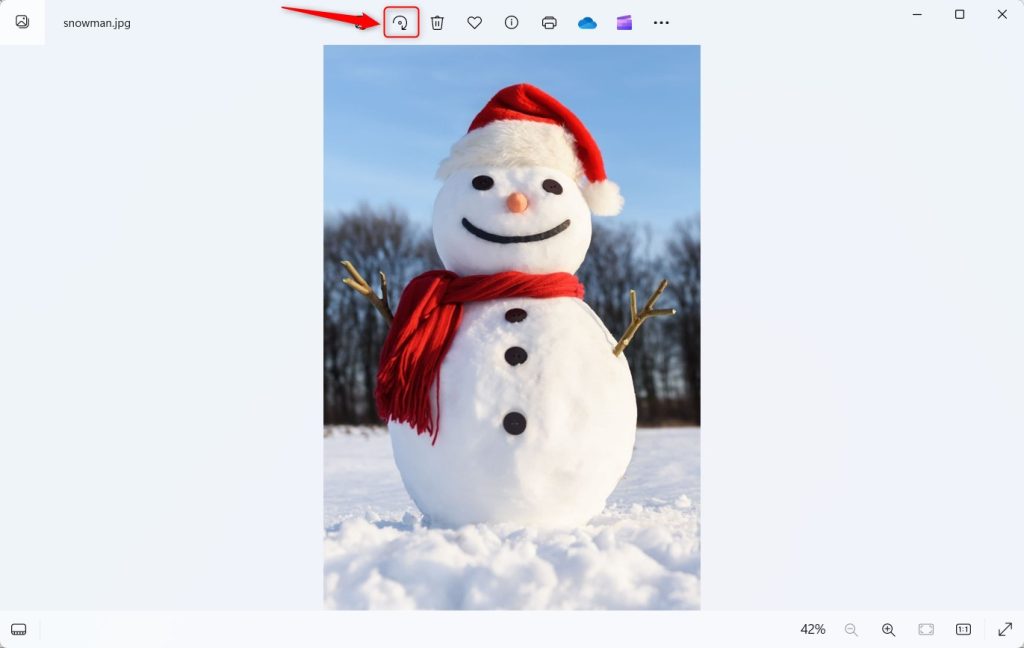
Windows 11’s built-in Photos app makes rotating your pictures quick. Double-click any image to open it, and you’ll see a clear rotate button right at the top. Each click turns the image 90 degrees clockwise. This lets you easily fix its orientation without installing anything new.
- Double-click your image to open it in the Photos app.
- Click the Rotate button at the top (it looks like a curved arrow), or press
CTRL + Ron your keyboard. - Each click or shortcut press turns the image 90 degrees clockwise.
- When finished, click the three dots (More options) in the top right corner, and select Save as to save your rotated image.
- Choose where you want to save the image and click Save.
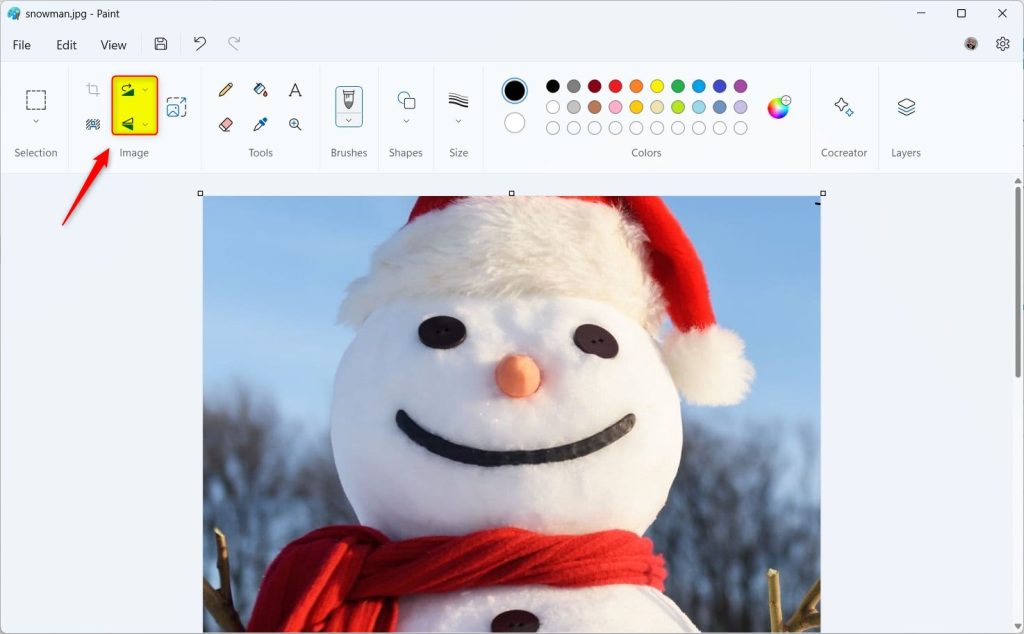
Rotate Images Using the Paint App
You can also use the classic Paint app in Windows 11 to rotate your pictures. Open your image with Paint, and you’ll find easy-to-use rotate buttons on the toolbar. This method lets you turn the image 90 degrees left or right, offering a quick way to adjust orientation if you’re comfortable using Paint.
- Right-click the image file, choose Open with → Paint.
- In Paint, find the Rotate buttons on the top toolbar.
- Click Rotate right or Rotate left to turn the image 90 degrees.
- When done, click File → Save or Save as to keep your changes.
Summary
Rotating images in Windows 11 is convenient because you can use tools already on your computer, like File Explorer, the Photos app, and Paint. You won’t need to download any extra software to get your pictures facing the right way. Pick the method that feels most comfortable for you to adjust image orientation with just a few clicks.
The Photos app and Paint app also let you rotate and save your pictures easily. Choose the method you like best to fix your pictures’ orientation in just a few clicks!
Try it out the next time you need to fix a picture’s orientation!
How do you rotate a picture 90 degrees on Windows?
To rotate a picture 90 degrees on Windows 11, open it in an app like File Explorer or Photos, and then use the rotate button in the toolbar.
How do I rotate any image in my PC?
You can rotate any image on your PC using Windows’ built-in tools like the Photos app or File Explorer.
Was this guide helpful?

About the Author
Richard
Tech Writer, IT Professional
Richard, a writer for Geek Rewind, is a tech enthusiast who loves breaking down complex IT topics into simple, easy-to-understand ideas. With years of hands-on experience in system administration and enterprise IT operations, he’s developed a knack for offering practical tips and solutions. Richard aims to make technology more accessible and actionable. He's deeply committed to the Geek Rewind community, always ready to answer questions and engage in discussions.


No comments yet — be the first to share your thoughts!