How to Restore Known Quick Access Folders in Windows 11

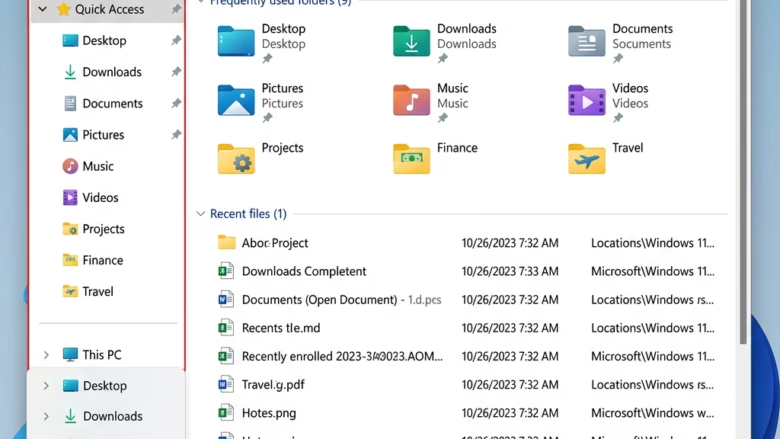
Quick Access folders in Windows 11 are the shortcuts in the File Explorer sidebar that take you straight to places like Downloads, Documents, and Pictures. A Windows update or a settings reset can make them disappear. You can usually bring them back in a minute or two by pinning them again.
Your files are not affected. They stay where they are on your drive, and the fix only restores the shortcuts. It works the same on Windows 11 Home and Pro, and it needs no restart.
Open File Explorer , browse to the missing folder like Documents or Downloads, right-click it, and select Pin to Quick access. The folder reappears in the Pinned section under Home in the sidebar immediately, no restart required.
What is Quick Access?
Quick Access is the part of File Explorer that shows your pinned folders, frequently used folders, and recent files. In current Windows 11 builds you reach it through Home in the sidebar and in the main pane. Your pinned folders also appear in the sidebar under Home. If your sidebar looks different, your Windows 11 version may be older. Older builds label the top entry “Quick access” instead of “Home”.
Quick Access saves you from clicking through several subfolders to reach the place you use most. Windows suggests folders automatically based on what you open. Folders you pin yourself stay put and are not replaced by those suggestions. Pinning the folders you actually work in keeps the list relevant.
Pinning Your Favorite Folders to Quick Access
Pinning a folder keeps it at the top of File Explorer , one click away. You no longer have to dig through your drives every time you need a project folder. Use these steps for any folder, including the standard ones that have gone missing.
- Open File Explorer . Click the folder icon on the taskbar , select it from the Start menu , or press Win+E. A File Explorer window opens.
- Browse to the folder you want to pin. Use the sidebar or the address bar to find it. It could be a project folder, a work folder, or a folder of photos.
- Right-click the folder and select Pin to Quick access. The folder now appears in the Pinned list under Home.
Tip: On a touchscreen, press and hold the folder icon until the menu appears, then tap Pin to Quick access. - Check the result. Click Home in the sidebar. The folder should be listed with a small pin icon.
You can also drag a folder from the main pane onto the Home area of the sidebar to pin it. If Pin to Quick access is missing from the menu, the item is probably already pinned. In that case the menu shows Unpin from Quick access instead. Some items, such as certain virtual or system locations, can’t be pinned at all.
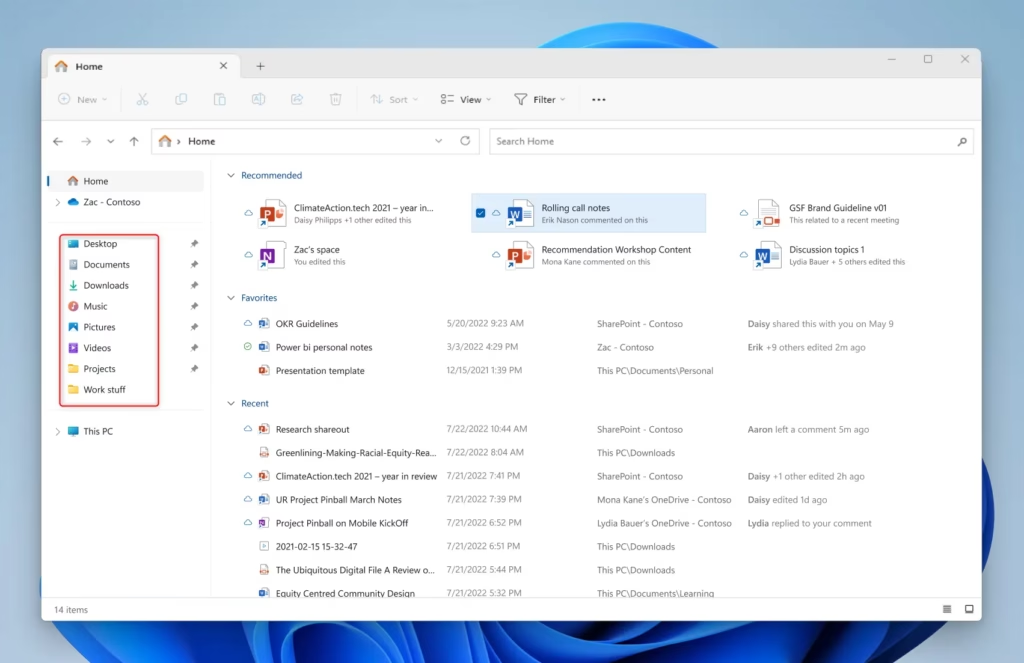
They are also listed in the left sidebar under Home. You can pin as many as you like. Once you pass about 15 pinned items, the list gets cluttered and Quick Access becomes less useful. If the list is getting long, unpin the folders you rarely open.
Unpinning Folders You No Longer Need
Unpinning folders you no longer need keeps File Explorer clean. Old project shortcuts and unused directories make the list longer, which makes your important folders harder to spot. Unpinning is also how you undo a pin you made by mistake.
- Open File Explorer and click Home in the sidebar if it isn't already showing. Find the "Pinned" section.
- Find the folder you want to remove. Pinned folders show a small pin icon.
- Right-click the pinned folder and select Unpin from Quick access. The folder disappears from the Pinned list and from the sidebar.
It removes only the shortcut. The files stay in their original location, and you can pin the folder again at any time.
If Quick Access shows items you don't want, such as recent files or frequently used folders, you can change that in Folder Options. Open the three-dot menu in the File Explorer toolbar, choose Options, and look at the Privacy settings on the General tab. There you can switch off recent files and frequent folders so that only your pinned folders show.
Restoring Those "Known Folders" to Quick Access
If Documents, Downloads, Pictures, or other standard folders have dropped out of Quick Access, you restore them by pinning them again. First you have to find them. They are ordinary folders in your user profile, so they are always there even when the shortcuts are gone.
The original version of this tutorial said the "Up" arrow in Home would reveal them. That does not work in current Windows 11. Home is the top level, so the Up arrow is greyed out there. Use the steps below instead.
- Open File Explorer. Press Windows key + E. A File Explorer window opens, usually on Home.
- Click This PC in the sidebar. Depending on your Windows 11 version, you may see a "Folders" group at the top with Desktop, Documents, Downloads, Music, Pictures, and Videos. If you do, go to step 4.
- If the Folders group isn't there, open your user folder. Go to This PC Local Disk (C:) > Users, then open the folder with your user name. You should see Desktop, Documents, Downloads, Music, Pictures, and Videos listed.
- Right-click a folder you want back and select Pin to Quick access. Repeat this for each of the six folders.
- Click Home in the sidebar. The folders you pinned should now appear in the Pinned section.
If a folder is genuinely missing from your user folder, rather than just missing from Quick Access, the cause is something else. Examples are a moved or redirected profile folder, or a synced folder managed by OneDrive. That is a different problem from the one covered here.
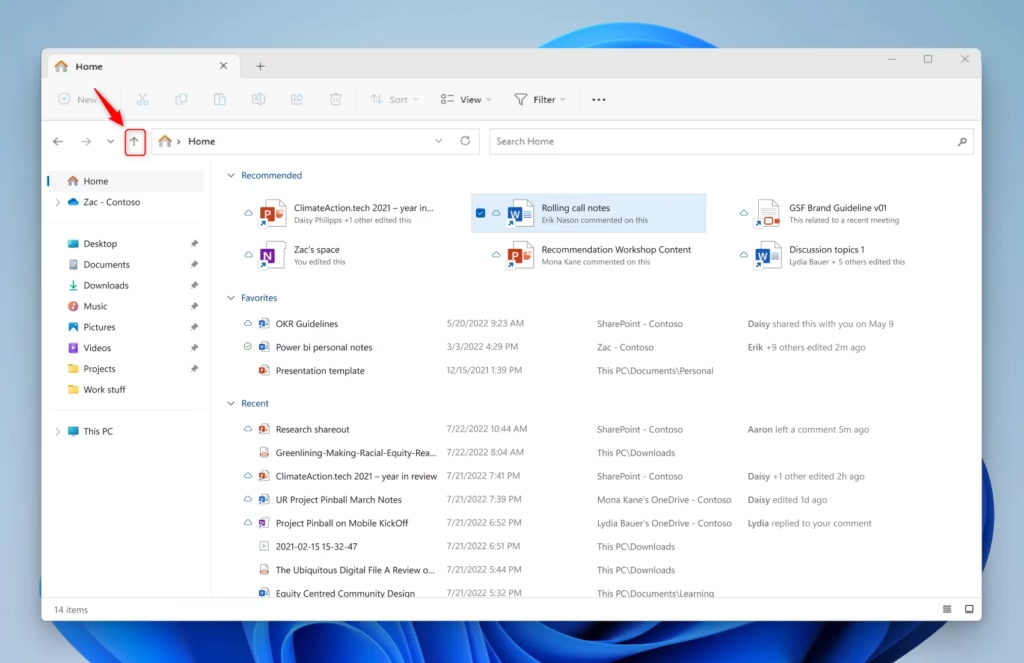
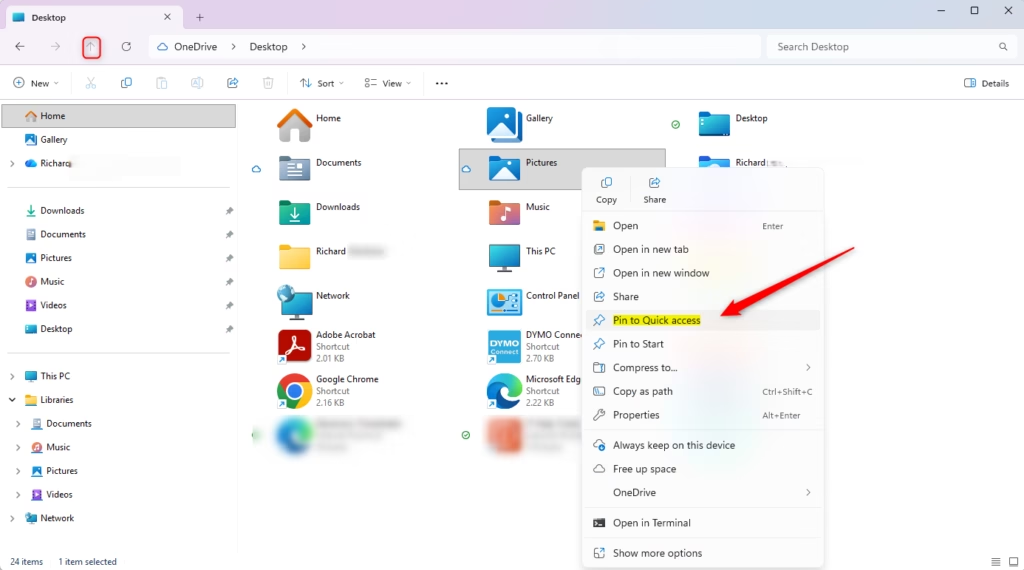
The known folders you pinned appear in the "Pinned" section of File Explorer. They show up in the Home view and in the left sidebar under Home. With the shortcuts rebuilt, your personal files are one click away again. If a folder still doesn't show, close and reopen File Explorer, then check that the pin was applied.
Reference:
Summary
Quick Access in Windows 11 lets you pin, unpin, and restore the folders you use most. If standard folders disappear, find them in your user folder and pin them again. That puts File Explorer back the way you work.
Have a question about this guide?
Answered by AI from this guide. Good questions may be added to this page — please don't include personal details.
Did this guide fix your problem?

About the Author
Richard
Tech Writer, IT Professional
Richard is a writer at Geek Rewind who turns complex IT tasks into clear, step-by-step guides. He draws on years of hands-on experience in system administration and enterprise IT operations, focusing on Windows, Linux and WordPress: the problems people actually run into, and the fixes that work. His server and WordPress guides come from systems he runs himself. Richard builds and maintains the platform behind Geek Rewind, from its Ubuntu servers and Nginx configuration to its custom WordPress plugins. Many new tutorials start with readers' questions, and he's always glad to answer them in the comments.
No comments yet — be the first to share your thoughts!