How to Remove a Device from Your Microsoft Account

Removing a device from your Microsoft account clears old computers, phones, and Xbox consoles from your online profile so they no longer track location data or hold onto software licenses. Your Microsoft account links up to 10 Windows PCs, tablets, and consoles at the same time, which often leaves your device list cluttered with hardware you no longer own.
Old laptops, broken machines, and traded-in gear sit in this inventory until you sign in to account.microsoft.com/devices to delete them. Cleaning out this list helps you keep track of your active hardware and frees up device slots.
Go to your Microsoft account’s Devices page online. Select the device you wish to remove and click the “Remove” button. Confirm your decision to disconnect the device.
How to remove devices from a Microsoft account
You can remove a device from your Microsoft account by visiting the official Microsoft account devices page, signing in with your login details, and clicking the remove option next to the hardware you want to unlink. This helps you keep your online device list clean and ensures old laptops or PCs you no longer own do not stay linked to your Microsoft profile.
This guide shows how to remove a device no longer needed from your Microsoft online account.
- Go to account.microsoft.com/devices, sign in, and find the device you want to remove.
- Select Show details to see info for that device.
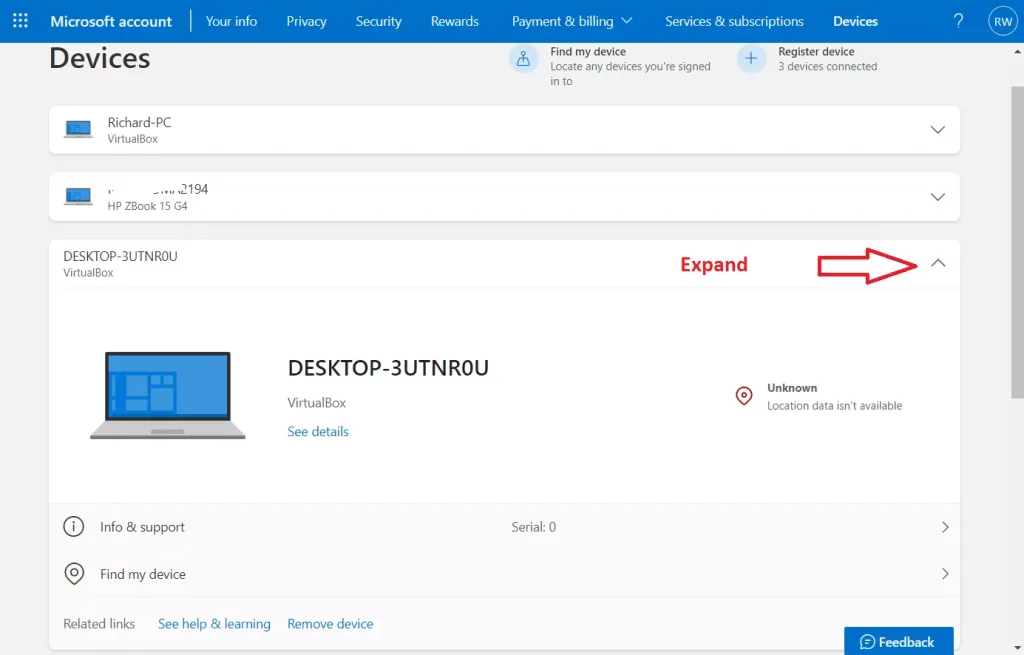
- Under your device’s name, select More actions > Remove.
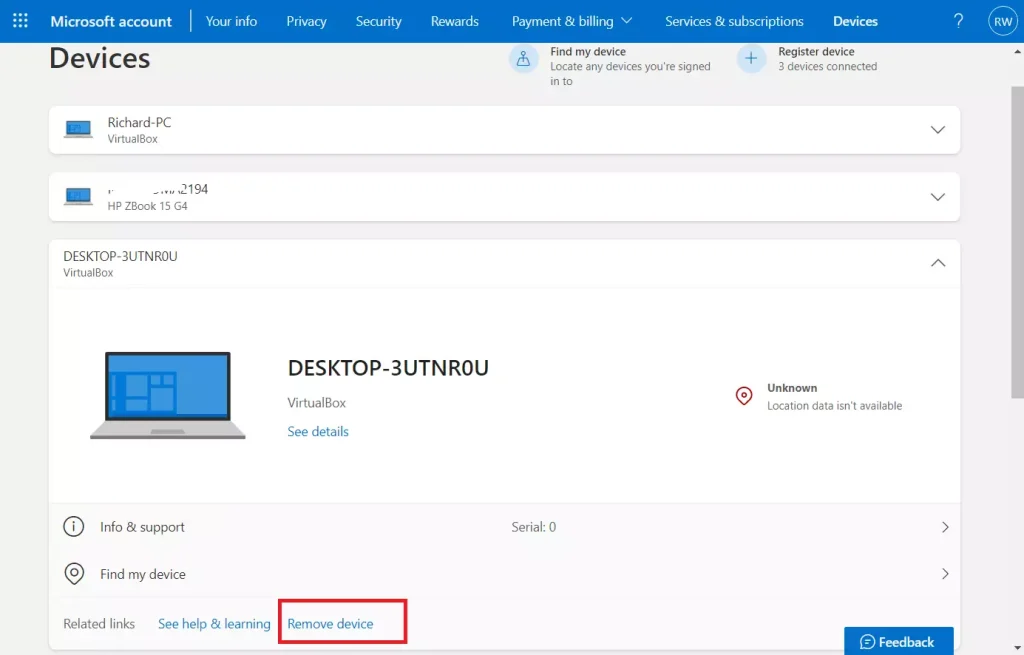
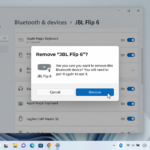
- Review your device details, select the check box, I’m ready to remove this device, then select Remove.
Anyone in the household can follow these steps to clear out unwanted hardware. If you want to remove a device for a child in your family, have your child sign in to account.microsoft.com/devices, then follow the exact instructions.
That completes the cleanup.
Review your connected hardware regularly to maintain account security and keep your device list accurate:
- Removing a device from your Microsoft online account is a straightforward process that involves a few simple steps.
- It's essential to regularly review and manage the devices connected to your Microsoft account to ensure security and account accuracy.
- Following the instructions, adults and children can easily remove unwanted devices from their Microsoft account profiles.
- Maintaining an organized device list allows users to fully utilize and manage Windows features such as app sharing and find my device functionality.
Was this guide helpful?
0% of readers found this helpful (1 votes)

About the Author
Richard
Tech Writer, IT Professional
Richard, a writer for Geek Rewind, is a tech enthusiast who loves breaking down complex IT topics into simple, easy-to-understand ideas. With years of hands-on experience in system administration and enterprise IT operations, he’s developed a knack for offering practical tips and solutions. Richard aims to make technology more accessible and actionable. He's deeply committed to the Geek Rewind community, always ready to answer questions and engage in discussions.


No comments yet — be the first to share your thoughts!