How to Optimize Storage Pools in Windows 11


Storage pools in Windows 11 combine two or more physical hard drives into a single virtual drive. The pool protects your files and makes them easier to manage. Keep at least 10GB of free space on each drive in the pool. Drives that run close to full cause slowdowns and leave the pool little room to move data around.
You can add more drives as your storage needs grow. You can also turn on safety settings, such as saving extra copies of your data, to guard against a drive failure. Storage Spaces is available in both Home and Pro editions of Windows 11. You can check the health of your drives at any time in the Storage Spaces settings. It is a good idea to look there before you run an optimization, so you know every drive is healthy first.
Open Settings System Storage Advanced storage settings Storage Spaces, select your storage pool, then click the Optimize button. Windows distributes your data evenly across all drives in the pool, improving performance and efficiency without requiring a restart.
Why Optimize Your Storage Pool?
Optimizing a storage pool spreads your files evenly across all connected drives. That uses the available space efficiently, speeds up data access, and reduces the risk of file loss. Storage Spaces is the Windows feature that groups multiple drives together to protect data. Running an optimization on it clears out fragmented space and balances the workload across your physical drives.
If you have not created one yet, the Storage Spaces page will have nothing to optimize.
Optimizing a storage pool spreads your data across all drives in the pool. This makes the best use of the drive space you have. Because the files are distributed, no single drive carries the whole load. That improves performance and lowers the risk of data loss.
The drives will be busy during that time.
Optimization balances storage use across all drives in the pool. It stops one drive from filling up while others stay nearly empty. This matters most right after you add new drives. A new drive starts out empty, and optimization moves existing data onto it so every drive contributes to your storage capacity.
If you have just added a drive, run the optimization once after it appears in the pool. You do not need to run it daily.
What Happens When You Optimize?
When you optimize, the system distributes data evenly, so all the drives work together better. Reads and writes are spread across more drives instead of piling onto one. Your storage ends up faster and more efficient. You do not need to restart Windows afterward. The change takes effect as soon as the optimization finishes.
How to Optimize Storage Pool Using Settings
Optimizing a storage pool in Settings takes a few clicks through the main system menus. The path is Settings System Storage Advanced storage settings Storage Spaces From there you can see your drives and start the optimization. This graphical tool needs no command-line experience. Windows may ask you to approve a User Account Control prompt, and you need an administrator account to make changes to the pool.
- Open the Settings app. Click the Start menu and select Settings. Or press Windows key + I to launch Settings app. The Settings window should open with the navigation list on the left.
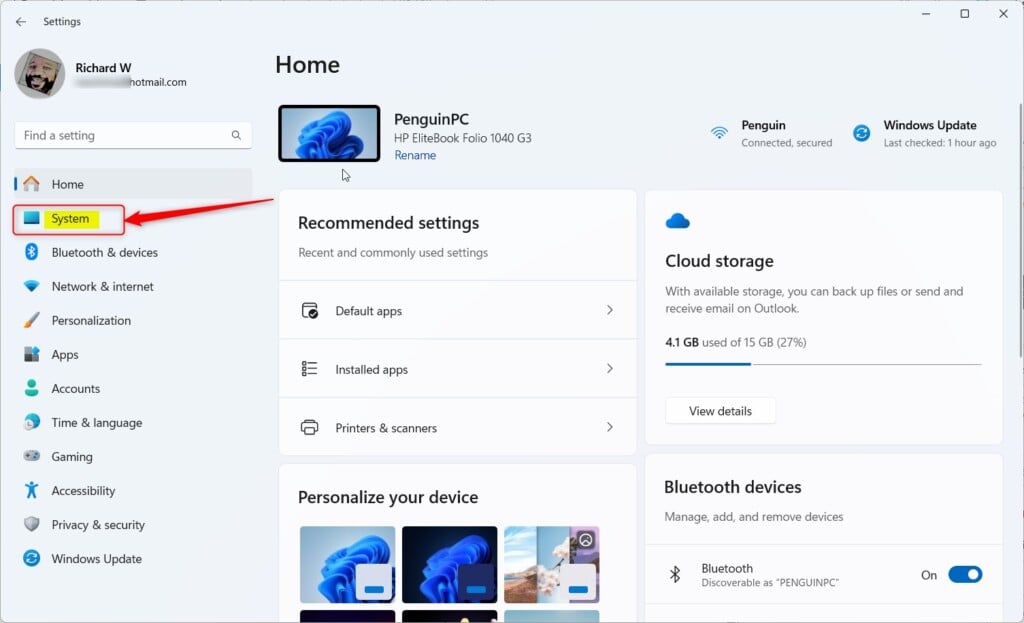
- When Settings opens, click System on the left. The System options appear on the right.
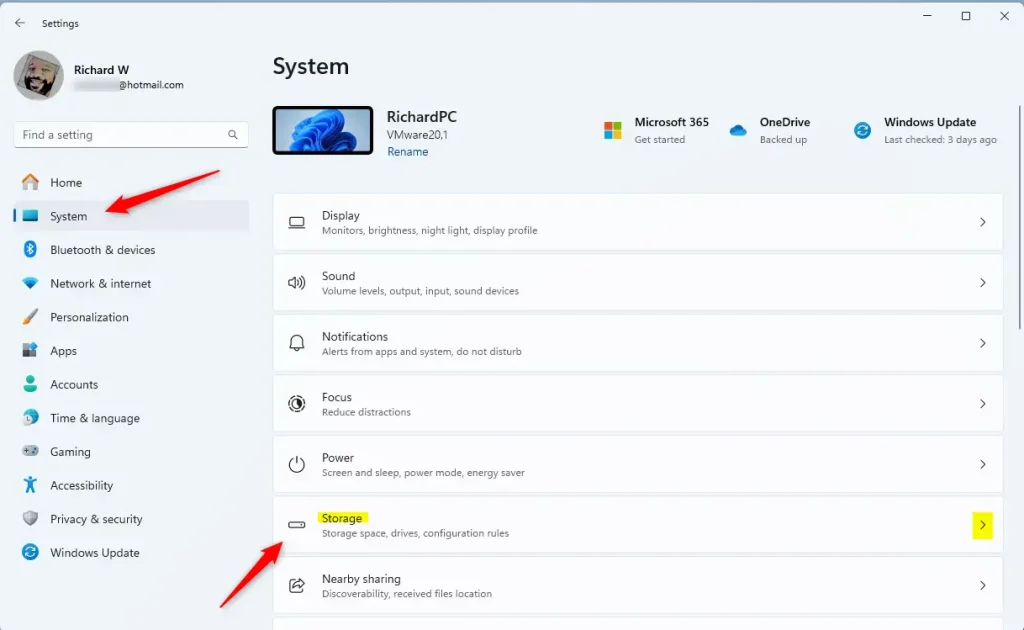
Windows 11 System button in Settings - Select the Storage tile on the right to open it. You should see your drive usage and the storage management options.
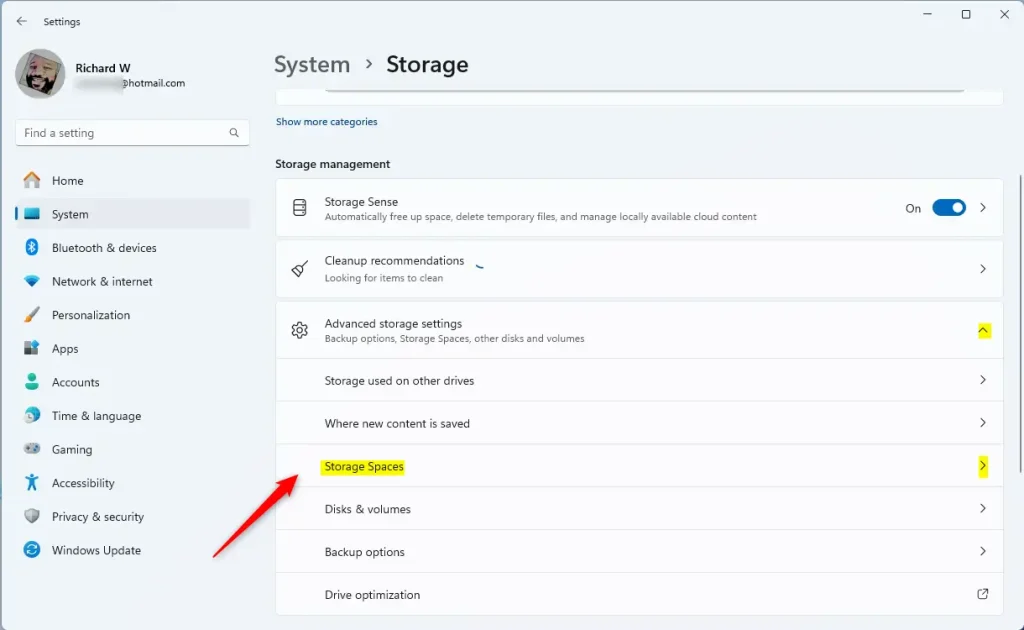
Windows 11 Settings app with System and Storage options highlighted. - On the System Storage page, expand the Advanced storage settings tile. Then click the Storage Spaces tile to expand it. If you do not see a Storage Spaces entry, check that you are on the Storage page and have scrolled down far enough.
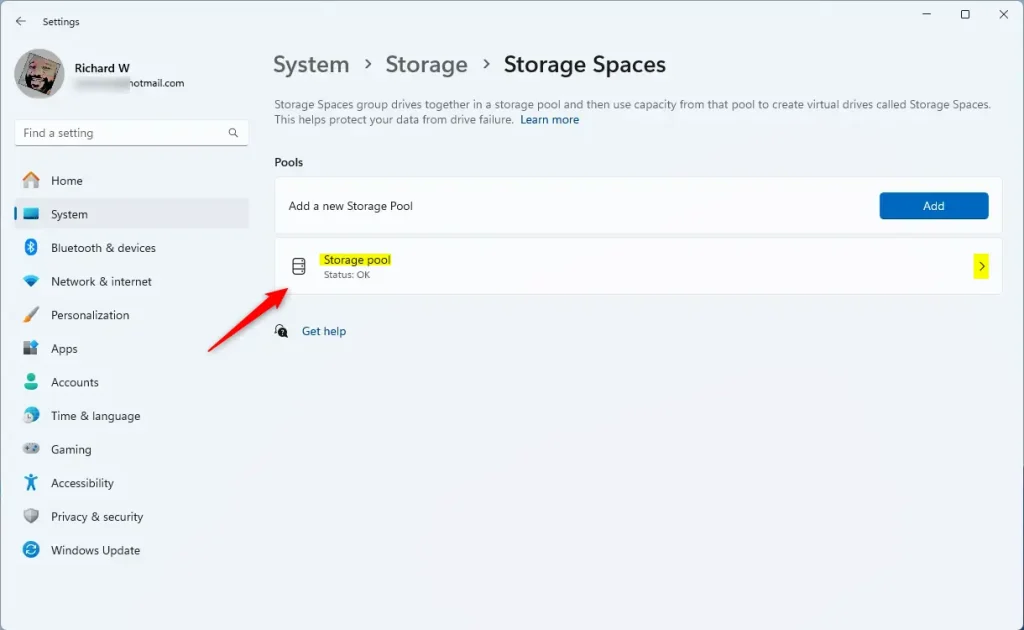
Windows 11 Storage Spaces tile in Settings app - Select the Storage pool tile to expand it. The pool and the drives in it should now be listed. If nothing is listed, you have no pool yet, and there is nothing to optimize.
Windows 11 storage pool tile - On the Storage pool status page, click the Optimize button. Windows starts moving data between the drives. If the button is greyed out, an optimization may already be running, or the pool may have a problem that needs fixing first. Check the drive health shown on the same page.
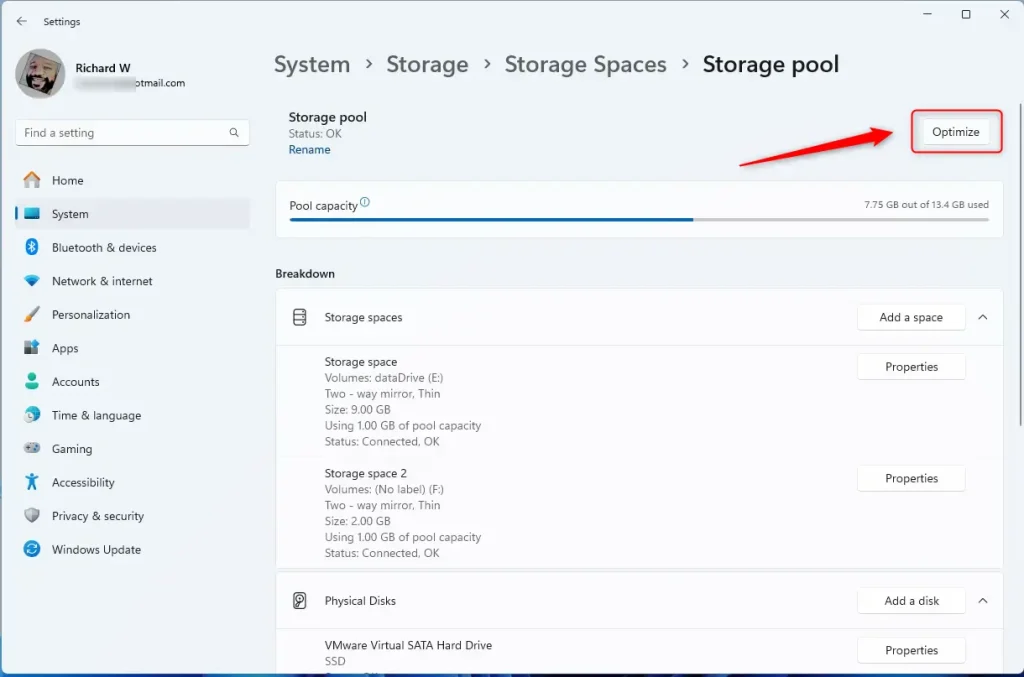
Storage pool optimize button - Wait for the optimization to complete. Then close the Settings app. Do not shut down or unplug any drive while it runs. You do not need to restart afterward.
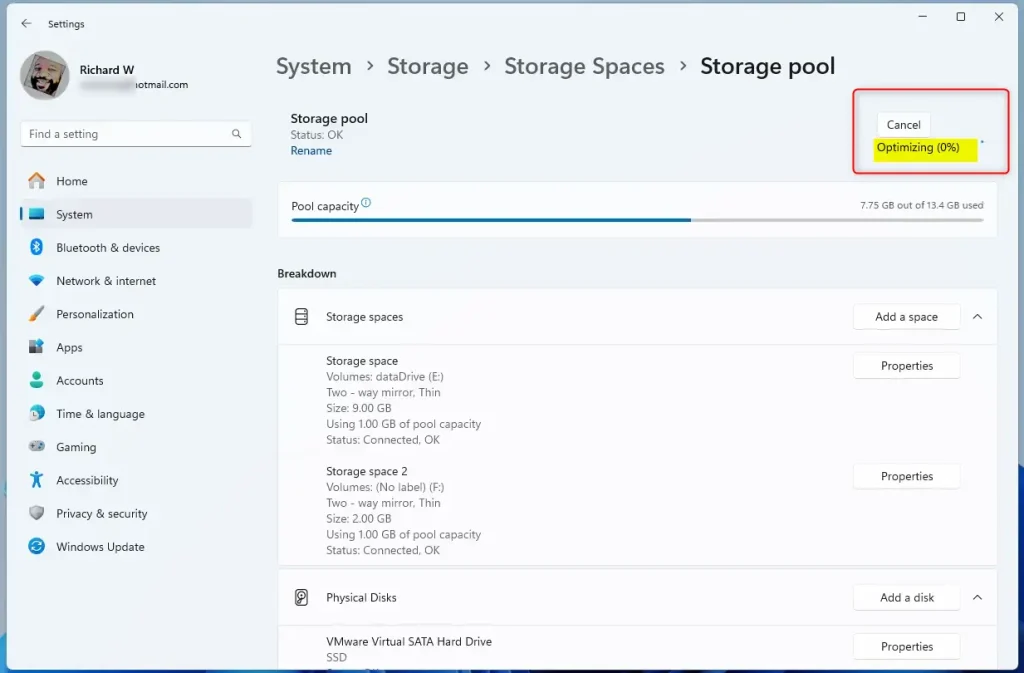
Storage pool optimize status
How to Optimize Storage Pool Using PowerShell
PowerShell gives advanced users direct command-line control over drive maintenance. Open Windows Terminal as an administrator, use the storage cmdlets to find your pool's exact name, then run the optimization command to reorganize your data. This method helps if the Settings app is unresponsive. It also suits you if you prefer to manage your system through scripts.
- [ADMIN REQUIRED] Open PowerShell in Windows Terminal as administrator. One way is to right-click the Start button and select Terminal (Admin). Approve the User Account Control prompt. The window title should show that it is running as Administrator.
- Use the command below to list all storage pools on your machine. Note the name in the FriendlyName column, because you need it for the next command.
Get-StoragePool - Then optimize the storage pool using the command format below. Replace the placeholder with the pool name from the previous step.
Optimize-StoragePool -FriendlyName "Storage pool name" - For example, to optimize a storage pool named "Storage pool," run this command:
Optimize-StoragePool -FriendlyName "Storage pool" - That is all you need to do! The command may take some time to finish, and you get your prompt back when it is done. If you see an error, check that the terminal is running as administrator and that the pool name is spelled exactly as it was listed.
Summary
Optimizing your storage pool in Storage Spaces improves performance and reduces the risk of data loss. You can do it in the Windows Settings app or in PowerShell in Windows Terminal. Both methods spread data evenly across all drives, which balances storage usage and makes the most of your drive capacity. Run an optimization after you add a drive. Keep at least 10GB free on each drive, and check your drive health in Storage Spaces now and then.
Was this guide helpful?

About the Author
Richard
Tech Writer, IT Professional
Richard is a writer at Geek Rewind who turns complex IT tasks into clear, step-by-step guides. He draws on years of hands-on experience in system administration and enterprise IT operations, focusing on Windows, Linux and WordPress: the problems people actually run into, and the fixes that work. His server and WordPress guides come from systems he runs himself. Richard builds and maintains the platform behind Geek Rewind, from its Ubuntu servers and Nginx configuration to its custom WordPress plugins. Many new tutorials start with readers' questions, and he's always glad to answer them in the comments.




[…] physical disk drives to a Storage pool, add a Storage space to an existing Storage pool, optimize a storage pool, rename a physical disk in a Storage pool, connect or disconnect storage spaces, and […]