How to Install TPM Diagnostics Tool in Windows 11
You install the TPM Diagnostics Tool in Windows 11 to assess the health and functionality of your Trusted Platform Module, a critical security processor integrated into your motherboard.
This tool helps you verify your TPM 2.0 chip’s status, essential for protecting encryption keys and Windows Hello credentials.
Running the diagnostics provides command-line reports that confirm your system adheres to enterprise security standards and helps troubleshoot issues with BitLocker or Secure Boot.
Install the TPM Diagnostics tool via Windows Settings > Apps > Optional features > View features, search for “TPM”, check “TPM Diagnostics”, and click Install. Alternatively, use command-line tools like DISM or PowerShell with administrator privileges.
Installation Methods Comparison
| Method | Difficulty | Best For |
|---|---|---|
| Settings App | Easy | General users |
| Command Prompt | Medium | Power users |
| PowerShell | Medium | IT Administrators |
Using the Settings App
You can install the TPM Diagnostics Tool in Windows 11 right from the Settings app; it’s a simple way to get it done.
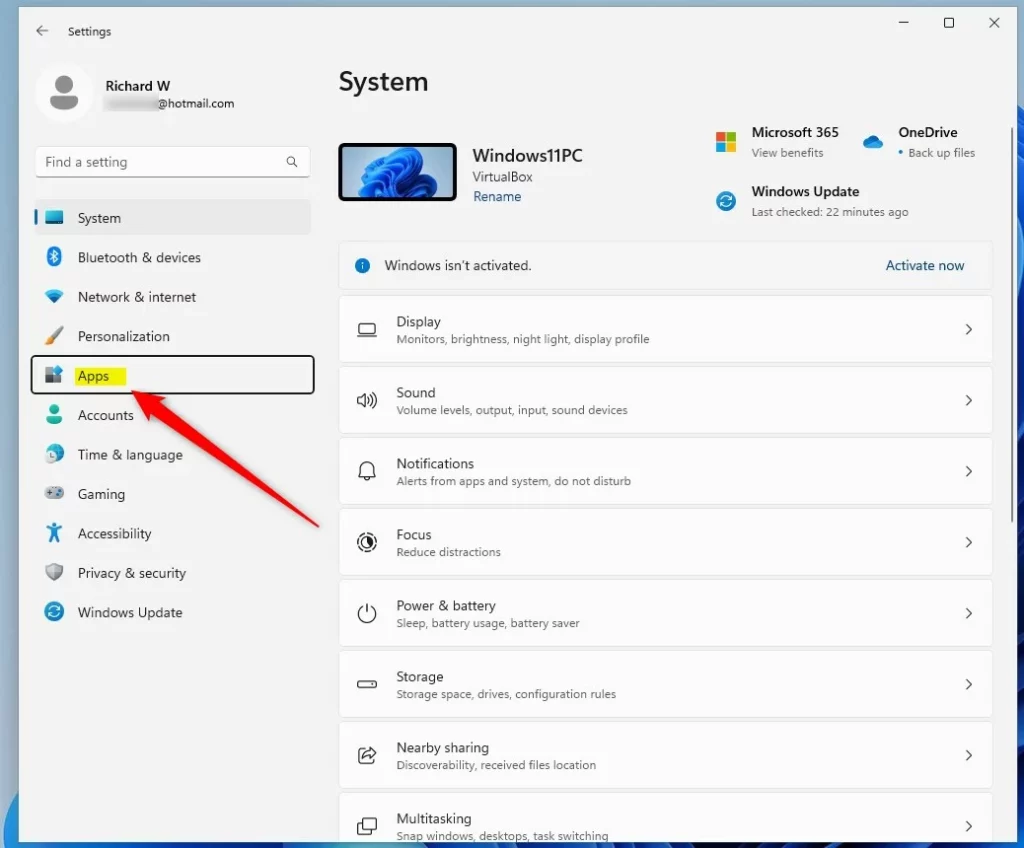
- Open the Start menu and select Windows Settings app.
windows 11 new settings button - Click on the Apps button on the left side.
windows 11 settings apps on menu - Click the Optional features box.
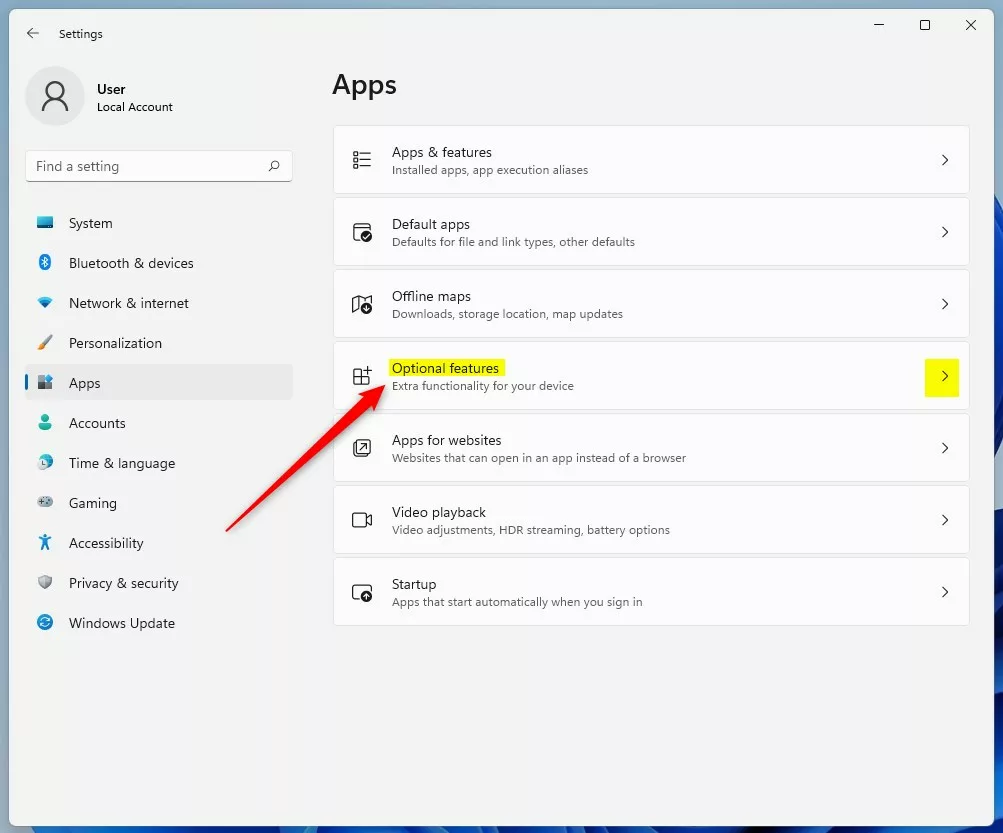
windows 11 optional features tile - Click the View features button.
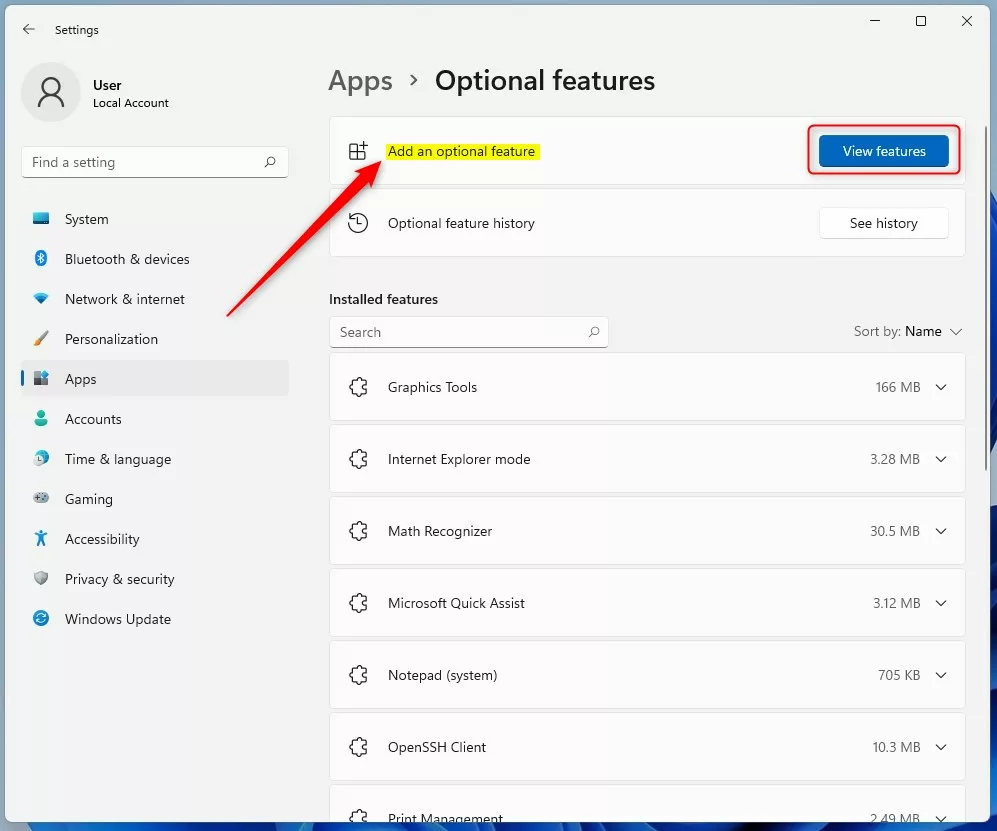
windows 11 optional features view features button - Type “TPM” into the search box.
- Check the box next to TPM Diagnostics and click Next.
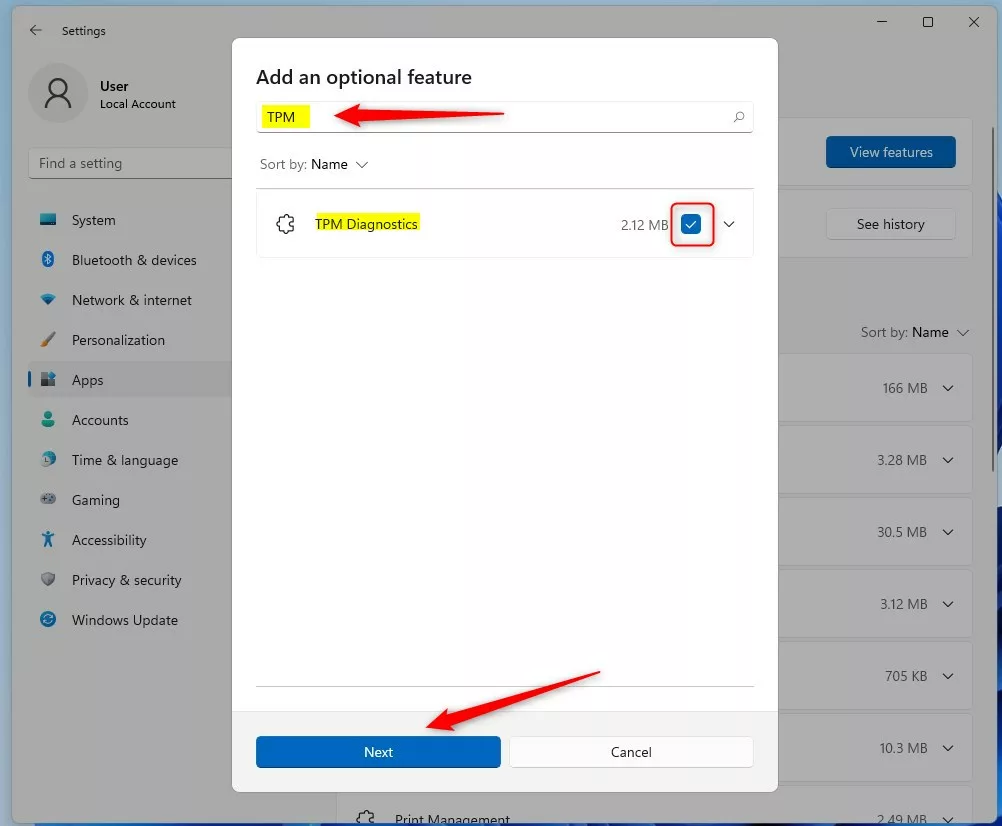
windows 11 add an optional feature window - Click Install.

windows 11 add an optional feature install button
Using Command Prompt or PowerShell
Warning: You must run these tools as an administrator. Right-click the Start button and select Terminal (Admin) or Command Prompt (Admin).
To install via Command Prompt:DISM /Online /Add-Capability /CapabilityName:Tpm.TpmDiagnostics~~~~0.0.1.0
To install via PowerShell, use the following command:Add-WindowsCapability -Online -Name Tpm.TpmDiagnostics~~~~0.0.1.0
Troubleshooting and Enterprise Context
If the TPM Diagnostics Tool in Windows 11 doesn’t install correctly, check your internet connection first, as it needs to download updates.
Summary
The TPM Diagnostics tool for Windows 11 is a handy utility that helps you check your computer’s security chip, making sure your system is protected.
Is the TPM Diagnostics tool installed by default in 🪟 Windows 11?
No, the TPM Diagnostics tool is not installed by default. It is classified as an optional feature within Windows 11. You must manually add it through the Optional Features menu or via command-line tools if you need to perform advanced security hardware troubleshooting or verification tasks.
Does the TPM Diagnostics tool require administrative privileges?
Yes, installing, removing, or running the TPM Diagnostics tool requires administrative privileges. Because the tool interacts directly with low-level hardware security components, Windows restricts access to these functions to prevent unauthorized users from modifying or querying sensitive security processor data on your computer.
Was this guide helpful?

About the Author
Richard
Tech Writer, IT Professional
Richard, a writer for Geek Rewind, is a tech enthusiast who loves breaking down complex IT topics into simple, easy-to-understand ideas. With years of hands-on experience in system administration and enterprise IT operations, he’s developed a knack for offering practical tips and solutions. Richard aims to make technology more accessible and actionable. He's deeply committed to the Geek Rewind community, always ready to answer questions and engage in discussions.


[…] As mentioned above, one of Windows 11’s requirements is to have TPM 2.0 enabled and CPUs that support it. The easiest way to determine if your PC supports TPM 2.0 is to run the Windows 11 PC Health Check app. […]