How to Install Pure-FTPd on Ubuntu 24.04
Pure-FTPd on Ubuntu 24.04 installs using simple commands to update your software list and then add the `pure-ftpd` package.
Pure-FTPd is a free, secure, and simple FTP server program. It makes transferring files safely over the internet easy, even letting you set up special accounts just for FTP without needing full system logins.
This FTP server is great for managing file transfers securely. You can give different people specific access levels, which keeps things tidy and safe.
Update your package list with `sudo apt update`, then install Pure-FTPd using `sudo apt-get install pure-ftpd`. The server will start automatically after installation.
Install Pure-FTPd
To install Pure-FTPd on Ubuntu 24.04, you’ll open your terminal and run two simple commands. This process sets up the software needed for your FTP server, allowing you to start moving files safely over your network. The commands you need are: sudo apt update and sudo apt-get install pure-ftpd.
sudo apt update
sudo apt-get install pure-ftpd
After installing Pure-FTPD, the commands below can be used to stop, start, and enable the server service to always start up when the server boots.
sudo systemctl stop pure-ftpd.service
sudo systemctl start pure-ftpd.service
sudo systemctl enable pure-ftpd.service
The main configuration file is at [/etc/pure-ftpd/pure-ftpd.conf].
The basic configuration is secure and appropriate for most environments, so there’s nothing to do.
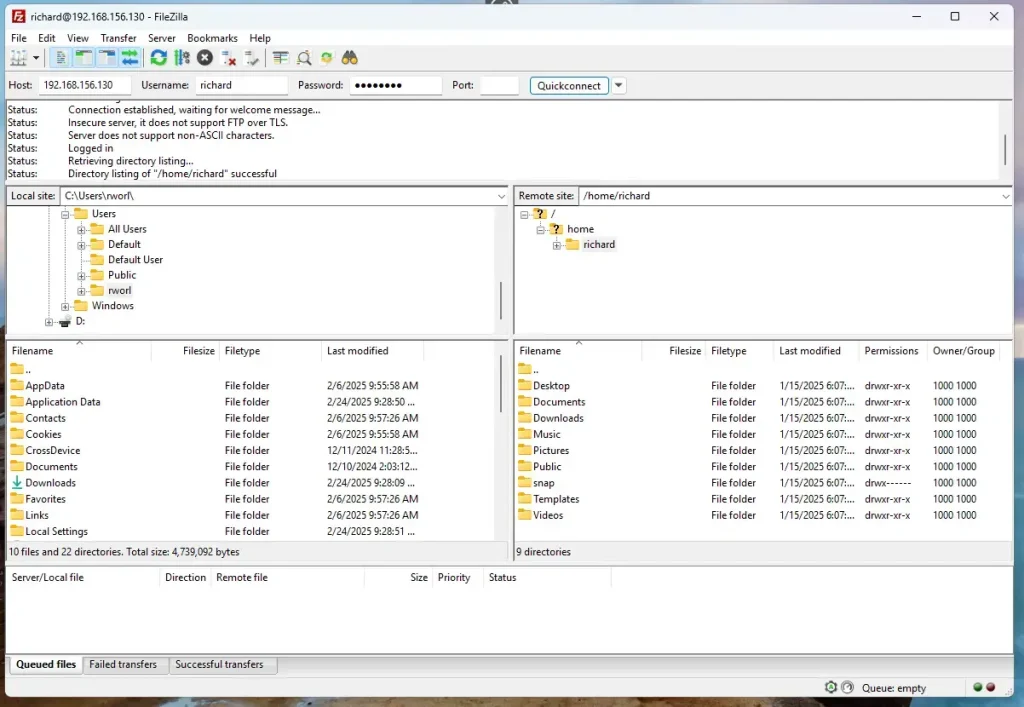
Pure-FTPd is now accessible through any FTP client. All user accounts not listed in the ftpusers file will receive access.
Access Pure-FTPd over SSL/TLS
You can access Pure-FTPd over SSL/TLS to keep your file transfers private and safe by encrypting them. This secures your connection, making sure sensitive information sent and received through the FTP server stays protected from anyone trying to snoop. You’ll need a certificate, like one from Let’s Encrypt or a self-signed one, for your server.
Use a public certificate like Let’s Encrypt or a self-signed on your server.
For this post, we’ll create a self-signed certificate for Pure-FTPd.
Run the command below to generate a self-signed certificate with Pure-FTPd.
sudo openssl req -x509 -nodes -newkey rsa:3072 -keyout pure-ftpd.pem -out pure-ftpd.pem -days 3650
When prompted, enter the certificate details.
Country Name (2 letter code) [AU]:US
State or Province Name (full name) [Some-State]:NY
Locality Name (eg, city) []:Brooklyn
Organization Name (eg, company) [Internet Widgits Pty Ltd]:GeekRewind
Organizational Unit Name (eg, section) []:IT
Common Name (e.g. server FQDN or YOUR name) []:pureftpd.example.com
Email Address []:
sudo cp pure-ftpd.* /etc/ssl/private
sudo chmod 600 /etc/ssl/private/pure-ftpd.pem
Once you’ve generated the server private key and certificate files, configure Pure-FTPD to use the SSL/TLS certificate created above.
To do that, run the commands below as root (sudo bash) to force Pure-FTPD to communicate over TLS.
sudo bash
echo "2" > /etc/pure-ftpd/conf/TLS
After adding the highlighted lines to the file, save it. Then, run the commands below to restart the Pure-FTPD server.
sudo systemctl restart pure-ftpd
With SSL/TLS configured, open your FTP client and set up the sites to use SSL/TLS.
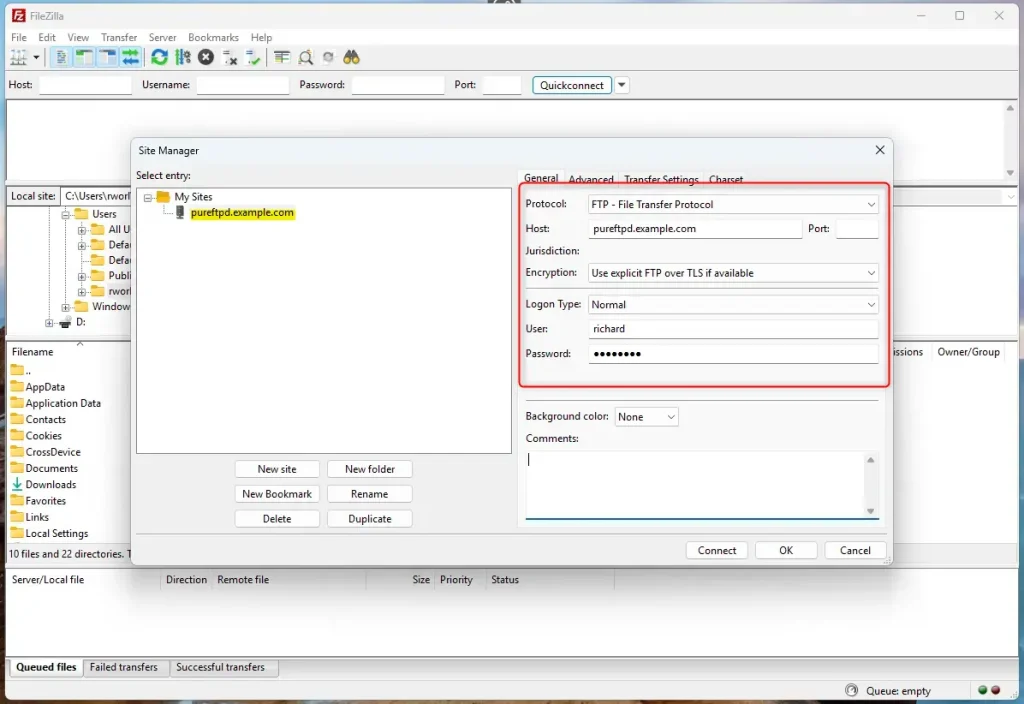
Since we used a self-signed certificate when prompted to trust it, OK.

Now, Pure-FTPd is communicating over SSL/TLS.

That should do it!
Conclusion:
- Installing Pure-FTPd on Ubuntu 24.04 provides a secure and efficient FTP server solution.
- The process includes creating virtual users, allowing for better management in shared hosting scenarios.
- Configuring SSL/TLS enhances security, ensuring encrypted data is transmitted over the FTP channel.
- Generating a self-signed certificate is a straightforward way to secure your FTP connections.
- Regular server updates and maintenance are essential for ongoing security and performance optimization.
This Pure-FTPd installation on Ubuntu 24.04 allows you to manage your FTP needs effectively, prioritizing security and efficiency for all your file transfers.
Was this guide helpful?

About the Author
Richard
Tech Writer, IT Professional
Richard, a writer for Geek Rewind, is a tech enthusiast who loves breaking down complex IT topics into simple, easy-to-understand ideas. With years of hands-on experience in system administration and enterprise IT operations, he’s developed a knack for offering practical tips and solutions. Richard aims to make technology more accessible and actionable. He's deeply committed to the Geek Rewind community, always ready to answer questions and engage in discussions.


No comments yet — be the first to share your thoughts!