How to Install Joomla on Google Cloud Server


Installing Joomla on a Google Cloud server lets you run a content management system (a software tool that helps you build and manage websites without coding) on a virtual machine running Ubuntu Linux. This guide covers the seventh step in the server setup process.
After setting up your Google Cloud server and required software, you install Joomla directly from your browser. Navigate to your server’s hostname or IP address in a web browser to begin the Joomla setup process.
You need a registered domain name and an active Google Cloud server before you begin this setup.
- How to create a website domain
- How to set up a Google Cloud server with Ubuntu Linux
- How to install Apache on a Google Cloud server (alternative to Nginx)
- How to install Nginx on a Google Cloud server (alternative to Apache)
- How to install PHP on a Google Cloud server
- How to install MySQL or MariaDB database server
With your website domain, Google Cloud server, and essential software like Apache, Nginx, PHP, and a database server ready, integrate Joomla.
Web servers publish and serve content to visitors browsing your site. PHP (a server-side scripting language) powers the dynamic elements of the site. A database server stores your website content efficiently.
Other software and packages might also be needed to enhance a website’s functionality. Below, we’ll guide you through installing these tools with Joomla.
Pointing your domain name to the newly created server makes it accessible online. Then, we showed you how to install software and packages to help us run a website online.
Connect to our Google Cloud server and install Joomla by integrating the software and packages installed in our previous posts.
How to connect to Google Cloud servers
Connecting to your Google Cloud server (Compute Engine) to install Joomla Google Cloud takes just a few clicks using the built-in browser SSH tool. Open the Google Cloud Console, go to your virtual machine (VM) instances list, and click the SSH button next to your running server to open a command line window right in your web browser without setting up extra keys.
Browser-based SSH works in Google Chrome, Firefox, Microsoft Edge, Internet Explorer 11 and later, and Safari 8 and later. Private browsing mode disables Safari support.
- Web browsers
- The latest version of Google Chrome
- Firefox
- Microsoft Edge
- Microsoft Internet Explorer 11 and later
- Safari 8 and later. Note that Safari is not supported in private browser mode.
- Virtual machine configurations
- All Linux VM images are natively available in Google Cloud.
All Linux virtual machine (VM) images are ready to use directly in Google Cloud. You won't need to install extra software or browser extensions. Log in to Google Cloud Console and navigate to Menu ==> Compute Engine ==> VM instances.
From the list of virtual machine instances, click SSH in the row corresponding to the instance you wish to connect to.

Alternatively, open an SSH connection to an instance by clicking its name and then selecting SSH from the instance details page.
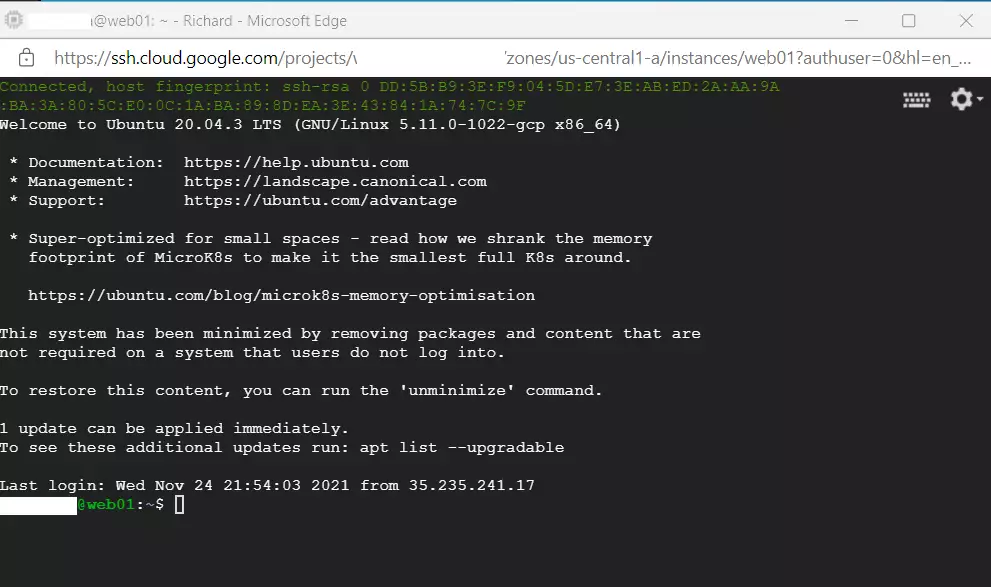
An SSH terminal window connected to the Ubuntu Linux instance created in the series's second post will appear.
You should now be able to run commands within the Ubuntu Linux environment on your Google Cloud server.
Install Joomla on Google Cloud Servers
To install Joomla Google Cloud on an Ubuntu Linux server, you need to set up a web server like Apache or Nginx, a database, and PHP. Once you install these required packages on your virtual machine, you can download the Joomla installation files and finish the setup process directly in your web browser in just a few minutes.
Once all required packages are installed, completing the installation directly from the browser makes setting up Joomla remarkably fast.
Below is a detailed guide to help you install Joomla on Ubuntu Linux with Apache or Nginx. Click on a link to learn more about installing and managing Joomla on Ubuntu Linux.
How to install Joomla on Ubuntu Linux with Apache
How to install Joomla on Ubuntu Linux with Nginx
Each link above outlines the steps we performed in our previous posts to reach this stage. You'll also learn how to secure your Joomla website with free Let's Encrypt SSL certificates.
That completes the process.
Conclusion:
You now have Joomla installed on your Google Cloud server. To recap:
- We discussed the importance of having a domain, a Google Cloud server, and necessary software packages for your website.
- You learned how to connect to your Google Cloud server using SSH from a web browser.
- We highlighted that installing Joomla is straightforward and can be done directly from your browser.
- Additional resources were provided to help you install Joomla with either Apache or Nginx.
- We emphasized the importance of securing your Joomla website with free Let's Encrypt SSL certificates.
By following these steps, you're well on your way to creating a dynamic and professional website with Joomla. Happy web development!
Was this guide helpful?

About the Author
Richard
Tech Writer, IT Professional
Richard, a writer for Geek Rewind, is a tech enthusiast who loves breaking down complex IT topics into simple, easy-to-understand ideas. With years of hands-on experience in system administration and enterprise IT operations, he’s developed a knack for offering practical tips and solutions. Richard aims to make technology more accessible and actionable. He's deeply committed to the Geek Rewind community, always ready to answer questions and engage in discussions.



No comments yet — be the first to share your thoughts!