How to Install Drupal with Nginx on Ubuntu 24.04


- 9 steps
- Needs administrator rights
Installing Drupal with Nginx on Ubuntu 24.04 gives you a fast, reliable website built from open-source parts. Drupal is the content management system that builds and manages your pages. Nginx is the web server that hands those pages to visitors quickly, even under load.
This guide sets up Drupal 10 on Ubuntu 24.04 LTS (Long Term Support) with Nginx, MariaDB and PHP-FPM. You need a user with sudo rights and a terminal on the server, either on the desktop or over SSH. Drupal 10 needs PHP 8.1 or newer, and Ubuntu 24.04 ships PHP 8.3, so you don’t need extra repositories. If you plan to add HTTPS at the end, you also need a domain name that points to the server.
Install Nginx, MariaDB and PHP on Ubuntu 24.04 with sudo apt update followed by sudo apt install nginx mariadb-server, then start and enable each service with sudo systemctl enable –now nginx and mariadb. Ubuntu 24.04 ships PHP 8.3, which meets Drupal 10’s requirement of PHP 8.1 or newer, so no extra repositories are needed.
Install Nginx HTTP server on Ubuntu
Nginx is the web server that sends your Drupal pages to visitors. To install it, run sudo apt update, then sudo apt install nginx. The first command refreshes the package list. The second downloads and installs Nginx.
- Open the Ubuntu terminal.
- Run the commands in the block below. If apt asks you to confirm the download, answer yes.
When the commands finish, Nginx is installed. On Ubuntu it usually starts on its own right after installation.
sudo apt update
sudo apt install nginx
Next, make sure Nginx is running and that it starts every time the server boots. The commands below start, stop and enable the Nginx service. Enable is the one that makes it start at boot. Run the start and enable commands. Use the stop command only when you want to shut Nginx down, for example while you troubleshoot.
sudo systemctl stop nginx
sudo systemctl start nginx
sudo systemctl enable nginx
Now check that Nginx answers requests. Open a web browser and go to the server’s localhost address or its IP address. Use localhost if the browser runs on the server itself. Use the IP address if you browse from another computer.
http://localhost
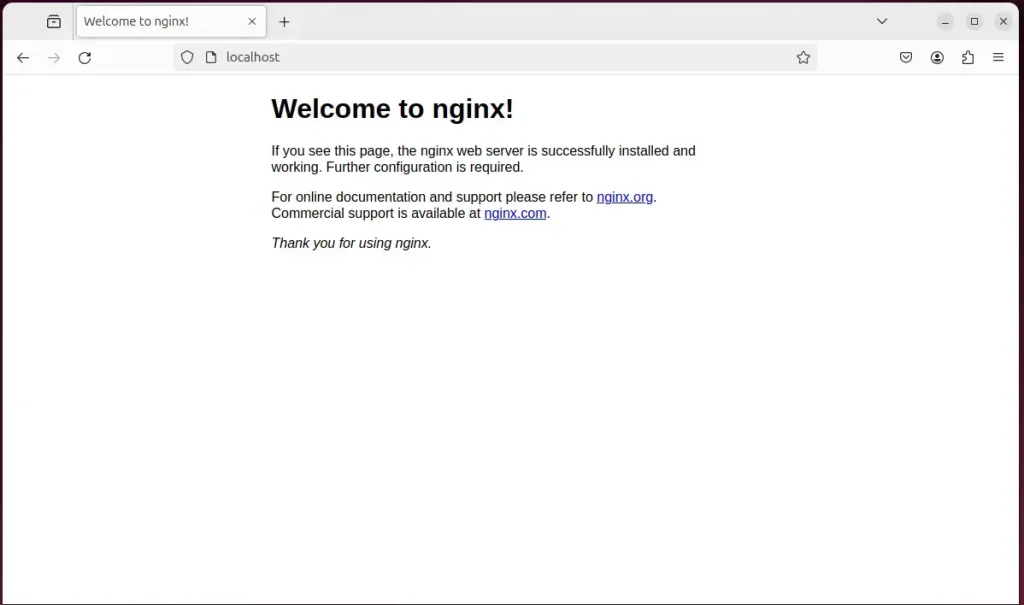
When you see the Welcome to nginx! page, the Nginx HTTP server is installed and working. If the page doesn’t load from another computer, check whether a firewall on the server is blocking port 80.
For more detail on installing Nginx on Ubuntu, see the post linked below.
Install MariaDB database server on Ubuntu Linux
MariaDB is the database server that stores your Drupal content, user accounts and settings. To install it, run sudo apt install mariadb-server in your terminal.
The steps below install MariaDB, start it, and confirm that it works.
- Open the Ubuntu terminal.
- Run the commands in the block below to install the MariaDB database server.
sudo apt update
sudo apt install mariadb-server
Once MariaDB is installed, use the commands below to stop, start and enable the service. As with Nginx, enable makes MariaDB start automatically when the server boots. You normally only need the start and enable commands.
sudo systemctl stop mariadb
sudo systemctl start mariadb
sudo systemctl enable mariadb
Now run the commands below to check that the MariaDB server is installed and responding.
sudo mariadb
These commands log you in to the MariaDB console. You should see a welcome message similar to the one below. On Ubuntu, the MariaDB root account is tied to the system root user, so running the client with sudo lets you in without a database password.
Welcome to the MariaDB monitor.  Commands end with ; or g.
Your MariaDB connection id is 32
Server version: 10.11.2-MariaDB-1 Ubuntu 23.04

Copyright (c) 2000, 2018, Oracle, MariaDB Corporation Ab and others.

Type 'help;' or 'h' for help. Type 'c' to clear the current input statement.

MariaDB [(none)]>
That message confirms the server is installed and running.
For more help with MariaDB, see the following:
- How to install MariaDB on Ubuntu Linux
- MariaDB without password prompt
Create a Drupal database
Drupal needs its own database and its own database user. To create them, open the database prompt by running sudo mysql, then run the SQL commands shown below. A dedicated database and user keep Drupal’s data separate from anything else on the server.
This database stores all of the Drupal application’s content and data.
You will create a database called drupaldb and a database user account called drupaldbuser.
The drupaldbuser account gets full control over the drupaldb database. That means it can create, modify and delete data inside drupaldb, and nothing outside it.
You can do all of this with the commands below. Work through them in two parts.
- Log on to the MariaDB database server with the command in the first block below.
- Wait for the MariaDB console prompt to appear before you type anything else.
sudo mariadb
At the MariaDB prompt, run the commands in the next block to create the database and the user and to grant access.
CREATE DATABASE drupaldb CHARACTER SET utf8mb4 COLLATE utf8mb4_unicode_ci;
CREATE USER drupaldbuser@localhost IDENTIFIED BY 'type_your_password_here';
GRANT ALL ON drupaldb.* TO drupaldbuser@localhost WITH GRANT OPTION;
FLUSH PRIVILEGES;
exit
Pick a strong one and write it down. You need the database name, username and password again in the Drupal installation wizard.
Install PHP-FPM on Ubuntu Linux
Nginx cannot run PHP code by itself, so it passes PHP requests to PHP-FPM. To install it, run sudo apt install php-fpm together with the extensions Drupal needs, such as php-mysql and php-curl. php-mysql lets PHP talk to MariaDB.
Ubuntu 24.04 installs PHP 8.3 by default. Note the version number, because the Nginx server block later has to match it.
sudo apt install php-fpm php-intl php-mysql php-curl php-cli php-zip php-gd php-common php-mbstring php-xml php-opcache php-readline php-sqlite3 php-zip php-apcu
For more help with installing PHP, see the post below.
Download Drupal files
Next, get the Drupal files onto the server. Use wget to download the latest release archive from the official Drupal site, extract it, and place the files under your web root at /var/www/html. This puts the core application files where Nginx can read and serve them.
The commands below download Drupal and create a new Drupal folder in the Nginx root directory. The steps happen in this order:
First, create a Drupal folder in the Nginx root directory.
Then change to the /tmp directory and download the Drupal files there. Unzip the downloaded archive and move its contents into the Drupal folder you just created. Using /tmp keeps the archive and the leftover files out of your web root.
Next, fix the permissions. The web root directory must be changed so the Nginx HTTP server can read and write files. Set ownership to the www-data user and group. This is the user Nginx and PHP-FPM normally run as on Ubuntu 24.04, and Drupal needs this access to work correctly.
sudo mkdir -p /var/www/drupal
cd /tmp/
wget https://www.drupal.org/download-latest/tar.gz -O drupal.tar.gz
tar -xvf drupal.tar.gz
sudo mv drupal-*/* /var/www/drupal
sudo chown -R www-data:www-data /var/www/drupal/
sudo chmod -R 755 /var/www/drupal/
With the files and permissions in place, configure Nginx to serve the Drupal content. You do this with a server block, which is a configuration file that tells Nginx which site to serve and where its files are.
Run the command below to create the Nginx server block file for Drupal. It opens a new, empty file in a text editor.
sudo nano /etc/nginx/sites-available/drupal.conf
Copy the content block below and paste it into the empty server block file.
server {
    listen 80;
    server_name drupal.example.com;
    root /var/www/drupal;

    index index.php;

    location / {
        try_files $uri /index.php?$query_string;
    }

    location @rewrite {
        rewrite ^/(.*)$ /index.php?q=$1;
    }

    location ~ '.php$|^/update.php' {
        include snippets/fastcgi-php.conf;
        fastcgi_pass unix:/run/php/php8.3-fpm.sock;
        fastcgi_param SCRIPT_FILENAME $document_root$fastcgi_script_name;
        include fastcgi_params;
    }

    location ~* /sites/.*/files/styles/ {
        try_files $uri @rewrite;
    }

    location ~ ^/sites/.*/files/ {
        try_files $uri @rewrite;
    }

    location ~* .(js|css|png|jpg|jpeg|gif|ico|svg)$ {
        expires max;
        log_not_found off;
    }
}- Find the highlighted PHP version in the file and make sure it matches the PHP version you installed. On Ubuntu 24.04 that is normally 8.3.
- Replace the example server name in the file with your own hostname or IP address.
- Save the file and close the editor.
Now enable the server block for your Drupal site. Run sudo ln -s /etc/nginx/sites-available/drupal /etc/nginx/sites-enabled/ to link it into the enabled sites. Then restart Nginx with sudo systemctl restart nginx. Nginx reads its configuration only when it starts or reloads, so it will not recognize the new site until you restart it. If the restart fails, the error message points to the line in the file with the problem. Fix it and restart again.
sudo ln -s /etc/nginx/sites-available/drupal.conf /etc/nginx/sites-enabled/
sudo systemctl restart nginx
Setup Let’s Encrypt SSL/TLS for Drupal
HTTPS encrypts the traffic between your visitors and the site. That matters most on the Drupal login page, where passwords are sent. To set up a free Let's Encrypt SSL/TLS certificate on Nginx, install the Certbot tool using snap, then run sudo certbot --nginx. Certbot requests the certificate and updates your Nginx configuration to force secure HTTPS connections.
Before you run it, make sure your domain name points to the server's public IP address, and that ports 80 and 443 are open. Let's Encrypt can't issue certificates for a bare IP address. Certbot asks for an email address, asks you to accept the terms, and asks which domain names to secure. The certificate renews automatically.
For more on installing and creating Let's Encrypt SSL certificates for Nginx, read the post below.
How to set up Let’s Encrypt SSL certificate for Nginx on Ubuntu Linux
When Certbot finishes, the Certbot Nginx plugin has already added the HTTPS settings to your Nginx server block file, /etc/nginx/sites-available/drupal.conf. You don't need to edit it by hand. If your file has a different name, look for the same changes in the file you created earlier.
Once Nginx has restarted, open your browser and go to the server hostname or IP address defined in the Nginx server block.
http://drupal.example.com
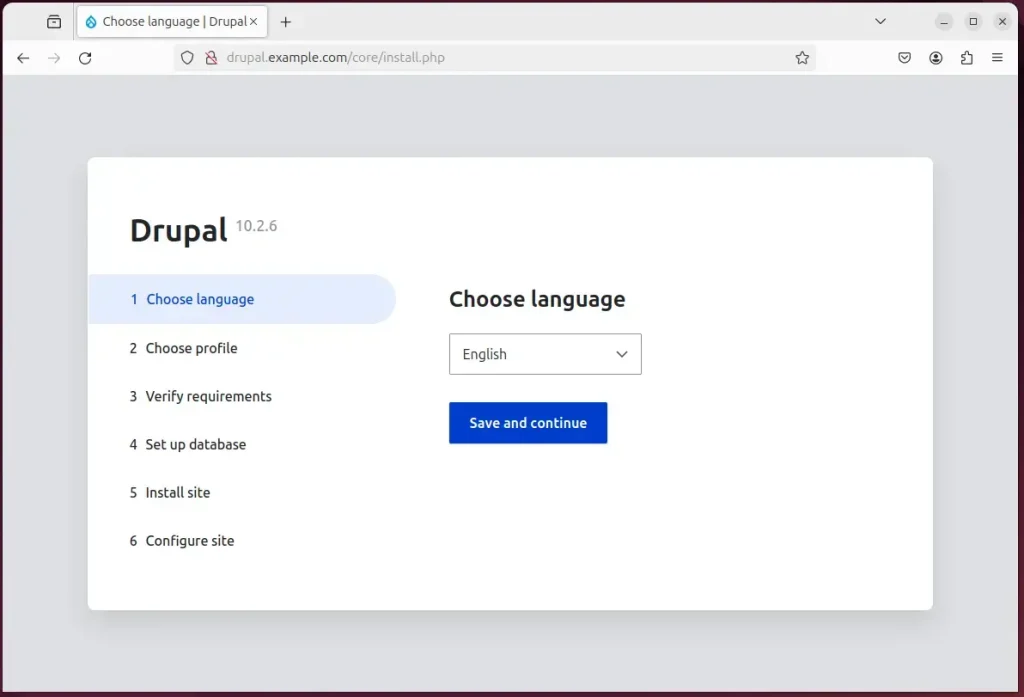
The Drupal installation wizard should appear. Choose the language for your site and continue. If you see an Nginx error or the default Nginx page instead, go back and check the server block and the PHP version in it.
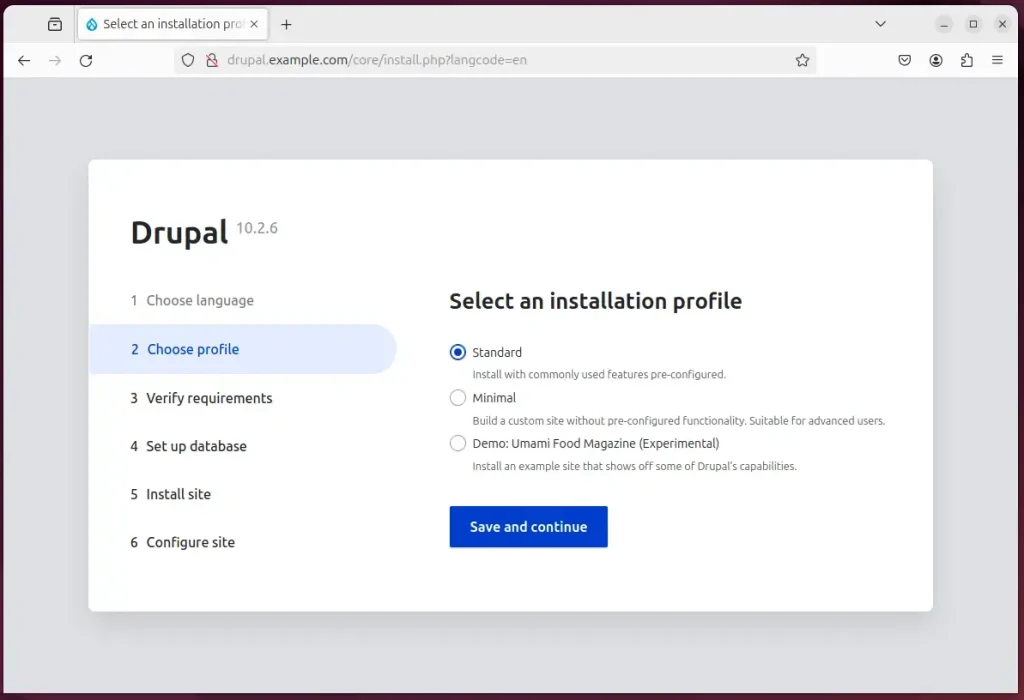
Next, select the installation profile. Standard is the usual choice for a new site, because it includes the common features most sites need. Minimal gives you a bare-bones start, and the demo profile loads sample content.
Next, the wizard checks the requirements. Confirm that all of them are met and continue. If it reports a problem, such as a missing PHP extension or a folder that isn't writable, fix it and reload the page. Use the permissions step above to check the ownership of the web root.
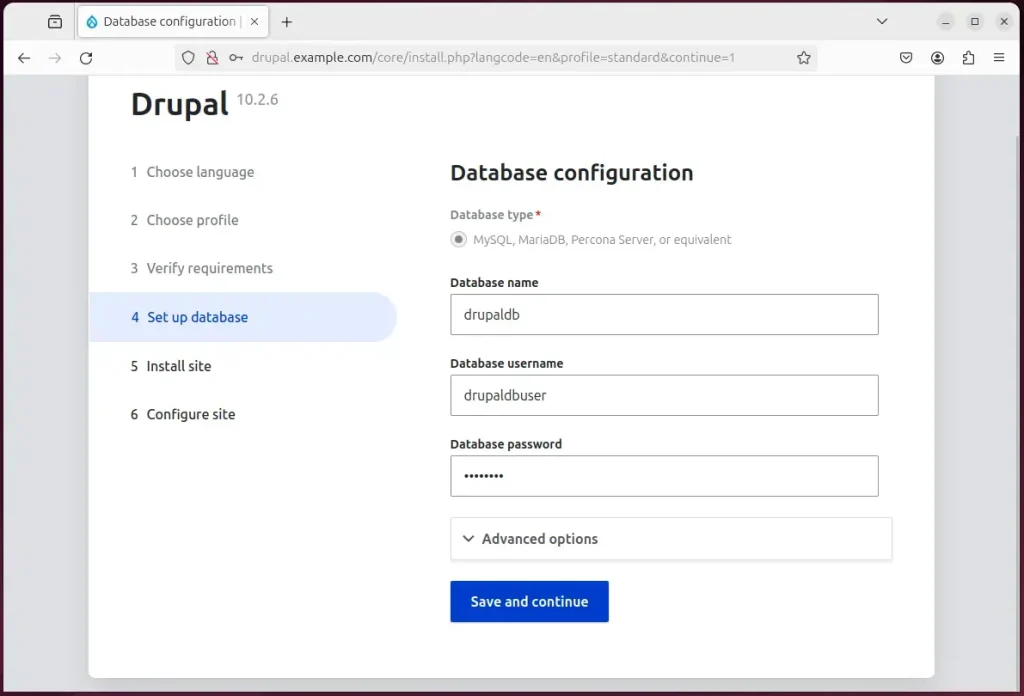
Then enter the database name, username and password you created earlier. Choose the MySQL, MariaDB or compatible database option. The host is the local server, so you can leave the default unless you put the database elsewhere.
Finally, set your site name and create an administrator account to log in with. Use a strong password and a valid email address. The wizard also asks for regional settings such as country and time zone. Drupal then finishes the installation.
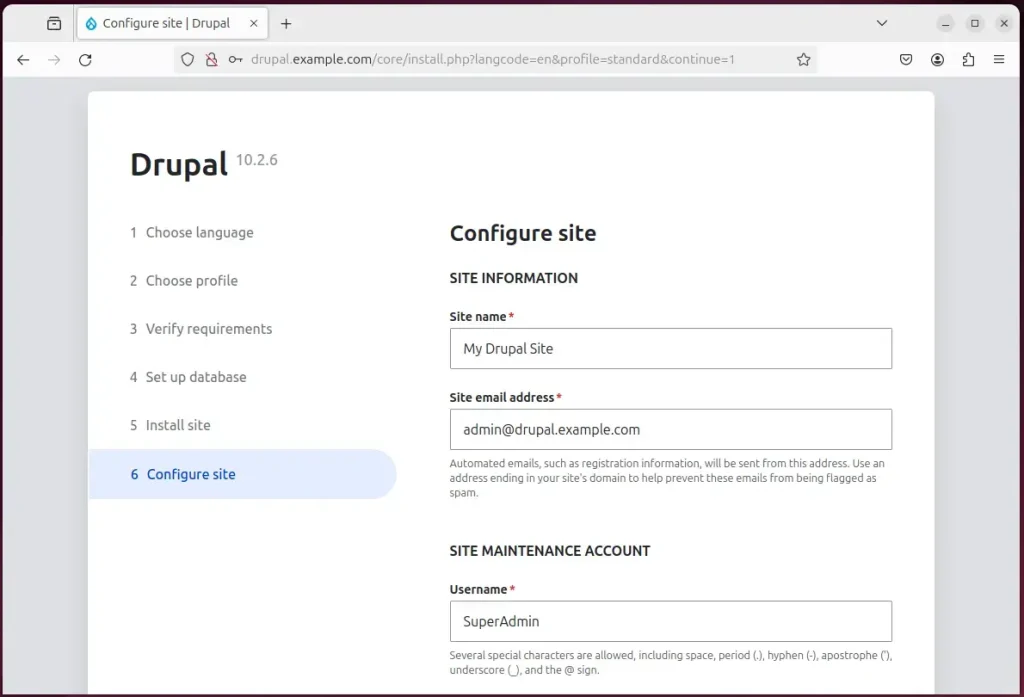
Your new Drupal site is created and ready to use. Log in with the administrator account you just made. You can check the health of the site at any time in Reports Status report.
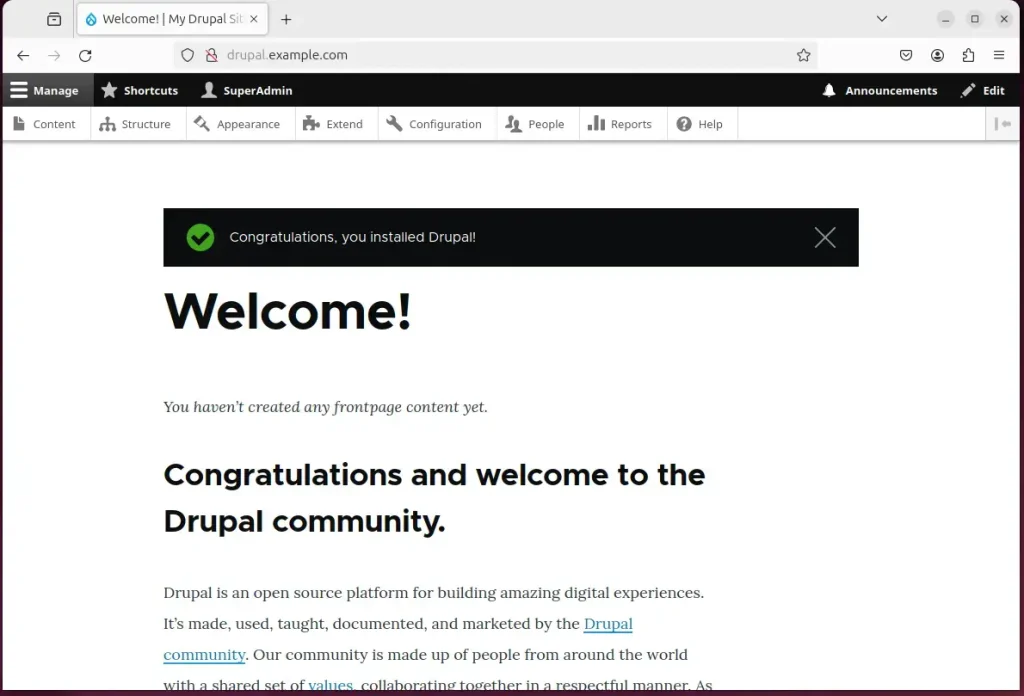
That should do it!
Conclusion:
- Running Drupal on Nginx on Ubuntu improves performance and the experience for your visitors.
- Nginx handles web requests efficiently and copes well with high traffic, which makes it a good choice for hosting Drupal websites.
- Drupal with Nginx on Ubuntu gives you a secure, reliable web environment for your projects.
- Securing the Drupal installation with a Let's Encrypt SSL/TLS certificate protects your visitors' data and makes the site more trustworthy.
- The steps in this article cover each component, from the web server to the installation wizard, and leave you with a working Drupal site.
Have a question about this guide?
Answered by AI from this guide. Good questions may be added to this page — please don't include personal details.
Did this guide fix your problem?

About the Author
Richard
Tech Writer, IT Professional
Richard is a writer at Geek Rewind who turns complex IT tasks into clear, step-by-step guides. He draws on years of hands-on experience in system administration and enterprise IT operations, focusing on Windows, Linux and WordPress: the problems people actually run into, and the fixes that work. His server and WordPress guides come from systems he runs himself. Richard builds and maintains the platform behind Geek Rewind, from its Ubuntu servers and Nginx configuration to its custom WordPress plugins. Many new tutorials start with readers' questions, and he's always glad to answer them in the comments.
No comments yet — be the first to share your thoughts!