How to Install and Use Quick Assist in Windows 11

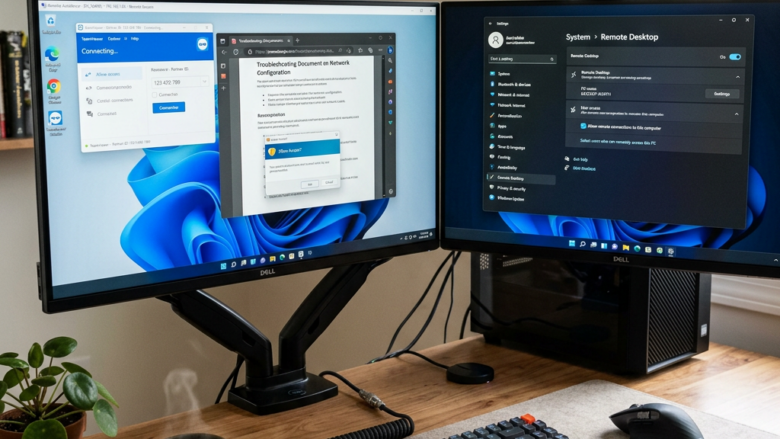
Quick Assist is a Windows 11 app that lets someone you trust view your screen and, if you allow it, control your PC from another location. It connects two computers over the internet with a secure 6-digit code. The person giving help signs in with a Microsoft account. The person getting help does not need to sign in.
It works well for helping friends or family without visiting them. You can troubleshoot an error, change a setting, or walk someone through new software while you both look at the same desktop. It is included in both Windows 11 Home and Pro, so you don’t need a special edition on either end.
Safety note: Only share a code with someone you know and have contacted yourself. Scammers often pose as “tech support” and ask people to open Quick Assist. If someone you didn’t call asks you to do this, close the app and don’t share anything.
Open the Microsoft Store from the Start menu , search for Quick Assist, and click Get or Install. Windows may ask for permission; click Yes or Allow. When complete, the button changes to Open and you can launch the app. No restart needed.
Step 1Install Quick Assist
On most Windows 11 PCs you don’t need to install Quick Assist, because it comes with the system. Current versions are delivered through the Microsoft Store, which is how the app gets updated. You only need the Store if the app is missing, you removed it, or you want to check for a newer version.
The steps below cover the Store route. In short, open the Microsoft Store from the Start menu , search for Quick Assist, and click the install or update button. Both people need Windows 11 with a working internet connection for the session to start.
If you can’t find the Microsoft Store in the Start menu , click the search box on the taskbar , type "Microsoft Store", and select it when it shows up. If it still doesn’t appear, your PC may be managed by an organization that has hidden it. In that case, ask your administrator.

This makes it faster to open next time. To remove the pin later, right-click the icon and choose the matching Unpin option.
Find Quick Assist: When the Store is open, click the search bar at the top. Type "Quick Assist" and press Enter. You should now see a list of results. Check that the publisher is Microsoft Corporation before you go further, because lookalike remote-access apps exist.
Install the App: Quick Assist should appear in the search results. Click on it to open its page. You will see a button that says "Get" or "Install." Click that button. A progress indicator appears while the app downloads and installs. If the app is already installed, the button may say "Update" or "Open" instead.
This is due to company policies. You'll need to contact your IT support or administrator for assistance. You can't get around this yourself on a managed PC. If the Install button is greyed out, the same policy is usually the reason.
Give Permission: Windows might ask for your okay to install the app. Click "Yes" or "Allow." This prompt doesn't always appear. If the download starts without it, carry on to the next step.
All Done! When the install finishes, the button will say "Open." You can now use Quick Assist. No restart is needed.
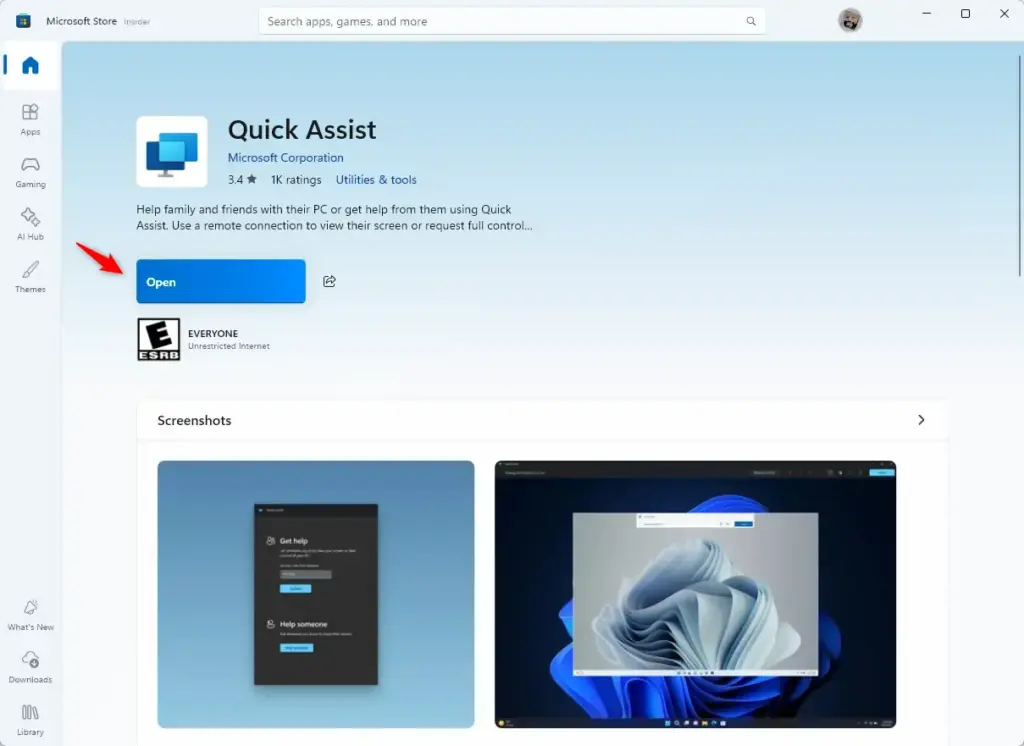
Good to know: The Microsoft Store updates Quick Assist. This means you will usually have the latest features and security fixes without doing anything. To check by hand, open the Store, click Library, then click Get updates. If automatic app updates are turned off in the Store settings, you will need to do this yourself.
Step 2Open Quick Assist
Now that Quick Assist is installed, let's open it. There are a couple of ways to do this: through the Start menu search, or with a keyboard shortcut. Both open the same app, so use whichever is quicker for you.
Method 1Through the Start Menu
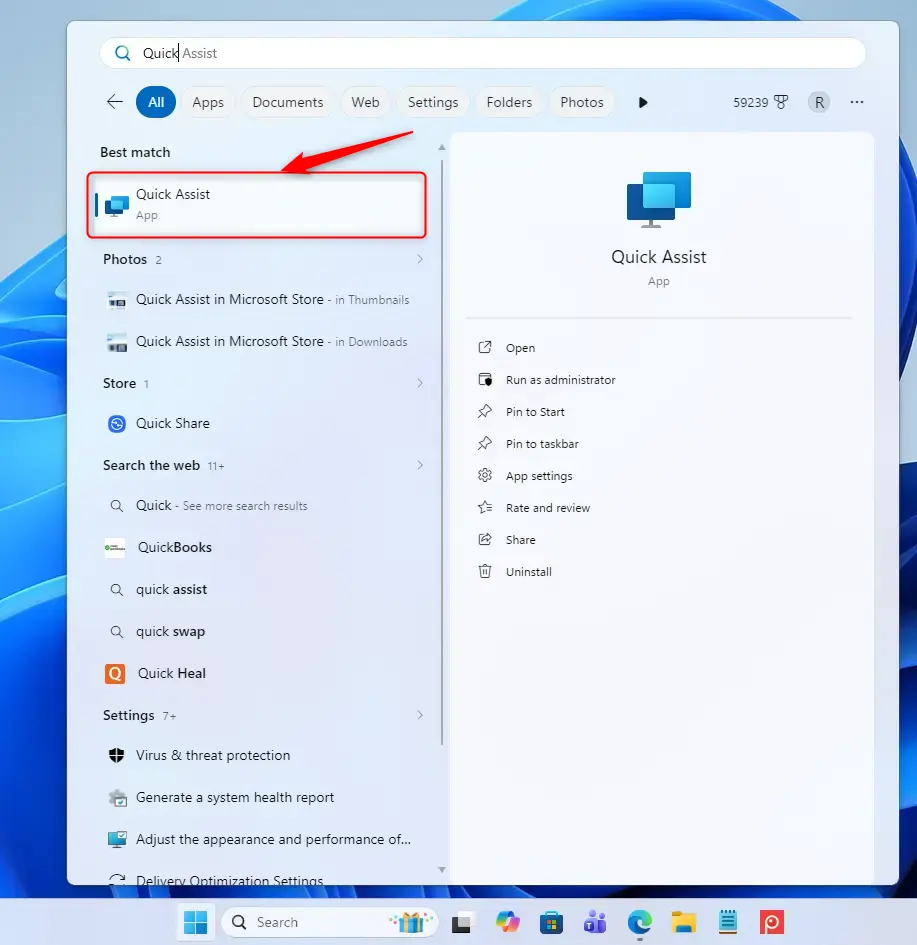
- Click the Start button (the Windows logo) in the bottom-left corner. On Windows 11 the Start button may be in the center of the taskbar, depending on your taskbar alignment. The Start menu opens.
- Start typing "Quick Assist" in the search bar. You don't need to click the search box first. Typing while the Start menu is open searches automatically.
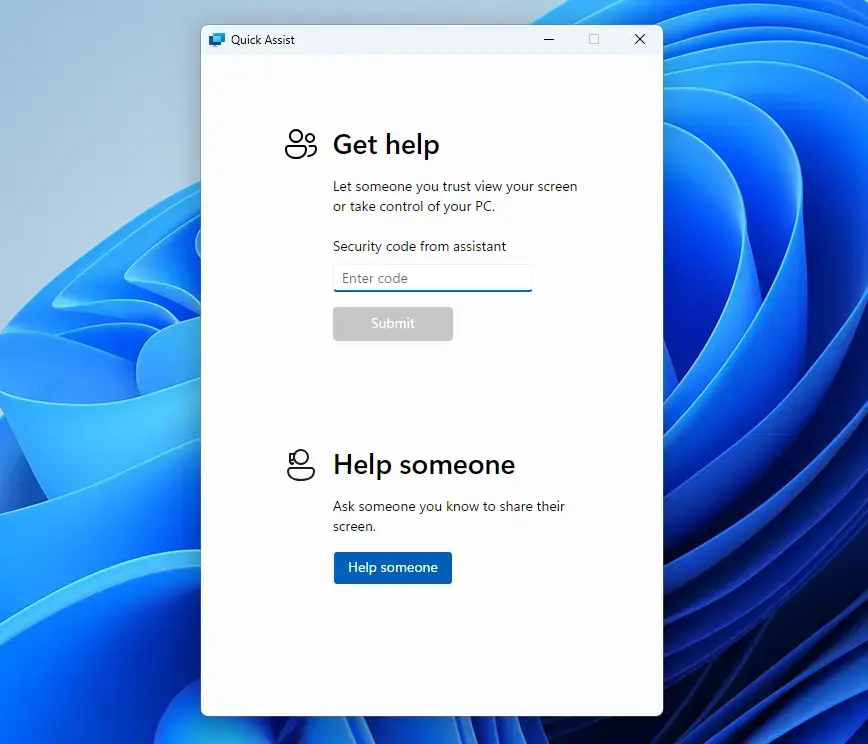
- The Quick Assist app should appear in the results. Click on it to open it. A window opens with the options to give help or get help. If it doesn't appear in the results, the app is probably not installed, so go back to the Store steps above.
Method 2The Keyboard Shortcut
The keyboard shortcut opens Quick Assist instantly, without searching through the Start menu. Press the Windows key, the Ctrl key, and the Q key at the same time to launch the remote support tool right away. The shortcut only works if Quick Assist is installed. If nothing happens, check that the app is installed and try opening it from the Start menu.
- Press and hold the Ctrl key and the Windows key, then press the Q key (Ctrl + Windows key + Q). The Quick Assist window should open. Don't press Windows key + Q on its own, because that opens search instead.
Tip: This shortcut saves time once you know it. It skips the need to search or go through menus. It is handy when you are on the phone with someone and need to get connected quickly.
No matter which way you choose, Quick Assist will open and be ready to help. The next step is to decide whether you are giving help or getting it.
Why Use Quick Assist?
Quick Assist is a handy tool for when you need help with your computer or want to help someone else fix their PC. It is built into Windows 11, it is free, and it needs no extra account on the side of the person getting help. Both sides see the same screen, so it is easier to explain a problem than over the phone alone.
What Happens When You Use Quick Assist?
When you start Quick Assist, you'll choose whether to give or get help, and a connection code is used to link the computers. In practice it goes like this:
- The helper opens Quick Assist, selects Help someone, and signs in with a Microsoft account. A 6-digit code is shown. The code expires after a short time (about 10 minutes), so share it promptly.
- The person who needs help opens Quick Assist, goes to the Get help section, and types in the code.
- The helper chooses whether to view the screen only or to take full control. The person getting help must approve the connection before anything is shared.
Either person can end the session at any time by closing Quick Assist. If the code doesn't work, make sure it was typed correctly and hasn't expired. If it has, the helper can ask for a new one.
Reference:
Summary
Quick Assist is a Windows 11 tool that lets you get or give remote computer help to others. Open it from the Start menu or with Ctrl + Windows key + Q, connect with the 6-digit code, and only ever share access with people you trust.
Have a question about this guide?
Answered by AI from this guide. Good questions may be added to this page — please don't include personal details.
Did this guide fix your problem?

About the Author
Richard
Tech Writer, IT Professional
Richard is a writer at Geek Rewind who turns complex IT tasks into clear, step-by-step guides. He draws on years of hands-on experience in system administration and enterprise IT operations, focusing on Windows, Linux and WordPress: the problems people actually run into, and the fixes that work. His server and WordPress guides come from systems he runs himself. Richard builds and maintains the platform behind Geek Rewind, from its Ubuntu servers and Nginx configuration to its custom WordPress plugins. Many new tutorials start with readers' questions, and he's always glad to answer them in the comments.
No comments yet — be the first to share your thoughts!