How to Install .NET 3.5 on Windows 11
.NET Framework 3.5 is a crucial component for running many older Windows applications on your PC.
This framework allows programs built for earlier versions of Windows to work correctly, potentially increasing the number of compatible legacy programs by up to 30%.
While Windows 11 supports newer .NET versions like 6, 7, and 8, many older games and business software still specifically require .NET 3.5 to function.
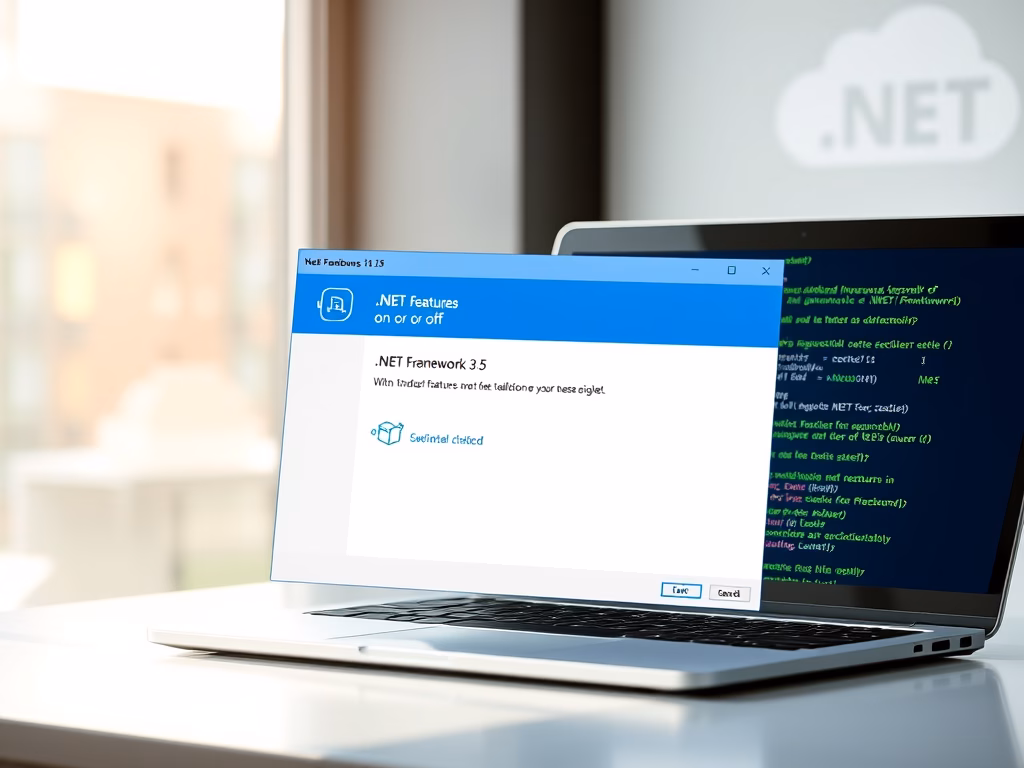
You can easily install .NET Framework 3.5 directly through the “Turn Windows features on or off” setting in Windows 11.
Install .NET 3.5 by searching for “Turn Windows features on or off,” checking the “.NET Framework 3.5” box, and clicking OK. Windows will download and install the necessary files. This enables support for older applications on your system.
Why does 🪟 Windows 11 prompt me to install .NET 3.5?
Windows 11 detects when an application requires specific libraries that are not currently enabled. Since .NET 3.5 is an optional feature, the system prompts you to download it so the legacy application can access the necessary code to run correctly.
Is .NET 3.5 safe to install on modern 🪟 Windows 11 versions?
Yes, it’s safe. It’s an official Microsoft component designed to coexist with newer versions like .NET 8. It doesn’t replace newer versions; it adds the required support for older software.
Method 1Install Using Windows Features
You can install .NET 3.5 on Windows 11 by turning it on in Windows Features. This built-in tool lets you add the framework right from your system settings. Look for ‘Turn Windows features on or off’ in the Start menu and check the box for .NET Framework 3.5.
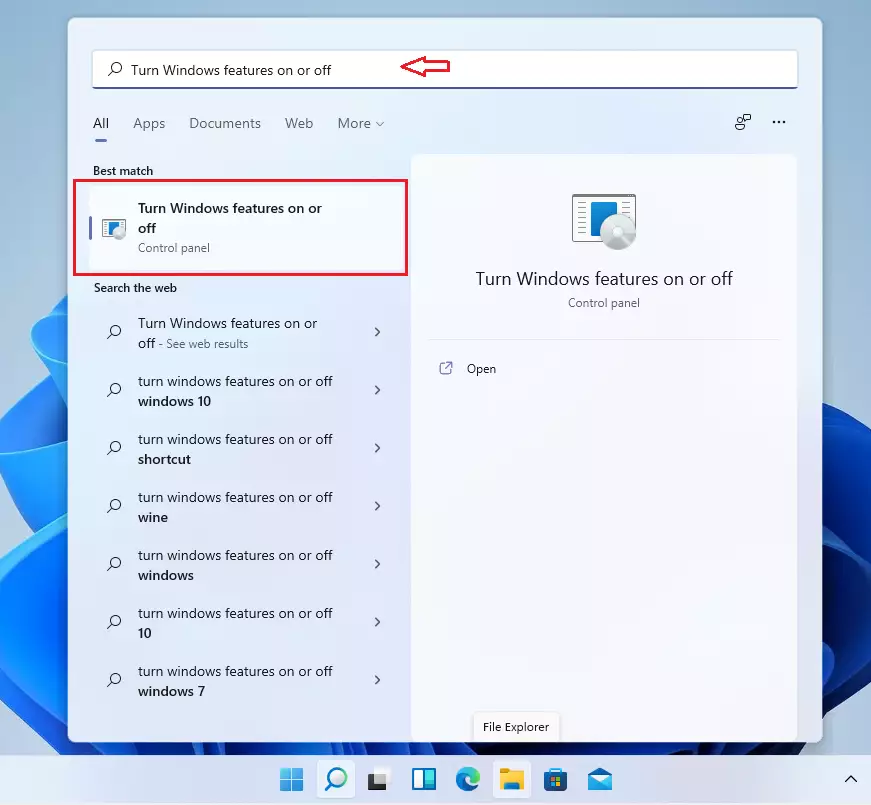
- Click the Start button and type “Turn Windows features on or off.”
- Click the matching result.
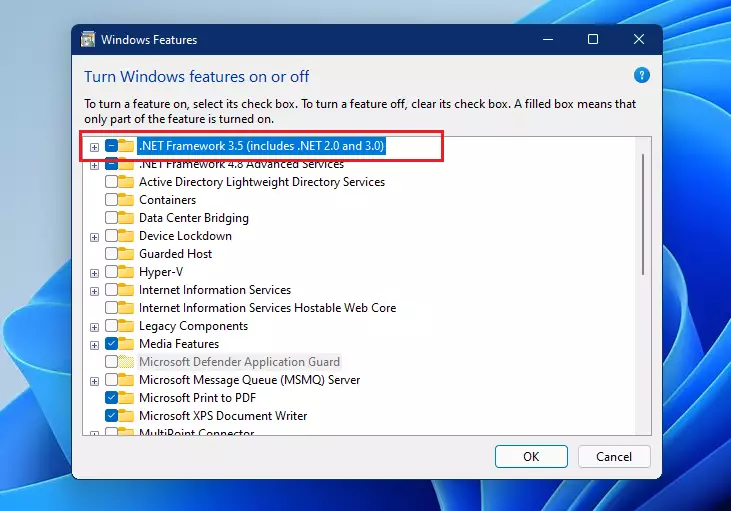
- Check the box for “.NET Framework 3.5 (includes .NET 2.0 and 3.0).”
- Click OK.
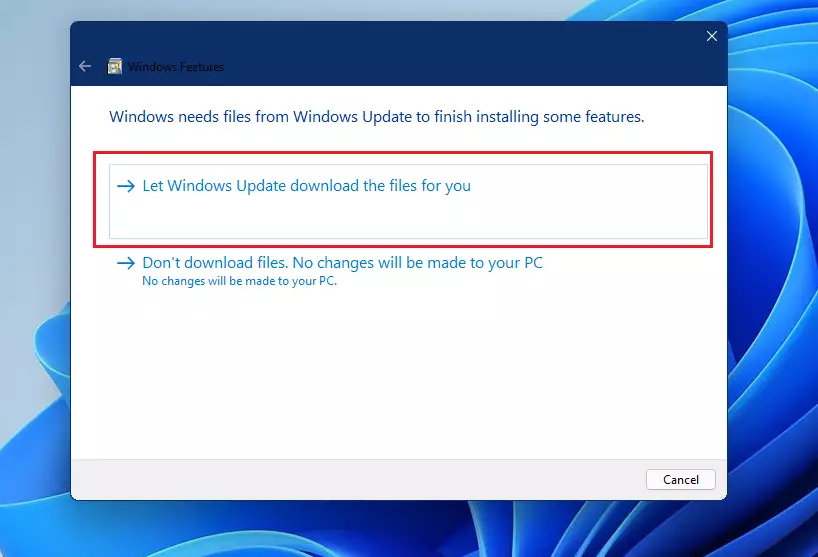
- Select “Let Windows Update download the files for you.”
- Wait for the process to finish.
Installing .NET 3.5 on Windows 11 adds legacy support for older applications. When you install it, Windows downloads the necessary files and registers them in your system folders.
Troubleshooting Common Errors (0x800F081F)
If you encounter error 0x800F081F, it means Windows can’t find the necessary files. This often happens if your Windows 11 build (like 26H1 or Build 28000) is preventing access to Windows Update. Consider using the offline installation method below.
Method 2Use Command Prompt (Admin Required)
Installing .NET 3.5 on Windows 11 using Command Prompt is a quick way to get the framework if you’re comfortable with the command line. Open Command Prompt as an administrator, then run a DISM command. This method is great if you prefer text-based commands over clicking through settings.
- Search for “Command Prompt” in the Start menu.
- Right-click and select “Run as administrator.”

- Run this command:
Dism /online /Enable-Feature /FeatureName:"NetFx3"Why: This forces the installation using DISM (Deployment Image Servicing and Management), a tool for managing Windows images. What happens: Your system attempts to fetch the feature directly from Microsoft servers.
Method 3Offline Installation (Admin Required)
Installing .NET 3.5 on Windows 11 without an internet connection is possible using your Windows installation media, like an ISO file. This method requires Command Prompt with administrator rights. Mount your Windows 11 ISO and then run a specific command to complete the offline setup.
If you have no internet, use your Windows 11 installation media (ISO).
- Mount your Windows 11 ISO file.
- Open Command Prompt as administrator.
- Run the following command, replacing D: with your drive letter:
Dism /online /enable-feature /featurename:NetFX3 /Source:<drive letter>:\sources\sxs /LimitAccessWhy: This method installs from local files when Windows Update won’t connect. What happens: Your system pulls the required files from the mounted ISO instead of the internet.
Summary
.NET 3.5 is essential for legacy apps on Windows 11. Use the Windows Features menu for a quick setup, or use DISM commands if you encounter errors like 0x800F081F. Always ensure you have admin rights before running commands.
Can I use the offline installer if I don’t have an internet connection?
Yes, you can use the DISM tool to install .NET 3.5 from a mounted Windows 11 ISO file. This bypasses the need for an internet connection by using the installation media as the source for the required files.
What is the difference between .NET Framework 3.5 and .NET 6/7/8?
.NET Framework 3.5 is a legacy environment for older Windows software. .NET 6, 7, and 8 are modern, cross-platform frameworks designed for current applications. They are separate products and both can exist on the same computer without conflict.
Was this guide helpful?

About the Author
Richard
Tech Writer, IT Professional
Richard, a writer for Geek Rewind, is a tech enthusiast who loves breaking down complex IT topics into simple, easy-to-understand ideas. With years of hands-on experience in system administration and enterprise IT operations, he’s developed a knack for offering practical tips and solutions. Richard aims to make technology more accessible and actionable. He's deeply committed to the Geek Rewind community, always ready to answer questions and engage in discussions.


all arenot working on my side,, always giving me errors
including attempting to download the standalone version from microsoft and running it as administrator..
downthere what i receive from powershell as an example,, other ways were not much luckier
PS C:\Windows\system32> Enable-WindowsOptionalFeature -Online -FeatureName “NetFx3”
Enable-WindowsOptionalFeature : Enable-WindowsOptionalFeature failed. Error code =
0x8000ffff
At line:1 char:1
+ Enable-WindowsOptionalFeature -Online -FeatureName “NetFx3”
+ ~~~~~~~~~~~~~~~~~~~~~~~~~~~~~~~~~~~~~~~~~~~~~~~~~~~~~~~~~~~
+ CategoryInfo : NotSpecified: (:) [Enable-WindowsOptionalFeature], COMExcept
ion
+ FullyQualifiedErrorId : Microsoft.Dism.Commands.EnableWindowsOptionalFeatureCommand
The complications in this procedure need an IT guy to run. I don’t have a clue what to do next. I have a $3,500 computer to run games on and make recipes in a second document drive. Can’t do either in the D RECIPES file as it is not responding. If Windows does not have a service pack it in it with the Windows Up date within it this a complete joke as a Windows 11. When do your customers complete IT corrections. I wish I had never complete and loaded Windows 11.
I can’t get any of them to work either.