How to Check When Windows Was Installed on Your PC

The quickest way to see when Windows was installed is the built-in systeminfo tool in Command Prompt. It prints the original install date and time of your current Windows setup. That date helps in a few cases. You can see how long the system has run without a wipe, spot an aging install, or check whether a repair shop put a fresh copy of Windows on the drive.
Windows records this date when setup first runs on the machine. Task Manager can also show system uptime, but uptime only counts the time since your last restart. It tells you nothing about the day Windows was installed, so don’t use it for this.
Open Command Prompt or PowerShell and type `wmic os get installdate` or `([WMI]”).ConvertToDateTime((Get-WmiObject Win32_OperatingSystem).InstallDate`) respectively. This will display the original installation date of your Windows operating system.
What happens when you are done?
The Registry Editor shows the date and time your current Windows build was put in place, stored as a raw number. It takes an extra step to read, but it is a good cross-check against the other two methods. Together they give you a clear baseline for the machine’s history. You can use that to decide whether a clean install is worth doing.
Method 1Using Command Prompt
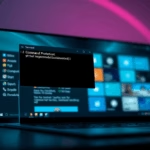
Command Prompt is the fastest method and takes a few seconds. You open it from the Start menu , type one short command, press Enter, and read the install date from the output. It works the same on Windows 11 Home and Pro, and you don’t need administrator rights.
- Click the Start menu. The Start menu opens, and you can start typing right away.
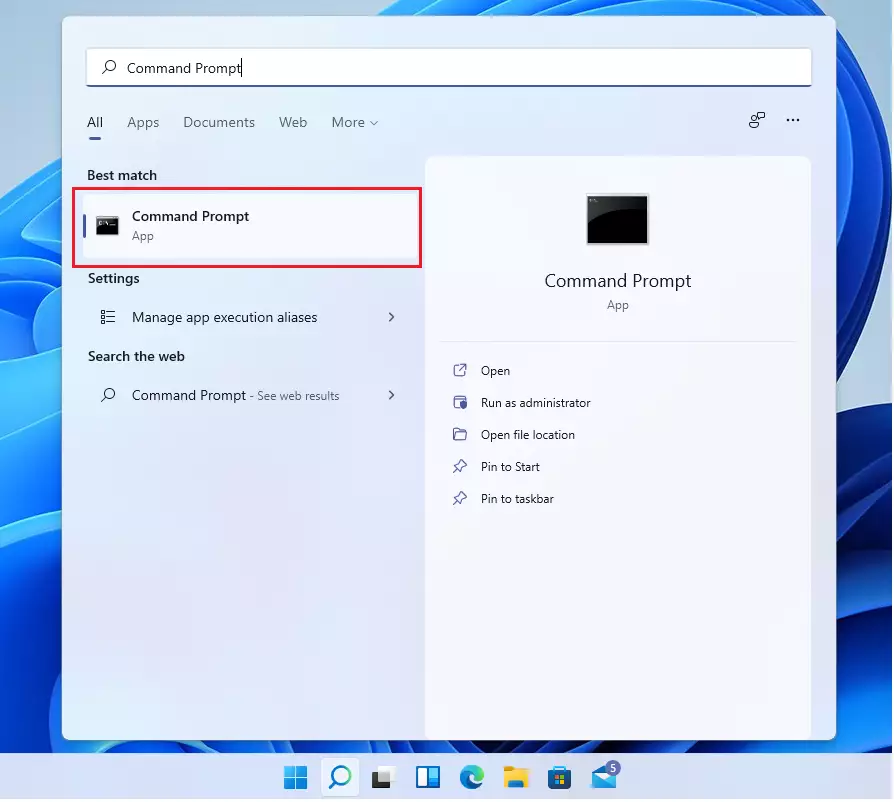
- Type Command Prompt in the search bar. Command Prompt should appear at the top of the results.
- Select the app from the list. A black window opens with a blinking cursor. Leave it as a normal window, since you don’t need Run as administrator for this.
With the black window open and the cursor blinking, type this command and press Enter. It may take a couple of seconds to print its result.
systeminfo | find "Original Install Date"
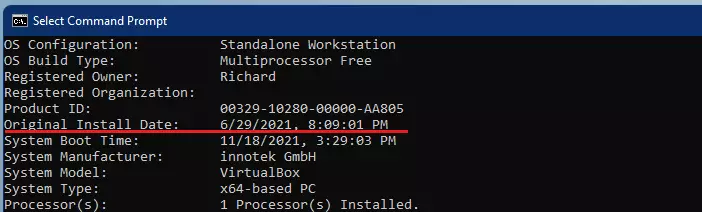
When the command finishes, you will see a line that looks like this:
Original Install Date: 20210629200901.000000+000
Read the number as year, month, day, hour, minute and second. In this example that is 2021-06-29 at 20:09:01. Depending on the command and your regional settings, the date may instead appear in a format like a normal short date and time. Both mean the same thing.

If you want to see more details, type the following and press Enter:
systeminfo
For more details, visit the official Microsoft documentation on systeminfo.
Method 2Using PowerShell
PowerShell gives you the same answer with a single command, and it shows the date in a format that is easy to read. You right-click the Start button, open PowerShell or Terminal, and run the command. This works on both Windows 11 Home and Pro.
- Right-click the Start button and select Terminal or PowerShell. On Windows 11 the menu usually lists Terminal. A window opens with a prompt that starts with PS.
- Type the following command and press Enter. You can also copy it from the box below and paste it in:
(Get-CimInstance Win32_OperatingSystem).InstallDate
This command translates the raw system data into a human-readable format immediately. The result is a normal date and time, so you don't need to decode anything. The command only reads information and changes nothing on your PC.
Method 3Using the Registry Editor
The Registry Editor stores the install date as a number, so this method takes one extra step. You open the registry, browse to the right key, read the stored value, and convert it to a normal date. Only read the value. Don't edit or delete anything in the registry while you are there.
First, open Registry Editor by typing regedit in the Start menu search and pressing Enter. If Windows asks Do you want to allow this app to make changes to your device?, click Yes. The Registry Editor window opens with a folder tree on the left.
Navigate to this path. You can click through the folders in the left pane, or paste the path into the address bar at the top of the window if your version has one:
HKEY_LOCAL_MACHINE\SOFTWARE\Microsoft\Windows NT\CurrentVersion
In the right pane, find the value named InstallDate. The number you see is in "epoch time," which counts the seconds since January 1, 1970. If the number is shown in hexadecimal, double-click the value and choose Decimal under Base to see it as a plain number, then click Cancel so nothing is changed. To make sense of it, copy that number and use an epoch converter website to turn it into a normal date.
Summary
Finding your Windows installation date is simple. You can use the Command Prompt, PowerShell, or the Registry Editor. Command Prompt and PowerShell are quicker. The registry route is handy when you want to confirm the raw value. Remember that if you upgraded your OS, the date can reflect that upgrade rather than the very first install. Also check your OS build version from time to time to make sure your system is fully up to date.
Was this guide helpful?

About the Author
Richard
Tech Writer, IT Professional
Richard is a writer at Geek Rewind who turns complex IT tasks into clear, step-by-step guides. He draws on years of hands-on experience in system administration and enterprise IT operations, focusing on Windows, Linux and WordPress: the problems people actually run into, and the fixes that work. His server and WordPress guides come from systems he runs himself. Richard builds and maintains the platform behind Geek Rewind, from its Ubuntu servers and Nginx configuration to its custom WordPress plugins. Many new tutorials start with readers' questions, and he's always glad to answer them in the comments.


No comments yet — be the first to share your thoughts!