How to Enable or Disable Wi-Fi in Windows 11

Windows 11 can connect to the internet wirelessly through your PC’s Wi-Fi adapter, with no cable involved. You can switch that connection on or off in a few seconds. The two easiest places are the Quick Settings panel on the taskbar and the main Settings app . Either one is useful when you want to save battery, rule out wireless problems, or force the PC onto a wired connection.
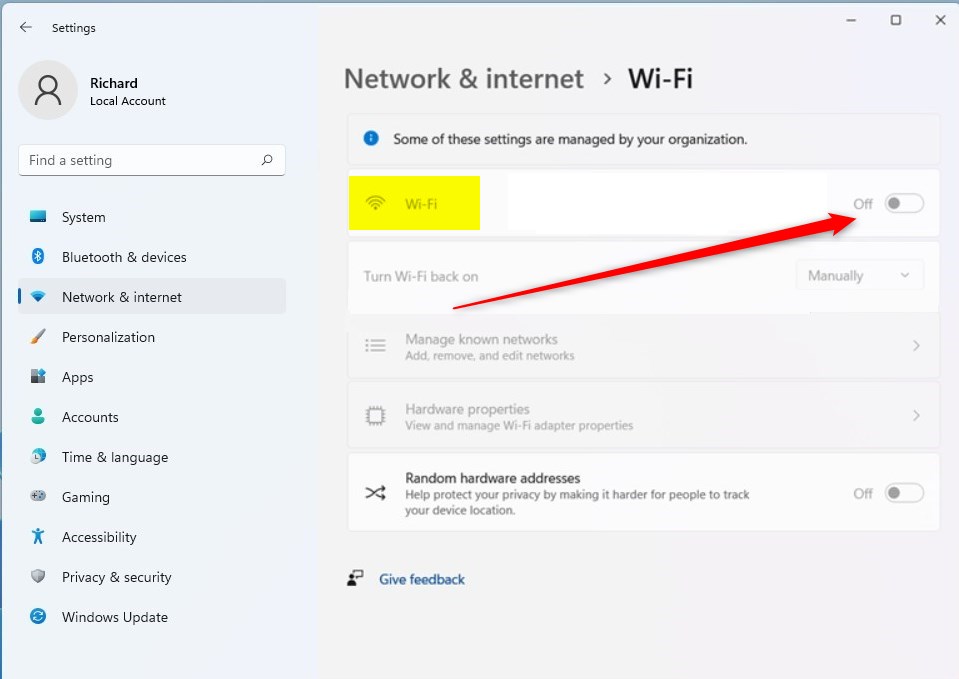
Open the Quick Settings panel by pressing Win+A, then click the Wi-Fi icon to turn it off. Alternatively, go to Settings Network & internet Wi-Fi and toggle the switch off. Wi-Fi disconnects immediately without restarting.
What is Wi-Fi?
It uses radio waves to link your device to a router or access point, which then connects you to the internet. Your PC needs a working Wi-Fi adapter for this. Most laptops have one built in, and many desktops don’t unless one was added.
🪟 Windows 11 Wi-Fi Features
Windows 11 brings better wireless performance, WPA3 protection (Wi-Fi Protected Access 3, a modern security protocol that safeguards your connection), and support for newer standards such as Wi-Fi 6. When you need to troubleshoot network problems or save battery, you can turn Wi-Fi off from the Quick Settings menu or the Settings app. You don’t need to restart the computer. Turning it back on works the same way.
These are the terms you will see most often:
- Wi-Fi 6: The sixth generation of Wi-Fi . It works faster and handles more devices at once.
- Wi-Fi 7: The newest generation. It offers even faster speeds and better performance. You need a Wi-Fi 7 adapter and a Wi-Fi 7 router to benefit from it.
- WPA3: The latest security standard. It keeps your Wi-Fi connection safer with stronger protection. Both your adapter and your router must support it.
Administrators who manage many PCs can configure advanced network rules through the Wi-Fi area in Policy CSP (Configuration Service Provider, a framework used to manage device settings). Home users rarely need this.
Faster and more secure Wi-Fi in Windows - Microsoft Support
This guide explains how to use Wi-Fi 7, Wi-Fi 6, and WPA3 in Windows for better wireless coverage and network security.
What You Need
If you are signed in with a standard account, Windows may ask for an administrator's password before it applies the change. On a work or school PC, your organization's policies can also block the change. In that case, ask your IT department.
How to Enable or Disable Wi-Fi
Enable Wi-Fi
This setting remains active by default, so Wi-Fi is on unless someone has turned it off. If you can't find a Wi-Fi option at all, the adapter may be disabled or missing a driver. Airplane mode can also be the cause.
reg add "HKEY_LOCAL_MACHINE\SOFTWARE\Microsoft\PolicyManager\default\Wifi\AllowWiFi" /v value /t REG_DWORD /d 1 /f
Disable Wi-Fi
reg add "HKEY_LOCAL_MACHINE\SOFTWARE\Microsoft\PolicyManager\default\Wifi\AllowWiFi" /v value /t REG_DWORD /d 0 /f
Summary
Disabling Wi-Fi in Windows 11 stops the computer from connecting wirelessly, and administrative rights remain necessary for making this change. A wired Ethernet connection keeps working while Wi-Fi is off. To undo the change, turn Wi-Fi back on the same way you turned it off. The PC should then reconnect to your saved network automatically.
Have a question about this guide?
Answered by AI from this guide. Good questions may be added to this page — please don't include personal details.
Did this guide fix your problem?

About the Author
Richard
Tech Writer, IT Professional
Richard is a writer at Geek Rewind who turns complex IT tasks into clear, step-by-step guides. He draws on years of hands-on experience in system administration and enterprise IT operations, focusing on Windows, Linux and WordPress: the problems people actually run into, and the fixes that work. His server and WordPress guides come from systems he runs himself. Richard builds and maintains the platform behind Geek Rewind, from its Ubuntu servers and Nginx configuration to its custom WordPress plugins. Many new tutorials start with readers' questions, and he's always glad to answer them in the comments.
No comments yet — be the first to share your thoughts!