How to Enable Media Sharing in Ubuntu Linux

Enabling media sharing in Ubuntu Linux lets you stream your music, photos, and videos to other devices on your network. This process involves installing and setting up a tool called Rygel.
Rygel acts as a server, making your media files visible to devices like smart TVs or game consoles. These devices often use UPnP or DLNA standards to connect. For example, you might use Rygel to send a movie from your Ubuntu PC to your PlayStation 4.
You can install Rygel easily through the Ubuntu Software Center or by typing a simple command in the terminal: `sudo apt install rygel`. This package turns your computer into a media hub.
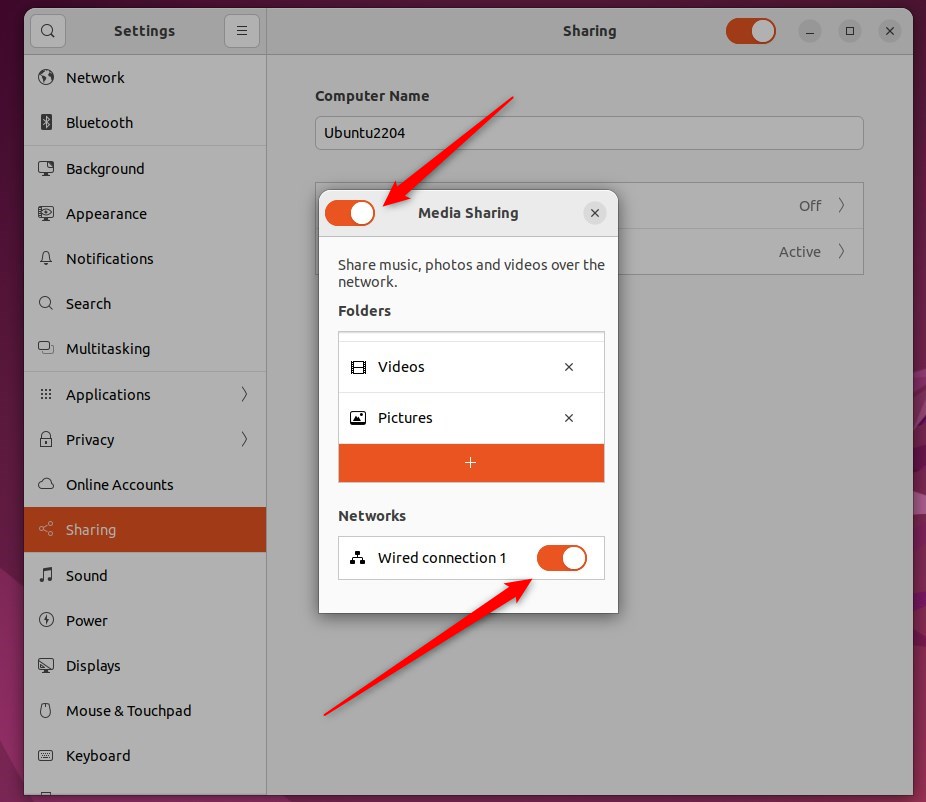
Open System Settings, then click Sharing. Toggle the main Sharing switch ON, then click Media Sharing. Toggle the Media Sharing switch ON to stream your music, photos, and videos to other devices on your network.
How to turn on or off media sharing in Ubuntu Linux
You can turn Ubuntu media sharing on or off within the Sharing settings. This feature makes music, videos, and other files from your computer visible to other devices on your home network. It’s a way to access your media from any device in your house.
Let’s get this set up.
Most Ubuntu settings are located in one place: the System Settings panel. This is where you can manage system configurations, create new users, and update your system.
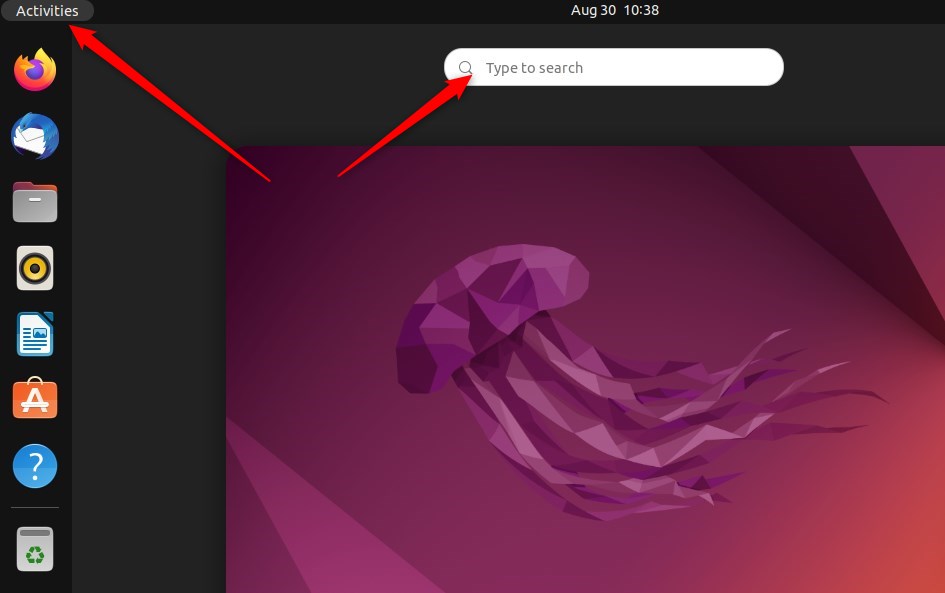
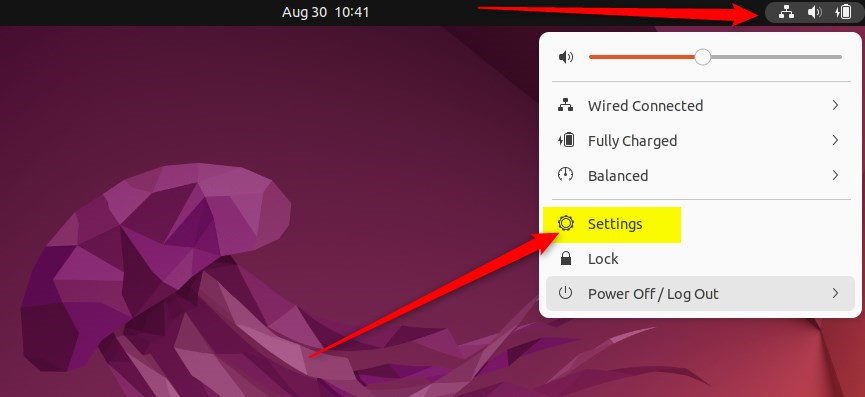
Alternatively, click on the System menu at the top-right corner of the top bar on your desktop.
On the System menu, select Settings, as highlighted below.
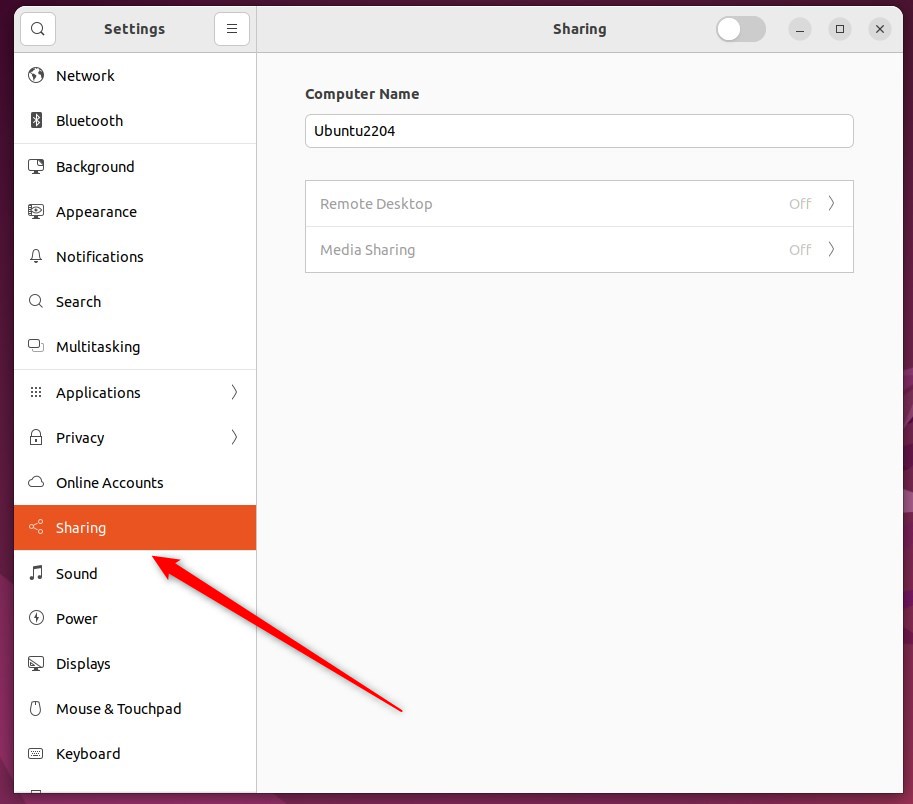
In the Settings app, click on the Sharing tile to open the panel.
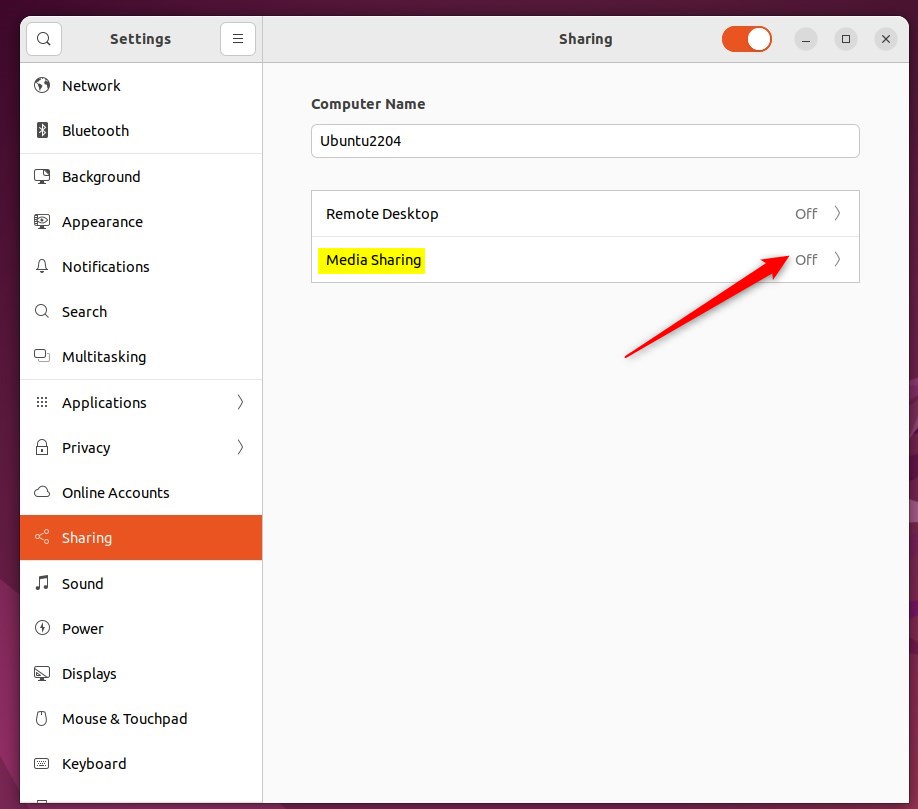
The Sharing switch at the top of the Sharing window controls media sharing. When turned on, your computer’s media files become visible to other devices on your network, allowing them to access your music, videos, and pictures. Sharing is disabled when the switch is Off.
If the text below Computer Name allows you to edit it, you can change the name your computer displays on the network.

In the System Settings -> Sharing panel, select Media Sharing as highlighted below.
On the Media Sharing window, toggle the Media Sharing switch to On.
To disable it, switch it back to the Off position.
Now, choose the network connection you want to use for sharing. Ensure your other devices are connected to the same network.
If a Wi-Fi network is available, that should be the best option to reach other devices.
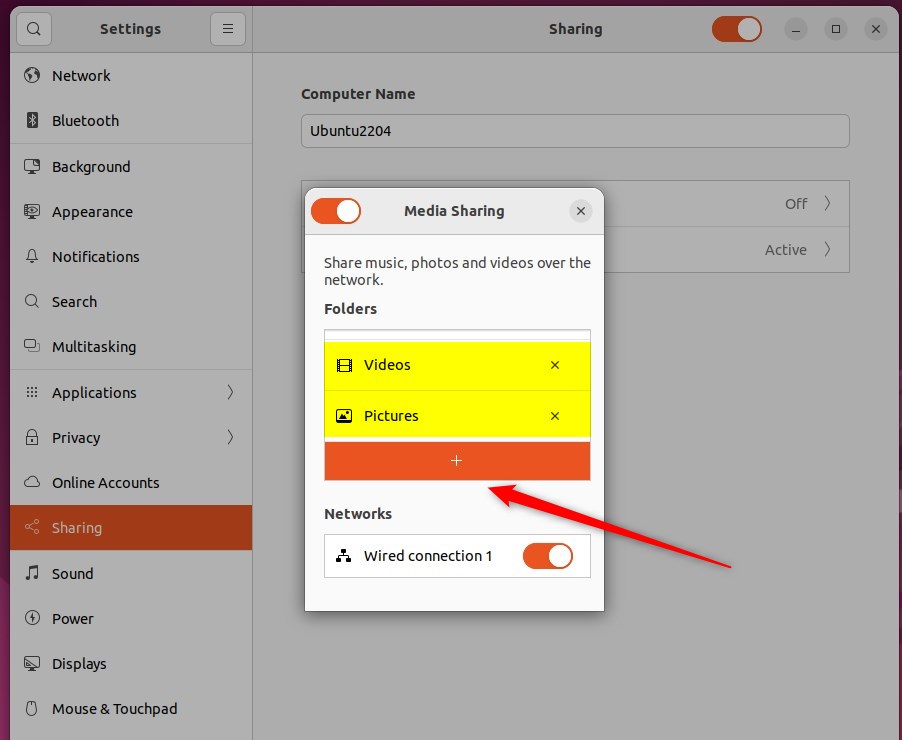
Click X on the Media Sharing window to close. Using the external device, you can now browse or play media in the folders you selected.
That should do it!
Conclusion:
- Media Sharing in Ubuntu Linux can be easily enabled or disabled using the Sharing panel in System Settings.
- Following the simple steps outlined in this post, you can share music, photos, and videos with UPnP or DLNA-enabled devices across the same network.
- Select the appropriate network connection for seamless sharing with other connected devices.
- After configuring Media Sharing, you can access and enjoy your media on various external devices such as phones, TVs, or game consoles.
How does media sharing work on Ubuntu?
So I’m going to share the desktop folder. Maybe let’s do that. One. So now instantly the desktop folder is shared for me. Now that’s all I have to do. Anyone else on my LAN.
Was this guide helpful?

About the Author
Richard
Tech Writer, IT Professional
Richard, a writer for Geek Rewind, is a tech enthusiast who loves breaking down complex IT topics into simple, easy-to-understand ideas. With years of hands-on experience in system administration and enterprise IT operations, he’s developed a knack for offering practical tips and solutions. Richard aims to make technology more accessible and actionable. He's deeply committed to the Geek Rewind community, always ready to answer questions and engage in discussions.
Even if i turn off the media sharing, the non-default folders are still being shared.
[…] you turn on DLNA media sharing in Windows, your system will begin scanning your network for DLNA-enabled devices. If a device is […]