Enable or Disable Windows 11 Network Adapter

A Windows 11 network adapter is the hardware part that connects your PC to the internet or a local network via Wi-Fi or an Ethernet cable. Turning a network adapter on or off controls your computer ability to access any network.
You can turn off any network adapter in just a few clicks inside the Windows 11 settings menu. People usually turn off their adapters to fix bad internet connections or to switch between different connections when they have more than one adapter installed.
Open Settings , go to Network & internet, then Advanced network settings, find your adapter, and click Disable. Alternatively, use Control Panel or Device Manager to right-click the adapter and select Disable.
How to disable or enable a network adapter in 🪟 Windows 11 via the Settings app
You can disable network adapter Windows 11 settings by opening the Settings app, going to Network & internet, selecting Advanced network settings, and clicking Disable next to your connection. To turn it back on, follow the same steps and click Enable.
Windows 11 keeps most of its settings in one place, the Settings app. This is where you can adjust system configurations, create new users, and update Windows. To access System Settings, press the Windows key + I or click Start ==> Settings, as shown in the image below:

Alternatively, you can use the search box on the taskbar to search for Settings. Then select to open it.
Windows Settings pane should look similar to the image below. In Windows Settings, click Network & internet tile to expand it.
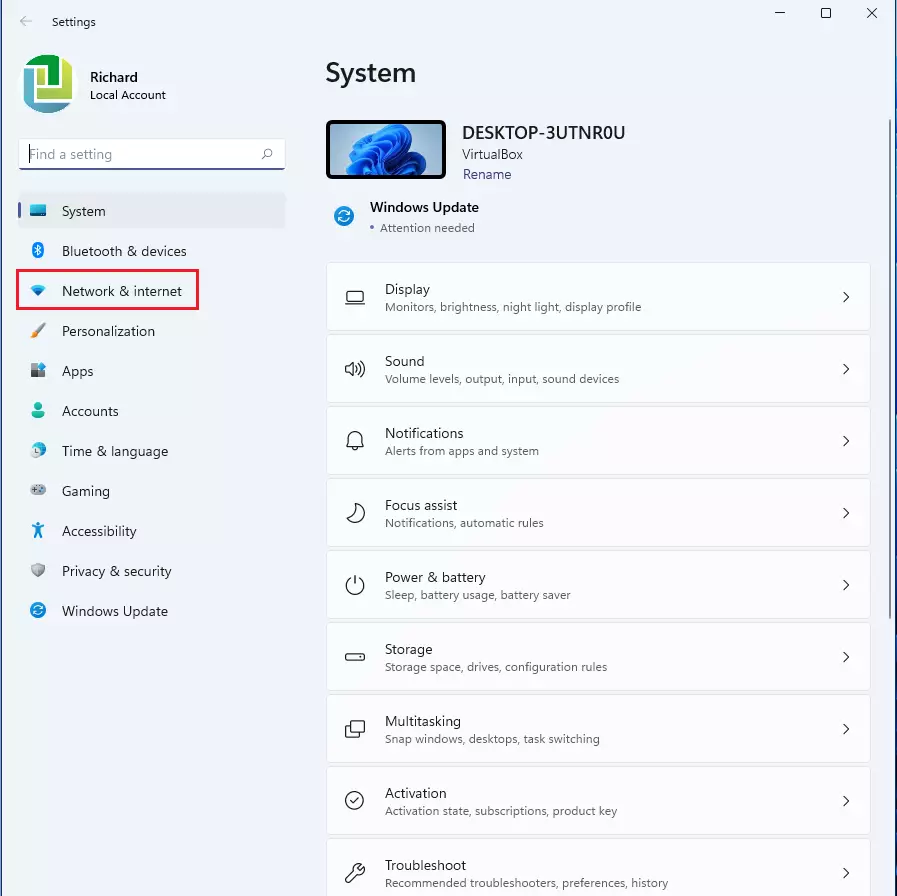
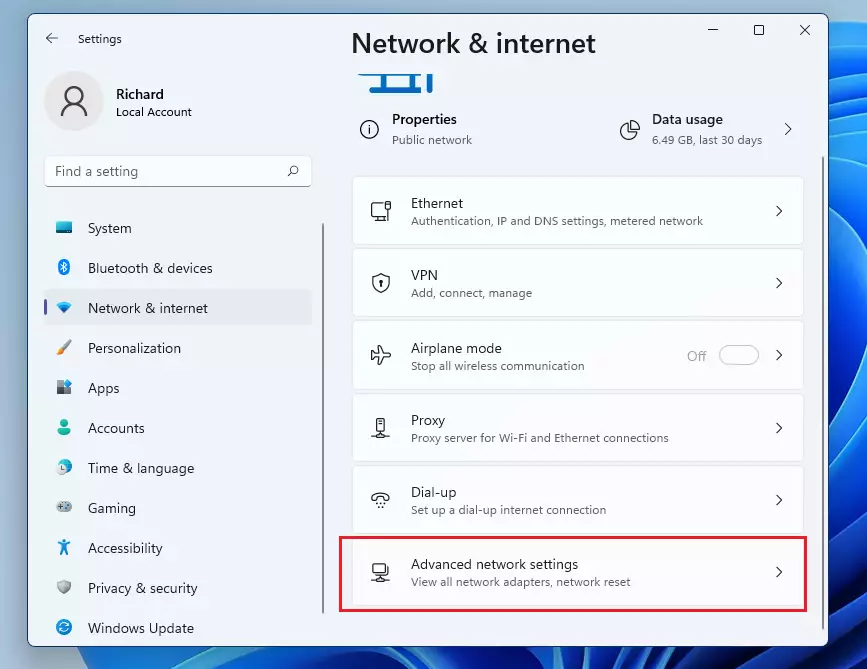
On the Network & internet settings pane, select the Advanced network settings tile at the bottom to expand it.
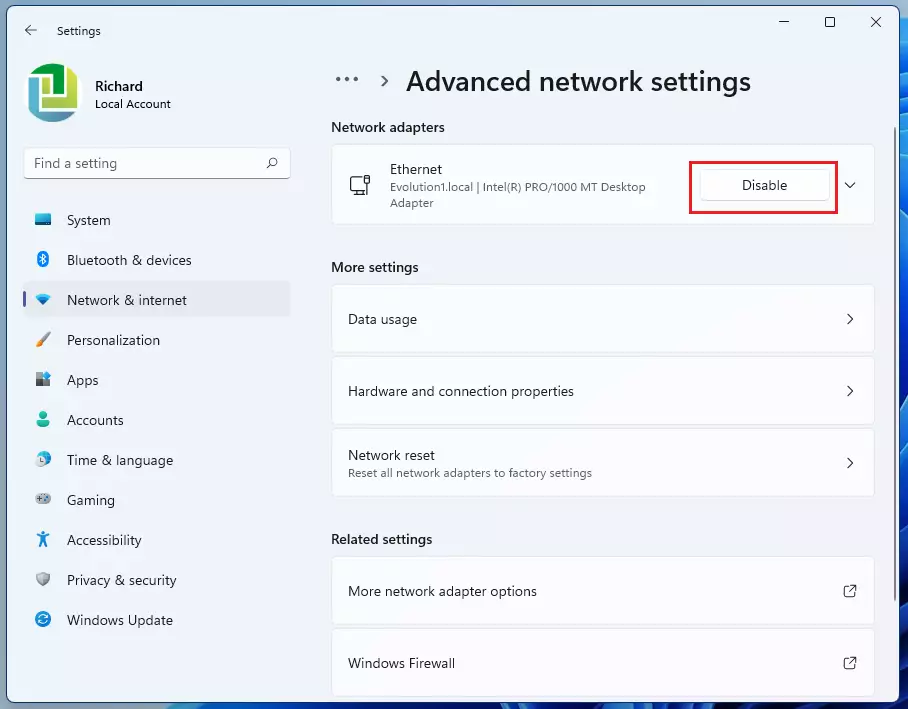
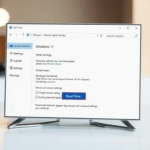
On the Advanced network settings pane, under Network adapters, select the network adapter name you want to disable. Then click the Disable button, as shown below, to turn off the network adapter.
Do this to all the adapters you want to disable in Windows.
That should do it. You can now exit the Settings app.
How to disable or enable a network adapter in 🪟 Windows 11 via Control Panel
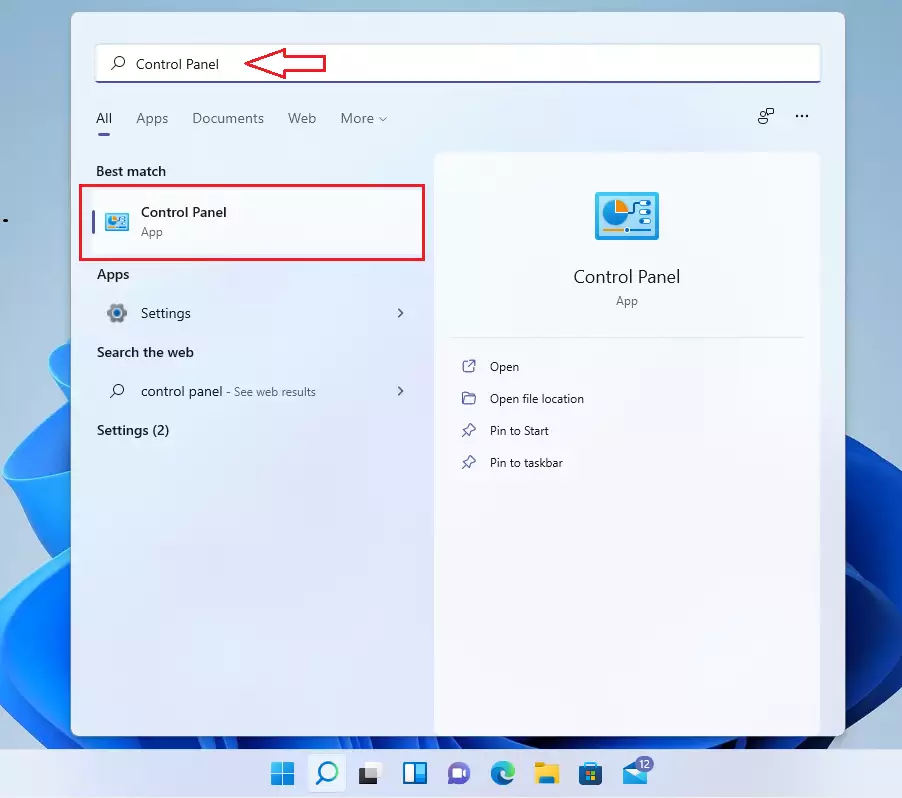
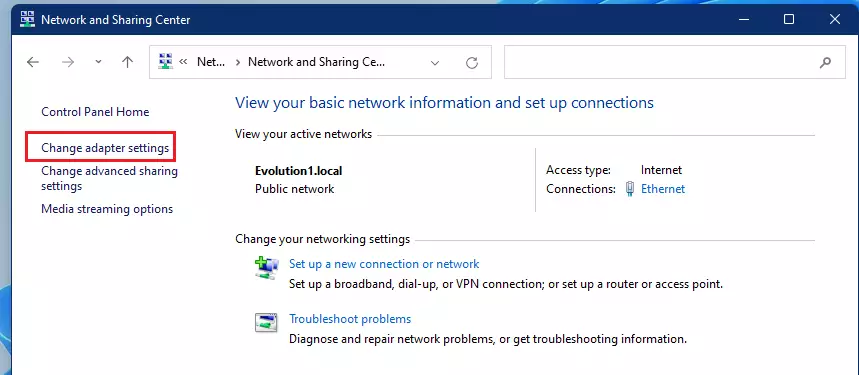
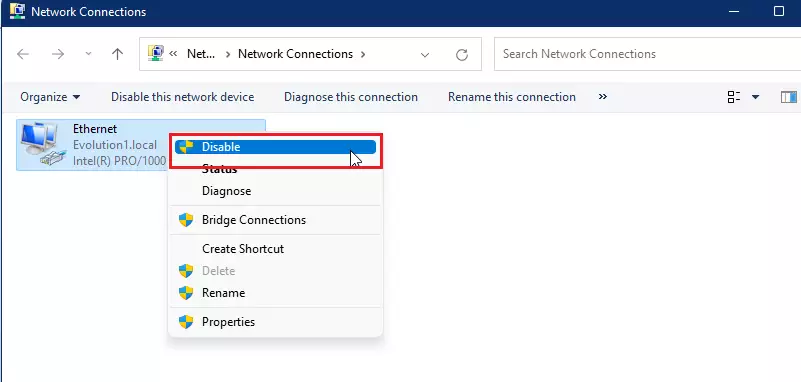
You can disable network adapter Windows 11 options through the Control Panel by opening Network and Sharing Center, clicking Change adapter settings, and right-clicking your connection to choose Disable. Right-click the same connection and choose Enable to turn it back on.
Go to Network and Internet Network and Sharing Center Change adapter settings in the Control Panel app.
In the Network Connections window, right-click the adapter you want to disable. Then select Disable on the context menu.
How to disable or enable a network adapter in 🪟 Windows 11 via Device Manager
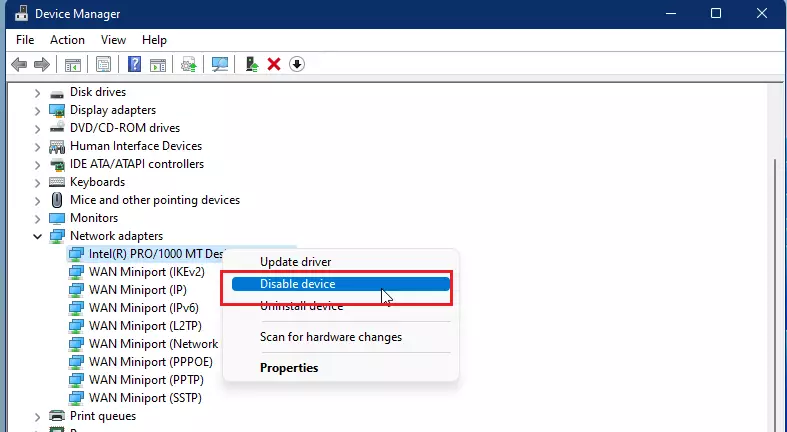
You can disable network adapter Windows 11 hardware using the Device Manager by expanding the Network adapters list, right-clicking your specific adapter, and selecting Disable device. To turn it back on, right-click the adapter again and select Enable device.
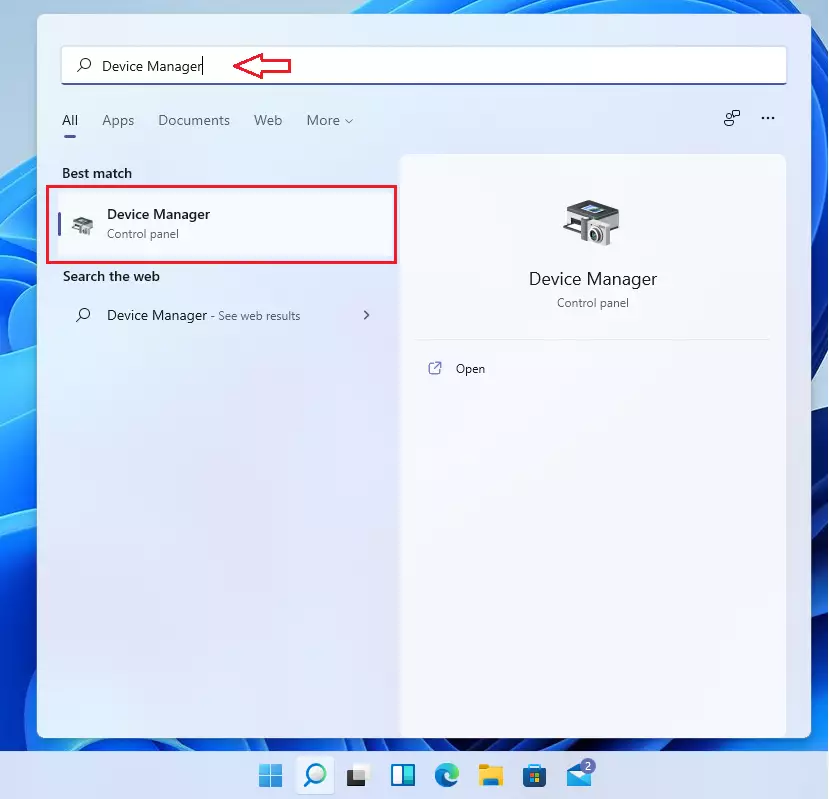
In the Device Manager app, expand the Network adapter sub-group, right-click on the adapter you want to disable and select Disable device.
How to disable or enable a network adapter in 🪟 Windows 11 via Command Prompt
You can disable network adapter Windows 11 connections using the Command Prompt by running an administrator window and executing specific netsh interface commands. This method lets you turn your network card on or off using typed commands instead of menus.
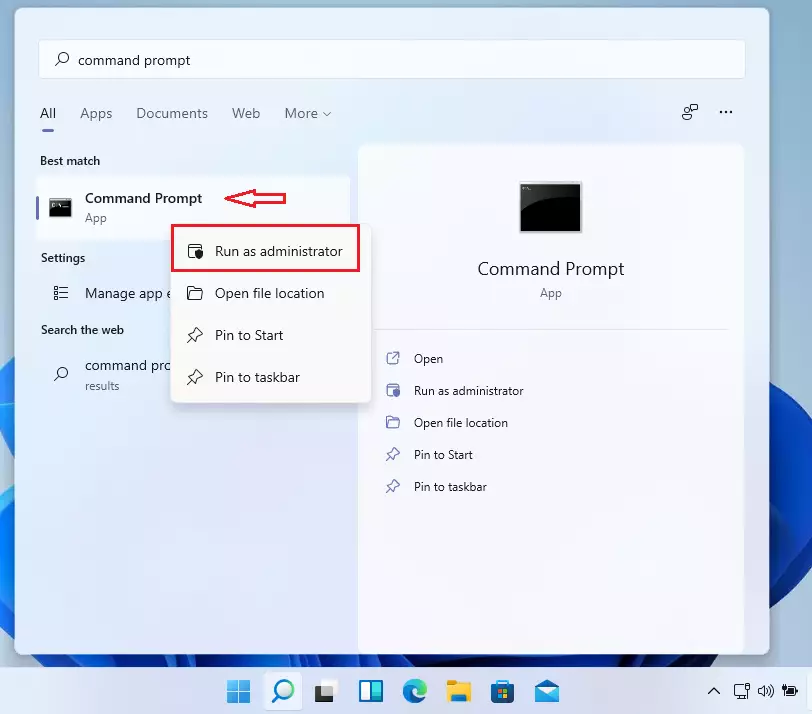
Once the Command Prompt opens, run the commands below to turn a network adapter on or off.
netsh interface set interface "Interface Name" disable
netsh interface set interface "Interface Name" enable
That should do it!
Conclusion: Managing network adapters in Windows 11 works across any of these four interfaces.
- Disabling a network adapter in Windows 11 is straightforward, whether using the Settings app, Control Panel, Device Manager, or Command Prompt.
- You may want to disable network adapters to enhance troubleshooting or manage multiple connections effectively.
- Ensure you know which adapter you are disabling to avoid losing internet connectivity.
- If you encounter any issues, restarting your device or enabling the adapter again can often resolve connectivity problems.
- Familiarizing yourself with these methods can improve your overall experience and efficiency in managing network connections on your Windows 11 device.
Was this guide helpful?

About the Author
Richard
Tech Writer, IT Professional
Richard is a writer at Geek Rewind who turns complex IT tasks into clear, step-by-step guides. He draws on years of hands-on experience in system administration and enterprise IT operations, focusing on Windows, Linux and WordPress: the problems people actually run into, and the fixes that work. His server and WordPress guides come from systems he runs himself. Richard builds and maintains the platform behind Geek Rewind, from its Ubuntu servers and Nginx configuration to its custom WordPress plugins. Many new tutorials start with readers' questions, and he's always glad to answer them in the comments.

No comments yet — be the first to share your thoughts!