How to Delete Files and Folders from Your OneDrive but Not Your Computer in Windows 11

Sometimes you need to free up OneDrive cloud space but still want the files on your PC. OneDrive creates a folder on your computer that mirrors your Microsoft cloud storage. Whatever you delete inside that folder is also deleted from the cloud, so you can’t just press Del.
The workaround is to move the files out of the OneDrive folder instead of deleting them. OneDrive sees them leave the synced folder and removes them from the cloud, while the files stay on your hard drive in their new location. Don’t confuse this with the Files On-Demand option Free up space, which does the opposite: it keeps the file in the cloud and removes the local copy.
To delete files from OneDrive but not your computer, move them out of the OneDrive folder on your PC to another local folder. OneDrive will then remove them from cloud storage during its next sync, while they remain accessible on your computer.
Deleting from OneDrive, Not Your Computer
Moving items out of the main OneDrive folder first lets you clear cloud storage while keeping copies safe on your computer’s hard drive. This works on both Windows 11 Home and Pro, and it doesn’t need a restart.
Before you start, check that OneDrive is running and signed in. Look for the cloud icon in the taskbar notification area . The move only reaches the cloud once OneDrive can sync, so the PC needs an internet connection.
Here is the method to follow:
1Find Your OneDrive Folder
- Open File Explorer (the folder icon on your taskbar ), or press the Win+E.
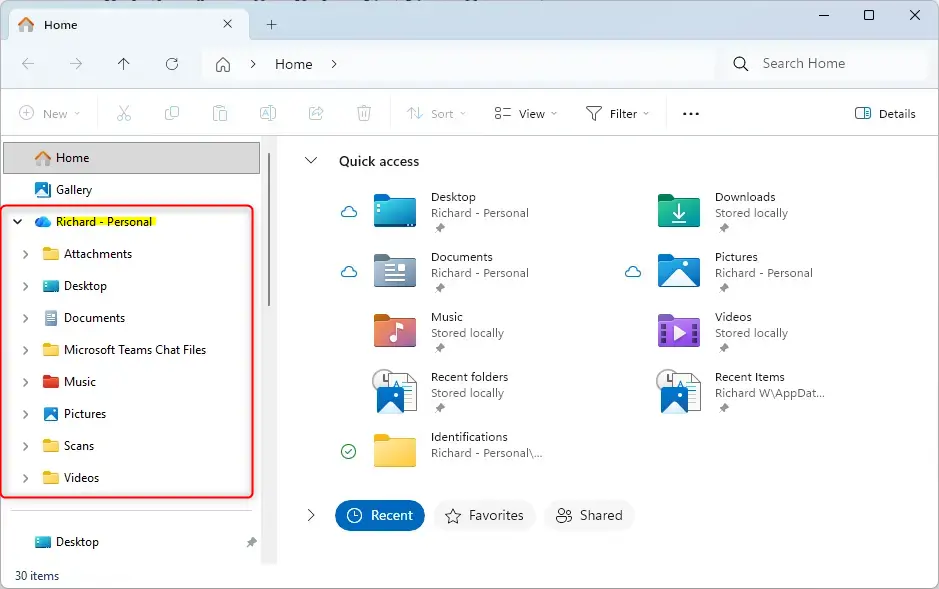
- Look in the left navigation pane for OneDrive. If you have more than one account signed in, you may see entries such as OneDrive – Personal or OneDrive – followed by a company name. Pick the one that holds the files you want to remove from the cloud.
Click the entry. You should now see the files and folders stored in that OneDrive account.
2Move the Files Out of the OneDrive Folder
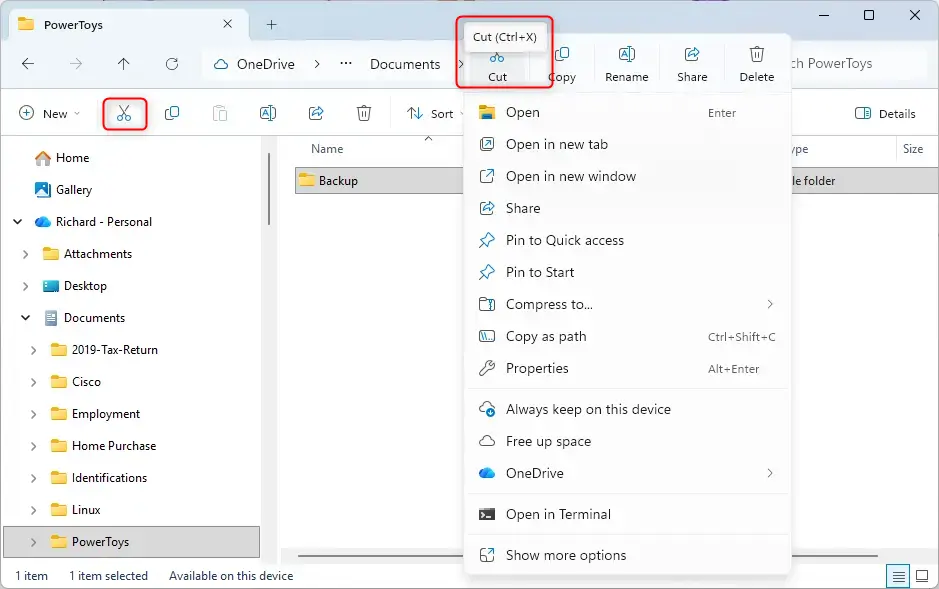
- Select the files or folders you want to remove from the cloud. Hold Ctrl and click to pick several items, or press Ctrl + A to select everything in the folder.
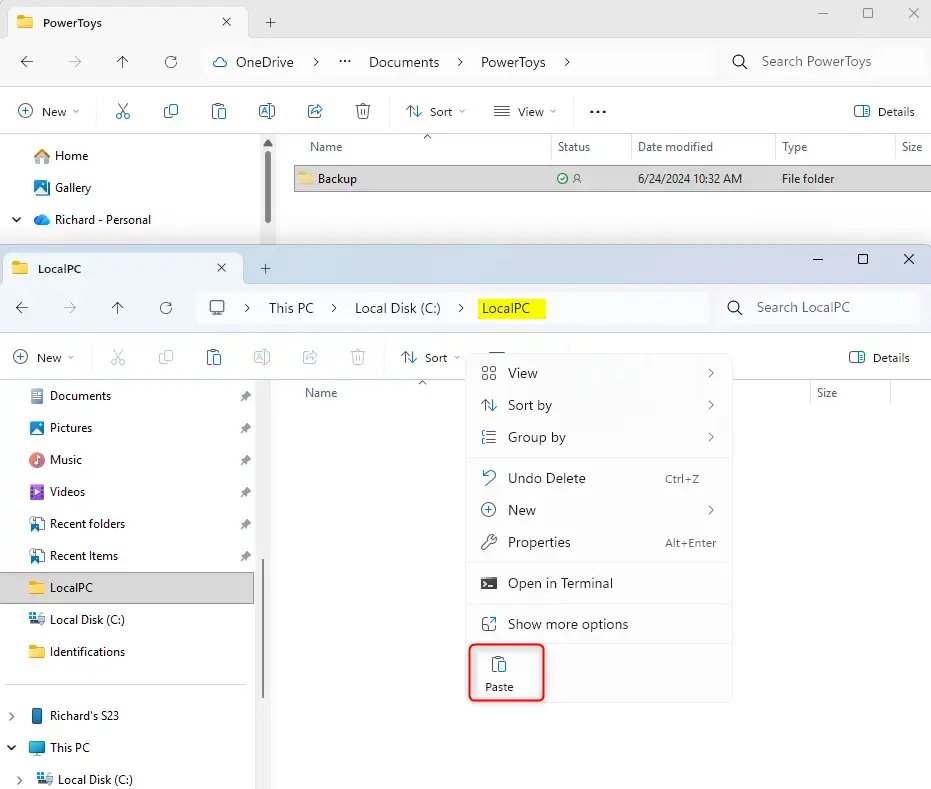
- Drag them to a location outside OneDrive. A folder on your C: drive or another local drive works. You can also open a second File Explorer window and drag between the two.
Dragging the files outside the OneDrive directory keeps your local copies. It also puts them where OneDrive no longer tracks them, so the online cloud copy can be removed.
Pick the destination with care. If you use OneDrive folder backup for Desktop, Documents or Pictures, those folders are synced too, and moving files into them just uploads them again. Choose a folder that isn't synced.
3Let OneDrive Sync
Once the files are outside the folder, OneDrive stops syncing them. The next background sync cycle removes those files from cloud storage automatically. You don't need to change anything in the OneDrive settings or on the website.
You may see a small sync icon on the OneDrive taskbar icon while it works. Wait until it shows that everything is up to date.
4Check if the Files Are Gone
- Wait a few moments for the sync engine to process the change.
- Sign in to OneDrive on the web and open the folder the files came from. They should no longer be listed.
- Check the Recycle bin on the OneDrive website. Files removed from the cloud usually land there first, and they may still count toward your storage until you empty it or they expire.
If you need the files back in OneDrive later, move them from the new location back into your OneDrive folder and they will upload again.
Reference:
https://support.microsoft.com/en-us/onedrive/delete-files-or-folders-in-onedrive
Summary
Moving files out of your computer's OneDrive folder before you delete anything removes them from cloud storage but leaves the copies on your local hard drive. If the cloud copy is still there, check that OneDrive is signed in and not paused, and give it a little longer to sync.
Did this guide fix your problem?

About the Author
Richard
Tech Writer, IT Professional
Richard is a writer at Geek Rewind who turns complex IT tasks into clear, step-by-step guides. He draws on years of hands-on experience in system administration and enterprise IT operations, focusing on Windows, Linux and WordPress: the problems people actually run into, and the fixes that work. His server and WordPress guides come from systems he runs himself. Richard builds and maintains the platform behind Geek Rewind, from its Ubuntu servers and Nginx configuration to its custom WordPress plugins. Many new tutorials start with readers' questions, and he's always glad to answer them in the comments.
No comments yet — be the first to share your thoughts!