How to Change Time Format in Ubuntu: 12h or 24h

The time format in Ubuntu controls how the clock in the top bar shows the time: a 12-hour AM/PM layout or a 24-hour clock. You can switch at any time, and nothing is lost either way. This guide covers three methods: the Settings app , a single terminal command, and Dconf Editor. The steps are written for current Ubuntu releases with the GNOME desktop, such as 22.04 LTS and 24.04 LTS.
Open Settings , go to System Date & Time, and set Time Format to 24-hour or AM/PM; on releases like 22.04, Date & Time sits directly in the sidebar. The top-bar clock changes immediately, with no restart or log-out needed. For a terminal method, run gsettings set org.gnome.desktop.interface clock-format 24h or 12h.
Quick Settings Menu
The Quick Settings menu is the fastest way to reach your clock settings. It sits in the top-right corner of the screen, next to the clock, and groups the network, sound and power icons together.
The menu itself leads you to Settings, where the time format option lives. The next section walks through that route step by step.
Change system time format using the Settings app
The Settings app is the easiest method and works the same on every standard Ubuntu desktop. You open Settings from the system menu in the top-right corner, go to the Date & Time page, and pick the clock style there. No terminal and no extra software are needed.
They do not touch the system time or time zone.
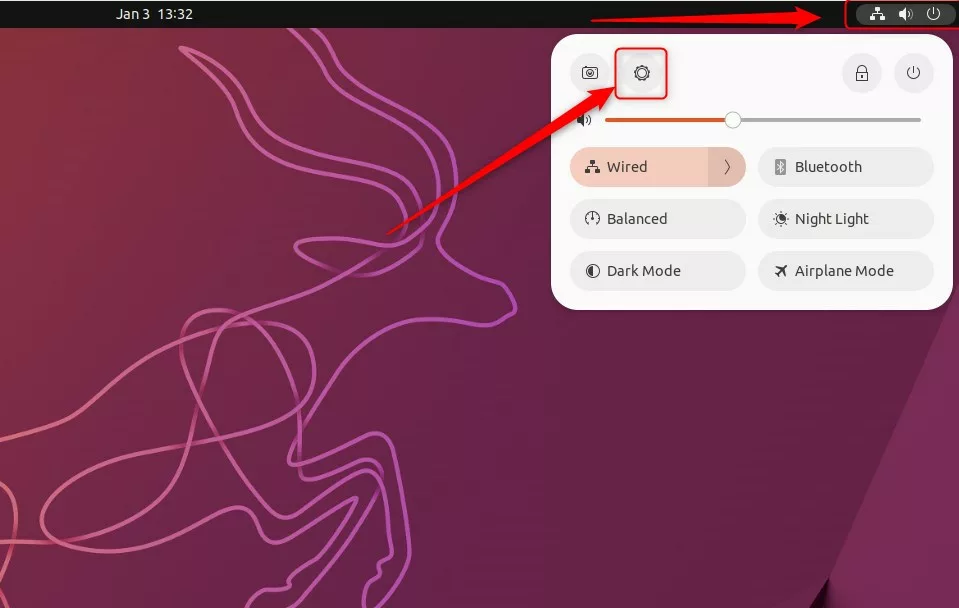
- Click the system menu in the top-right corner of the screen. This is the group of small icons next to the clock.
- Click the gear icon in the menu that opens. The Settings window should appear.
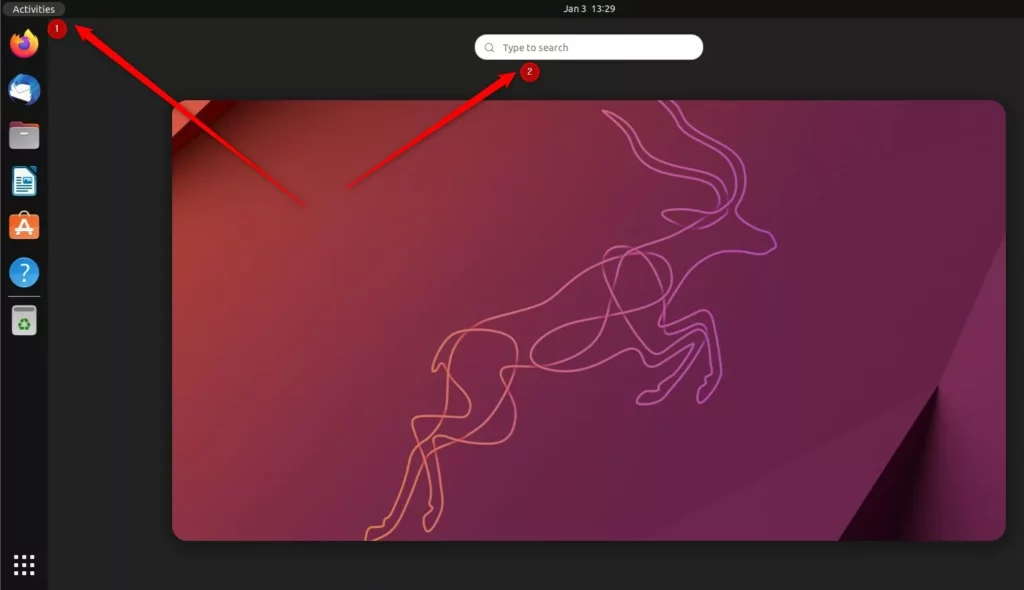
You can also reach the same place another way. Click the Quick Settings menu at the top-right and select the gear icon. Both routes open the same Settings window, so use whichever you find quicker.
- Click the Quick Settings menu at the top-right of the screen.
- Select the gear icon. The Settings window opens with a list of categories in the left sidebar.
- Scroll down the Settings sidebar until you see System, then click it.
- Select Date & Time. The date, time zone and clock options now appear on the right.
On some older releases, such as 22.04, there is no System category. Date & Time is listed directly in the sidebar, so you can click it without opening System first.
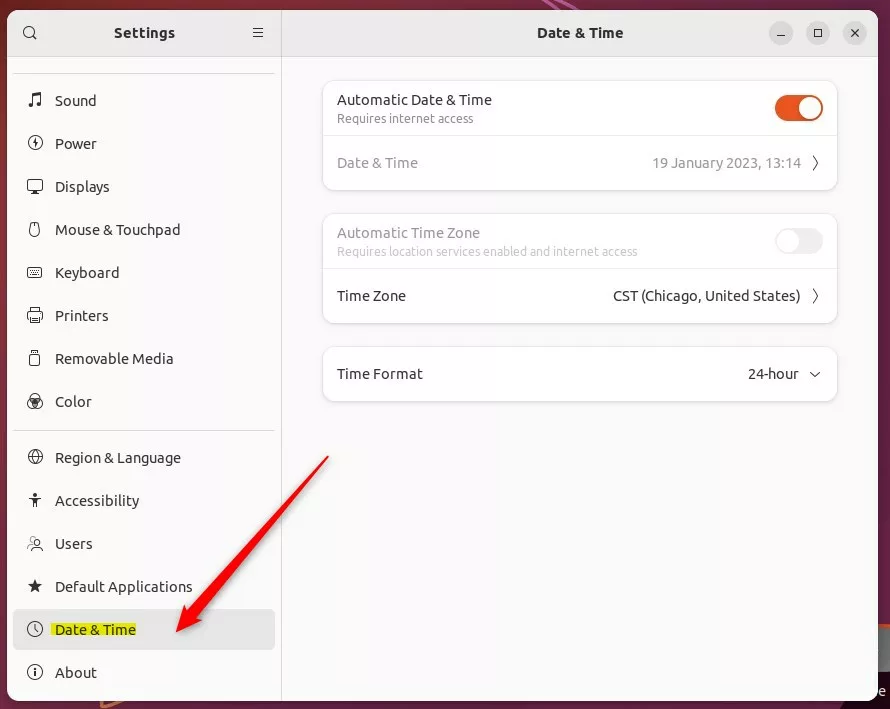
- Look for the Time Format section on the Date & Time page.
- Click the drop-down menu.
- Choose 24-hour for a clock like 17:30, or AM/PM for a clock like 5:30 PM.
If the option looks different on your release, for example as an on/off switch for 24-hour time, it does the same job. Turn it on for 24-hour display and off for AM/PM.
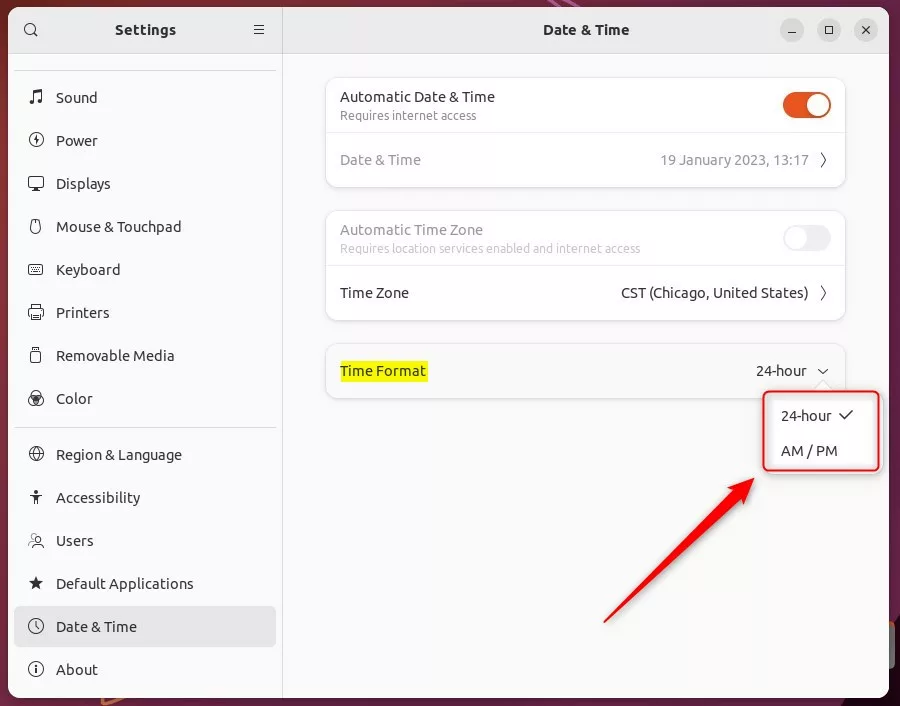
Your choice takes effect instantly. Look at the top bar and you should see the clock change straight away. You don't need to save anything, log out or restart.
To undo the change, return to the same page and pick the other option.
Change system time format using the command terminal console
If you prefer typing to clicking, you can switch formats from the terminal with one gsettings command. This is also handy over SSH-style workflows, in setup scripts, or when you want to apply the same setting on several machines.
Run the command as your normal user. You don't need sudo, and the setting applies only to your account.
- Open the terminal by pressing CTRL + ALT + T. A terminal window should open with a prompt waiting for input.
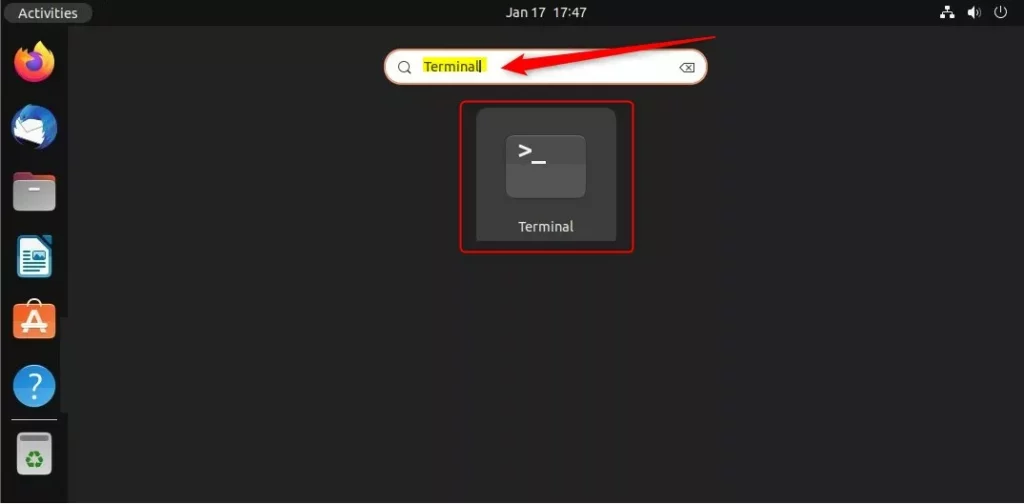
To set your clock to a 12-hour format:
- Type or paste the command below, then press Enter.
- Check the top bar. The clock should now show AM or PM. The command prints nothing when it works, so a blank line is normal.
gsettings set org.gnome.desktop.interface clock-format 12h
To switch back to a 24-hour format:
- Type or paste the command below, then press Enter.
- Check the top bar. The clock should now show a 24-hour time such as 17:30.
gsettings set org.gnome.desktop.interface clock-format 24h
The change is immediate and needs no restart. Each command undoes the other, so you can swap back at any time.
Change system time format using the Dconf Editor
Dconf Editor is a graphical tool for GNOME's low-level configuration database. It exposes far more options than the Settings app. Use it if you want to see the raw setting behind the clock, or if you are already adjusting other hidden options.
It isn't installed by default, so you need to add it first. After that, you browse to one specific setting and change its value.
Dconf Editor is an advanced tool that lets you change core system settings. Incorrect changes can harm system stability.
Only change the one setting described below. If you are unsure about a value, leave it alone.
You must install this tool first. Learn how to install software here: How to add or remove software on Ubuntu Linux.
When the install finishes, open Dconf Editor from your applications menu. On first launch it may show a warning screen. Read it, then confirm that you want to continue.
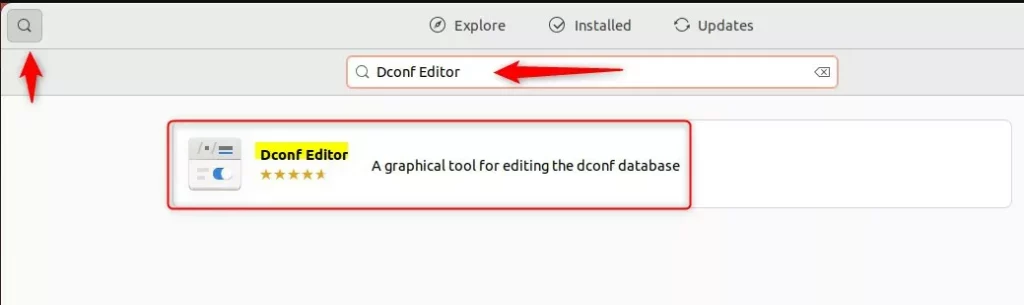
- After launching Dconf Editor, go to the path below. Click through each folder in turn, or use the search function in the editor.
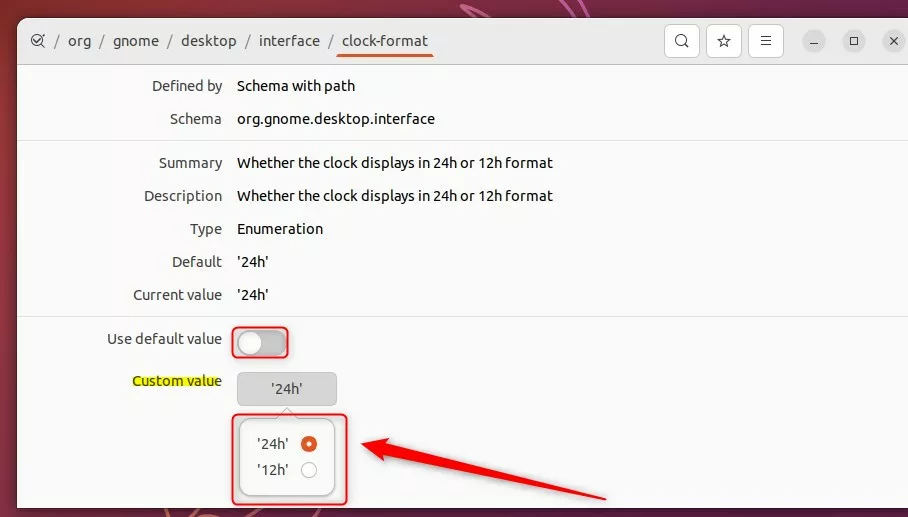
- Open clock-format once you reach the interface folder. The setting's details page should open.
org > gnome > desktop > interface > clock-format
- Turn the Use default value switch off. The Custom value box becomes editable.
- Enter '12h' or '24h' into the Custom value box, then apply the change. Use '12h' for AM/PM and '24h' for the 24-hour clock.
- Look at the top bar. The clock should update straight away, with no restart.
To undo the change, turn Use default value back on. The setting returns to Ubuntu's default.
Conclusion
You've learned how to toggle your time display using the Settings app, the terminal, or the Dconf Editor. For most people the Settings app is enough. Use the terminal command when you want a quick, repeatable change, and keep Dconf Editor for when you need to look at the underlying setting. Whichever you pick, the change is instant and easy to reverse.
Have a question about this guide?
Answered by AI from this guide. Good questions may be added to this page — please don't include personal details.
Did this guide fix your problem?

About the Author
Richard
Tech Writer, IT Professional
Richard is a writer at Geek Rewind who turns complex IT tasks into clear, step-by-step guides. He draws on years of hands-on experience in system administration and enterprise IT operations, focusing on Windows, Linux and WordPress: the problems people actually run into, and the fixes that work. His server and WordPress guides come from systems he runs himself. Richard builds and maintains the platform behind Geek Rewind, from its Ubuntu servers and Nginx configuration to its custom WordPress plugins. Many new tutorials start with readers' questions, and he's always glad to answer them in the comments.
[…] Linux default displays the system time in a 24-hour or military time format. Therefore, the only information on the Top menu bar is the clock. If you want, you can also add […]