How to Add Weather Info to Ubuntu Top Menu Bar

Weather info on the Ubuntu top menu bar puts the current temperature right next to your clock, so you do not need to open a browser tab to check the forecast. This setup uses a GNOME Shell extension, a small add-on that brings extra features to your desktop.
Ubuntu running GNOME 40 or newer supports community extensions. You can install them through your web browser or through the Extension Manager app, and this guide uses Extension Manager. A weather add-on places a small temperature readout and a sky icon on your main panel. Clicking it opens a full forecast window. The whole job takes about ten minutes: install the weather package, set your location, install the extension, and check the result.
Install the Weather O’Clock extension on Ubuntu by opening Extension Manager, searching for Weather O’Clock on the Browse tab, and clicking Install. First run sudo apt install gnome-weather in a terminal (Ctrl+Alt+T) and set your city in the Weather app. The temperature then appears on the top bar, with no restart needed.
Install Gnome Weather package
The Gnome Weather package provides the core weather data that the top bar extension relies on. Install it with either method below.
- Press Ctrl+Alt+T to open a terminal window.
- Type sudo apt install gnome-weather and press Enter.
- Enter your password when asked. Nothing shows while you type, which is normal. Confirm with Y if apt asks, then wait for the prompt to return.
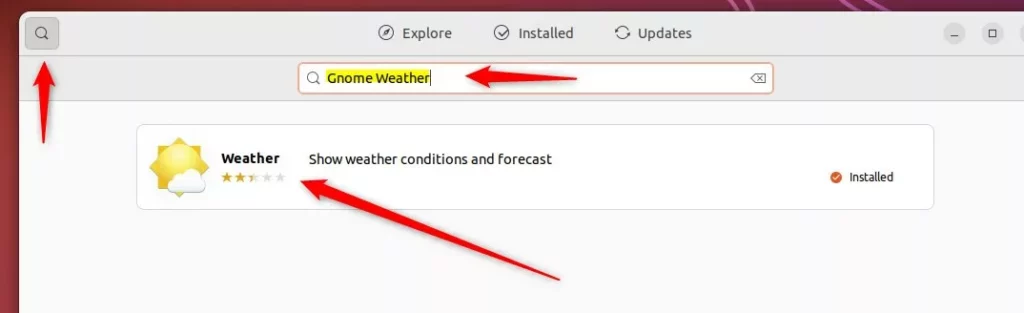
It is called Ubuntu Software on 22.04 and App Center on 24.04 and newer. Search for Weather and click Install. No restart is needed. To undo the install later, remove the package from the same store or with apt.
Having both on one system can cause conflicts, such as two copies showing up or the wrong one launching. Pick the command below that matches how your copy was installed, and use only that one:
- For the Deb version:
sudo apt install gnome-weather - For the Snap version:
sudo snap install gnome-weather
The extension can only show data for a place you have chosen, so set your location before moving on.
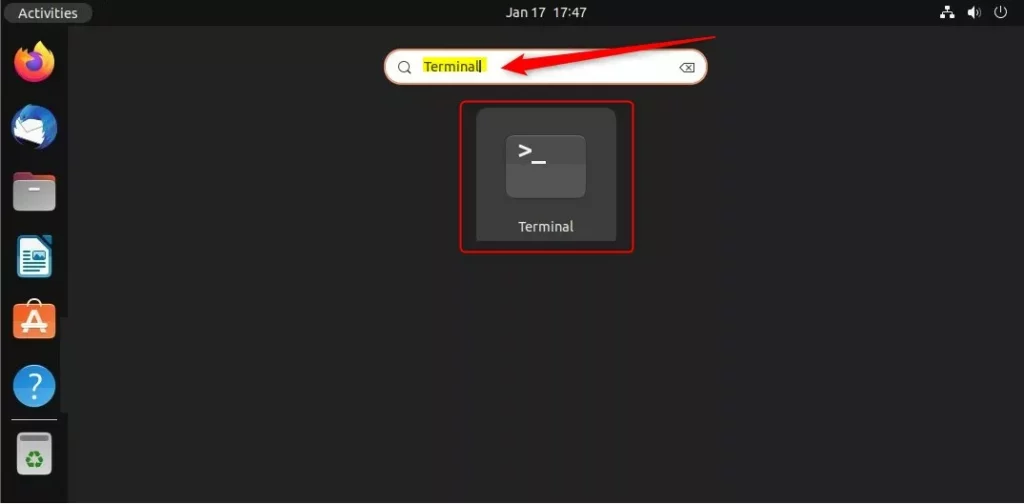
- Open the Weather Indicator app from the Activities overview or the app grid.
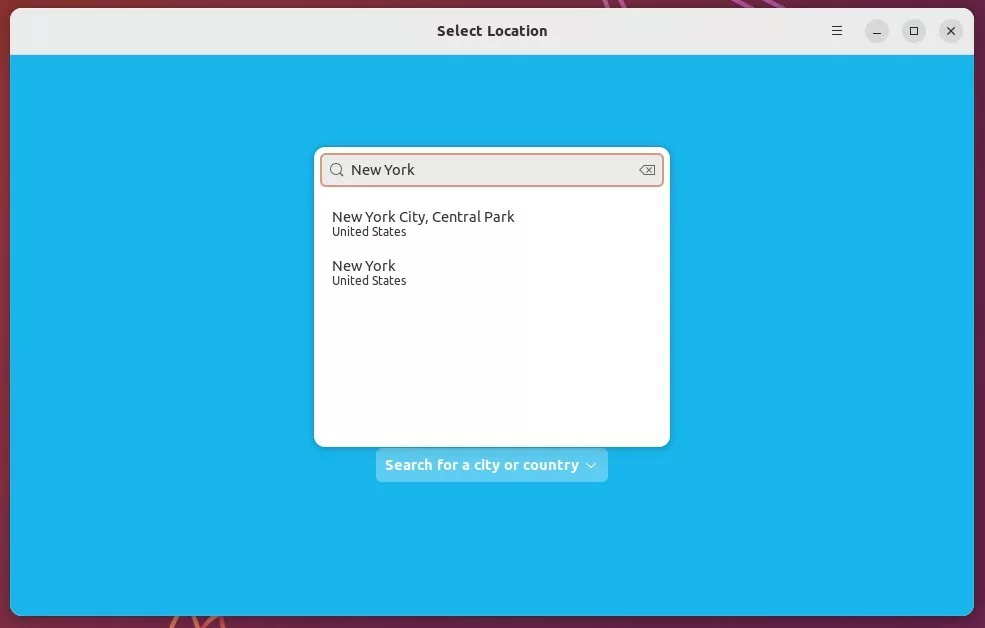
- Search for your city and pick the right match from the results list. Check the region or country if several cities share a name.
- Select it to lock in your location. The app should now show the current conditions for that city.
Setting this location ensures the weather data displayed matches your area accurately. If the numbers look wrong later, come back here first and check that the right city is selected.
Install Weather O'Clock Extension
The Weather O'Clock extension adds the actual weather display to your Ubuntu top bar by connecting your system to a weather source. The short version is to open Extension Manager, search for Weather O'Clock, and turn it on. The steps below cover each part in more detail.
Extension Manager is a separate app from the extension itself, and it is not always installed by default. The next section covers getting it if you do not have it yet.
Search for "Extension Manager" in your App Center to make management easier. On Ubuntu 22.04 the store is called Ubuntu Software, so search there instead. Click Install and wait for the download to finish. With this app you can install, switch on, switch off and remove extensions without a browser.
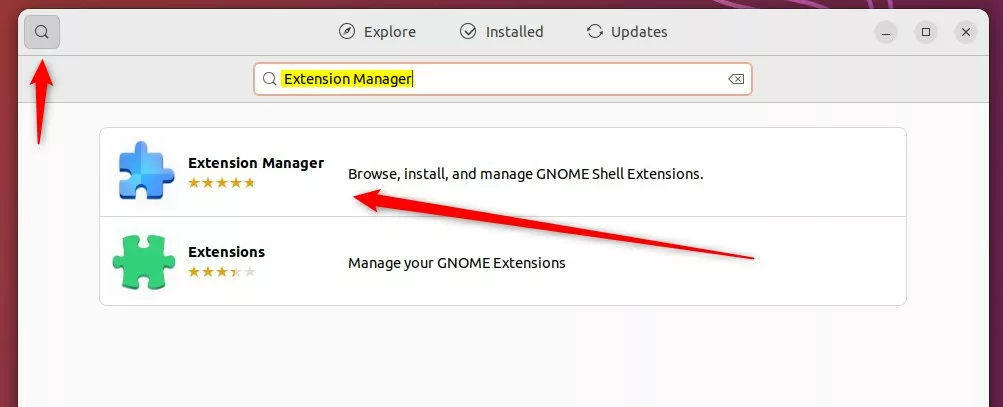
Once the download finishes, open Extension Manager and install the extension.
- Open Extension Manager from the Activities overview.
- Click the Browse tab.
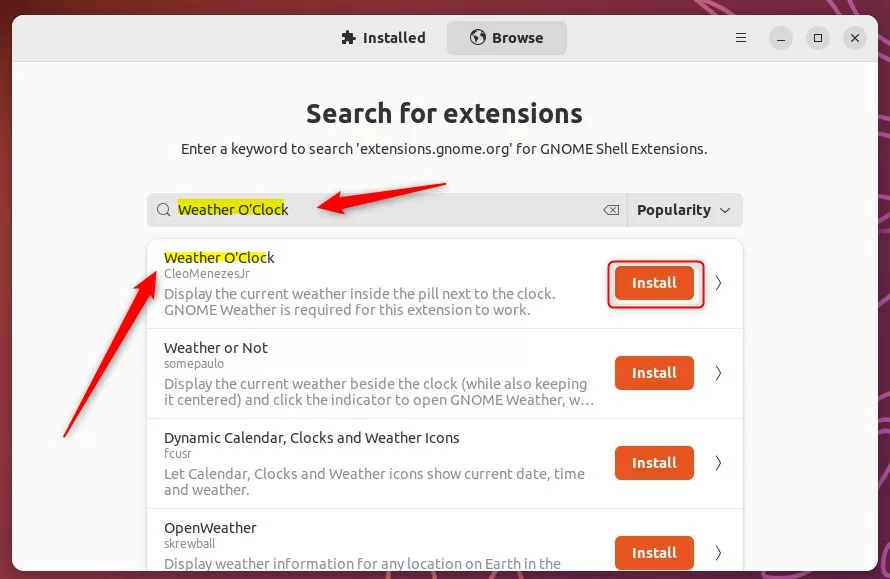
- Click the search box and type 'Weather O'Clock'. The extension should appear in the results.
- Select it and choose a version compatible with your GNOME Shell. You can check your GNOME version in Settings About If the extension lists no version for your release, it is not supported there yet.
- Click Install and confirm any permission prompt that appears.
If Browse shows nothing, check that you are online. If you have no internet connection, the store listing cannot load.
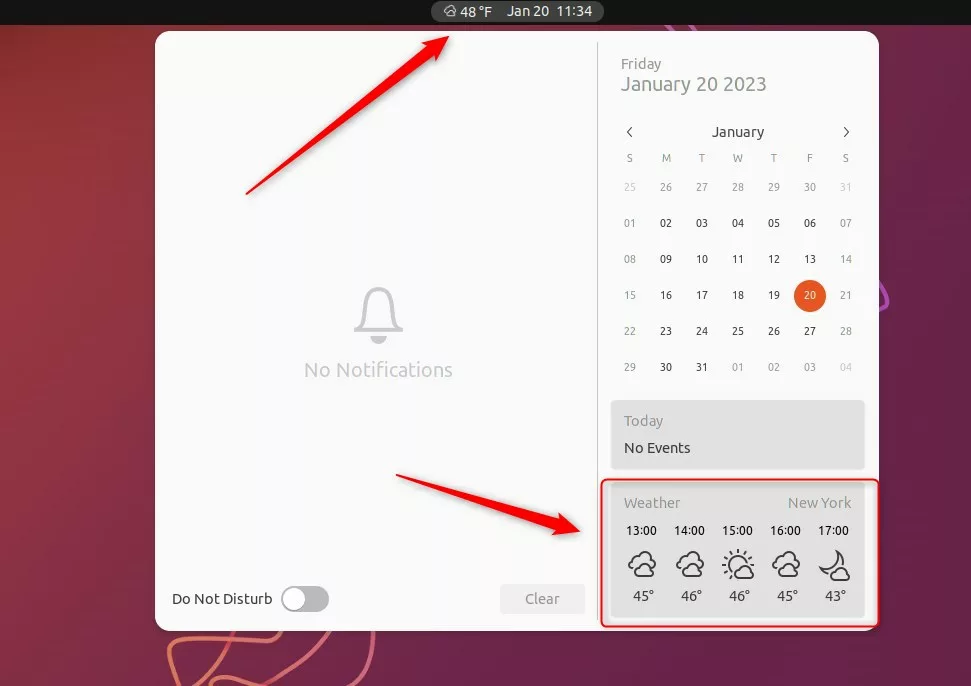
Weather data should appear on the top bar once the installation finishes, usually next to the clock. The first reading can take a few seconds to load. Click it to open the forecast window and confirm it shows your city.
If nothing appears, open the Installed tab in Extension Manager and make sure the Weather O'Clock switch is on. On some systems you need to log out and back in before a new extension loads. To remove the weather readout later, switch the extension off in the same tab, or uninstall it there.
Conclusion
Weather information now sits on the Ubuntu top bar, providing quick updates without requiring extra apps. If you ever want to change the city, update it in the weather app and the top bar should follow. You can turn the extension off at any time from Extension Manager.
Have a question about this guide?
Answered by AI from this guide. Good questions may be added to this page — please don't include personal details.
Did this guide fix your problem?

About the Author
Richard
Tech Writer, IT Professional
Richard is a writer at Geek Rewind who turns complex IT tasks into clear, step-by-step guides. He draws on years of hands-on experience in system administration and enterprise IT operations, focusing on Windows, Linux and WordPress: the problems people actually run into, and the fixes that work. His server and WordPress guides come from systems he runs himself. Richard builds and maintains the platform behind Geek Rewind, from its Ubuntu servers and Nginx configuration to its custom WordPress plugins. Many new tutorials start with readers' questions, and he's always glad to answer them in the comments.
[…] can also choose to display the current weather forecast of their city on the top menu bar. The system clock and weather information will be displayed and readily […]