How to Change Time Format in Windows 11
Changing the time format in Windows 11 adjusts how your clock displays the hour and minutes.
This setting lets you choose between a 12-hour clock, like 10:30 AM, or a 24-hour clock, such as 22:30.
You can personalize your clock’s appearance on the taskbar and other areas by following a few simple steps within Windows 11’s settings.
Open Settings, navigate to Time & language, then Language & region. Expand Regional format and click Change formats. Select your preferred time format from the dropdown menus for Short time and Long time.
Why Change Your Time Format?
Windows lets you pick how you want to see the time. You might prefer a 12-hour format (with AM/PM) or a 24-hour format. You can also customize it to show the time exactly as you wish.
What Happens When You Change It?
Once you change your time format, Windows updates how the time appears everywhere on your computer. The clock on your taskbar will reflect your new format immediately.
Where Windows Stores This Information
Windows 11 stores your time format settings in a special location known as the registry, which is a database for configuration settings. You can find these settings under HKEY_CURRENT_USER\Control Panel\International. Look for the values named sShortTime and sTimeFormat; these instruct Windows on how to display the time.
HKEY_CURRENT_USER\Control Panel\International
The specific settings are stored in these values:
sShortTimesTimeFormat
Option 1Change Time Format in Settings
- Open Settings by pressing
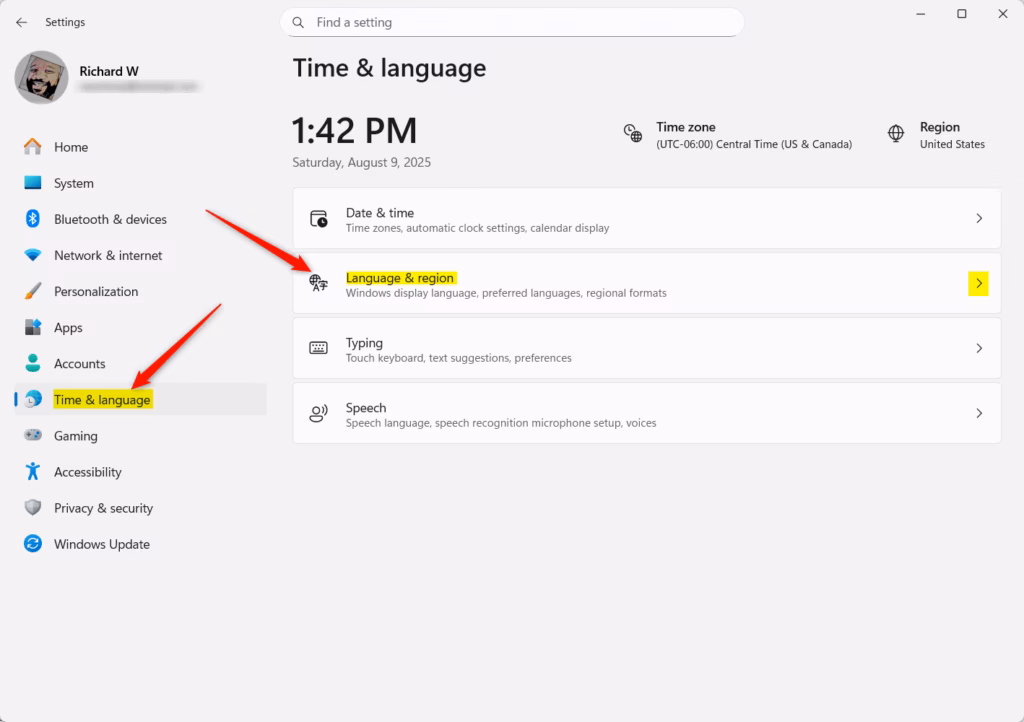
Win+Ion your keyboard. - Click on Time & language on the left side.
- Click on Language & region on the right side.
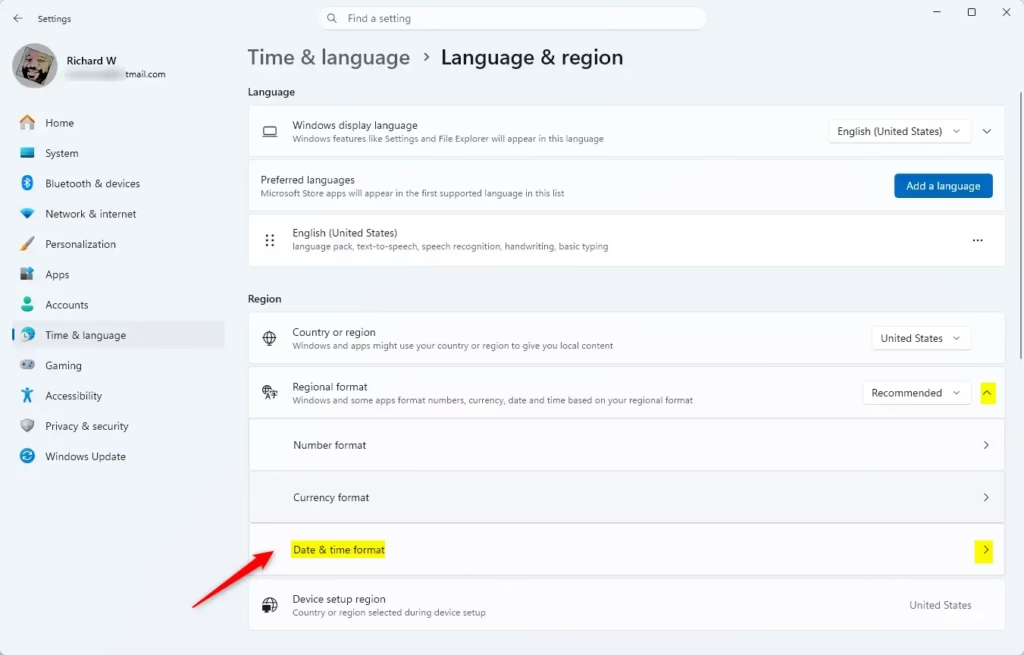
- Look for Regional format and click it to expand the options.
- Click on Date & time format (or Change formats on older Windows 11 versions).
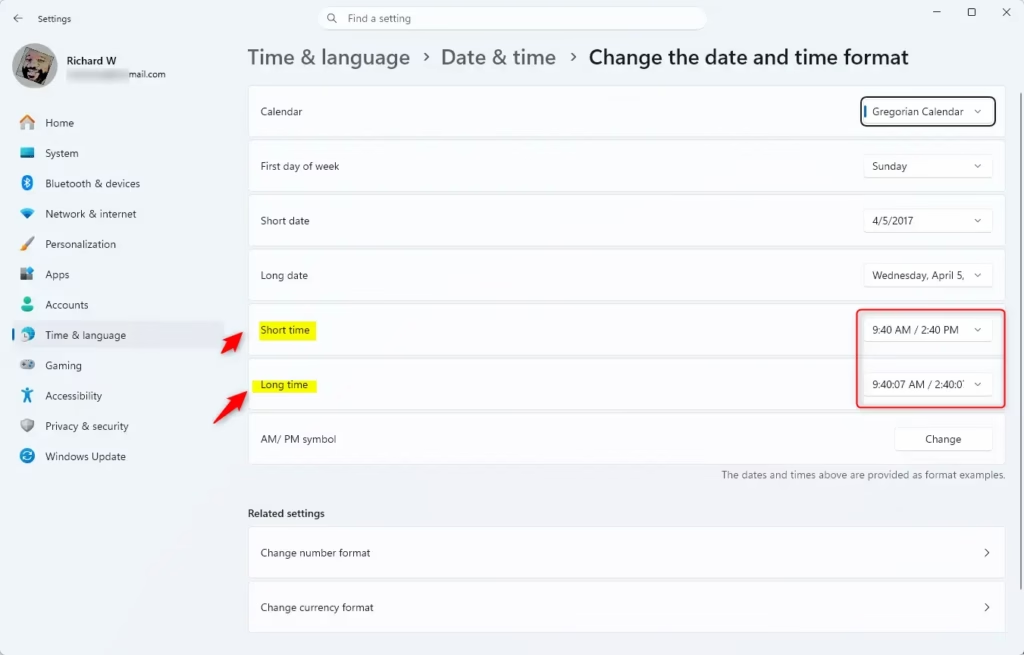
- In the dropdown menus, select the time format you want for Short time and Long time.
- Close Settings when you’re done.
Changing the Windows 11 time format through the Settings app is quite convenient. Open Settings, navigate to Time & language, then select Language & region. Once there, locate the Regional format options and pick your preferred short and long time formats from the dropdown menus.
Option 2Change Time Format in Region Control Panel
- Admin privileges required. Open the Control Panel and switch to icons view.
- Click on the Region icon.
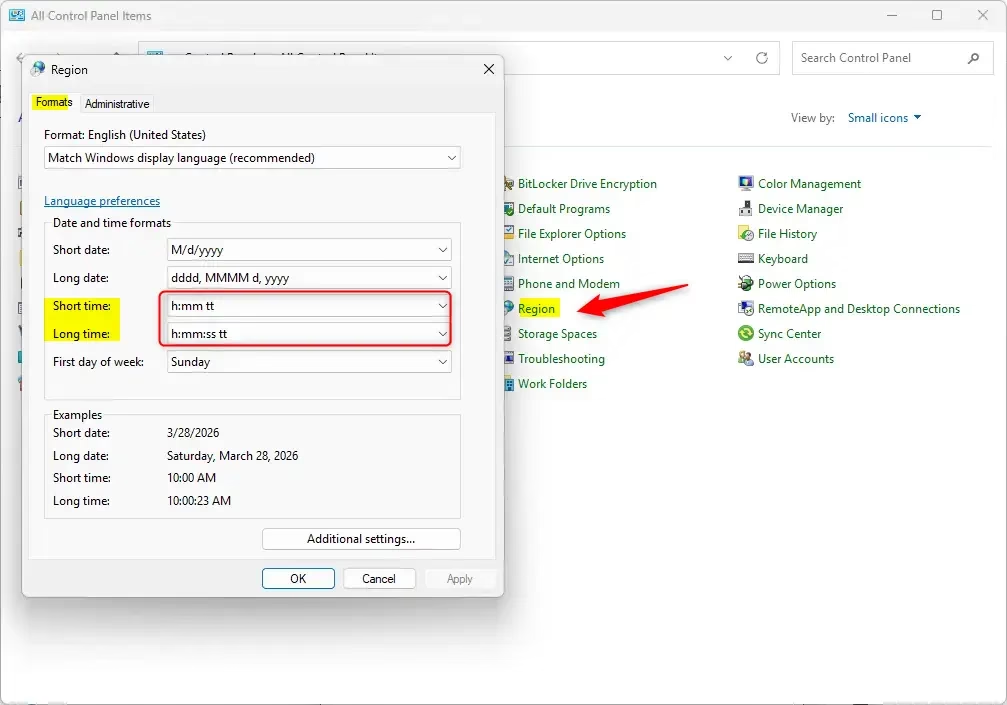
- Go to the Formats tab.
- Use the dropdown menus to select your preferred format for Short time and Long time.
- Click OK to save your changes.
Option 3Change Time Format with Custom Settings
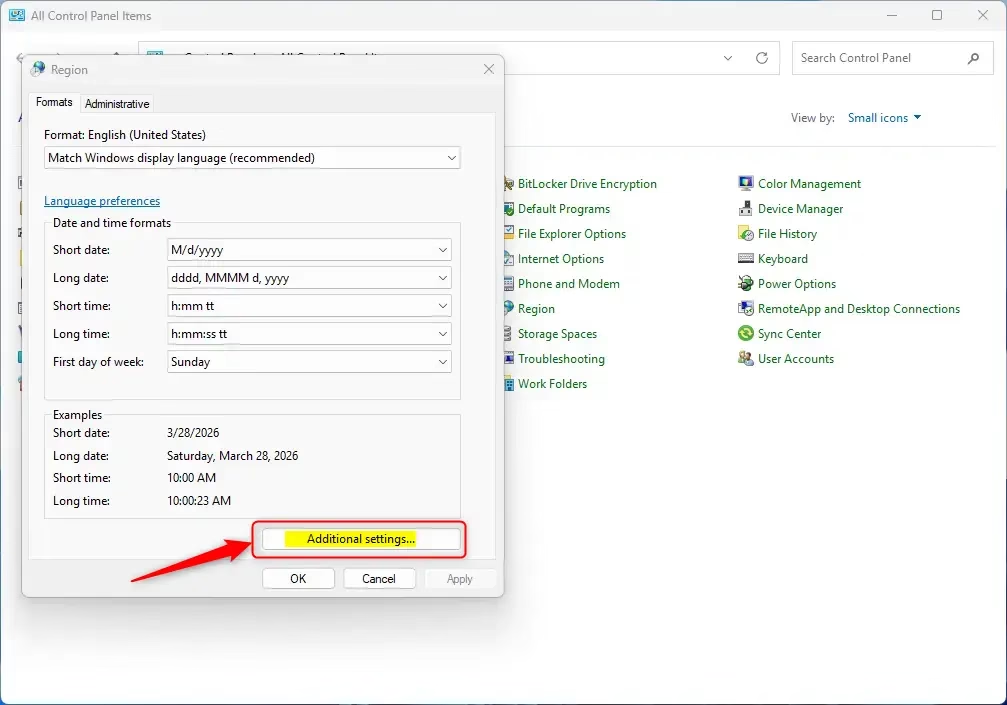
For more control over your Windows 11 time format, you can use custom settings via the Control Panel, though you’ll need administrator rights. Open the Control Panel, switch to icon view, and click the Region icon. On the Formats tab, choose ‘Additional settings’ to fine-tune how your time displays.- Admin privileges required. Open the Control Panel and switch to icons view.
- Click on the Region icon.
- Go to the Formats tab.
- Click on Additional settings.
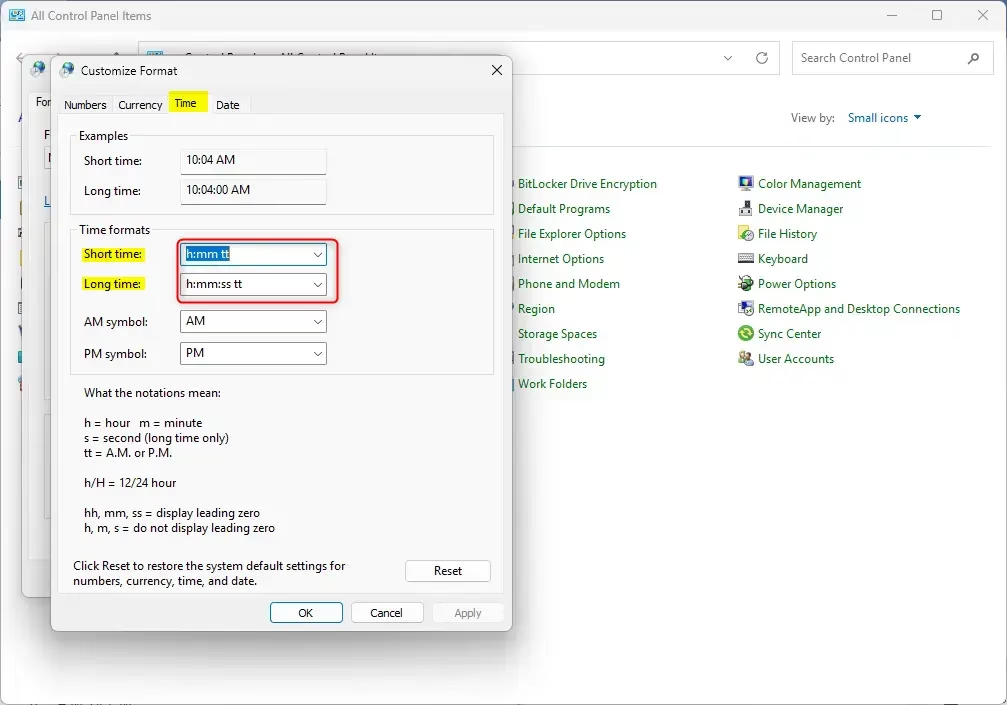
- Click on the Time tab.
- In the dropdown menus, select a format for Short time and Long time. You can also type a custom format in the text boxes if you want something different.
- Click OK.
- Click OK again to close the Region window.
Summary
Adjusting your Windows 11 time format offers clear options within both Settings and the Control Panel.
Was this guide helpful?

About the Author
Richard
Tech Writer, IT Professional
Richard, a writer for Geek Rewind, is a tech enthusiast who loves breaking down complex IT topics into simple, easy-to-understand ideas. With years of hands-on experience in system administration and enterprise IT operations, he’s developed a knack for offering practical tips and solutions. Richard aims to make technology more accessible and actionable. He's deeply committed to the Geek Rewind community, always ready to answer questions and engage in discussions.


No comments yet — be the first to share your thoughts!