How to Change Screen Tint Color and Strength in Windows 11

Screen tint in Windows 11 puts a colored filter over your monitor to soften harsh blue light and reduce eye strain during long sessions. Warm yellow and orange shades are the usual picks for daily work because they make text easier to read.
You can choose almost any color and use a strength slider to make the filter heavier or lighter. The setting sits in the Accessibility section of the Windows 11 Settings app .
The feature is hidden by default. Until you enable it (covered below), you won’t see it in Settings. It may also behave differently or be missing on some Windows 11 builds, so check your build if the page never appears.
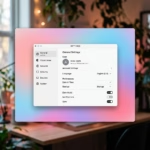
Open Settings by pressing Win+I, click Accessibility, then select Screen tint and choose a preset color or Custom tint to pick your own shade. Drag the Strength slider to adjust how dark the filter appears. The tint applies immediately to your entire display.
Why Use Screen Tint?
Long hours in front of a bright screen cause fatigue, dry eyes and headaches. Screen tint helps by softening panel glare, so the display feels less harsh, especially in a dim room or late in the day.
What happens when you enable Screen Tint?
When it is on, Screen tint lays a transparent color overlay across the whole display. The layer warms up everything you see, but it doesn’t hide or change what is on screen. Windows, text and images stay readable. They just look a little warmer or tinted.
If you do color-sensitive work such as photo editing or design, turn the tint off first.
Screen Tint vs. Night Light: What is the Difference?
Windows 11 has two tools for eye comfort, and they work differently:
- Screen tint applies a single color layer of your choice across the display. You control both the color and the strength.
- Night light warms up colors to reduce blue light, mainly in the evening. You'll find it under Settings System Display
You can try both and keep whichever suits you. Night light is better if you want an automatic evening schedule. Screen tint is better if you want a specific color all day.
How to Enable Screen Tint in 🪟 Windows 11
Screen tint is a hidden feature, so it isn't active on a normal install. To make the options appear, you run one command in Windows Terminal with administrator privileges, then restart.
If you are on a work PC without admin rights, you will need an administrator to do it.
- Open the Start menu and type Terminal.
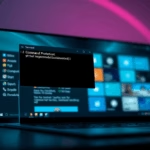
- Right-click Terminal in the results and select Run as administrator. Approve the User Account Control prompt if it appears. A Terminal window opens with administrator rights.
- Copy and paste the following command, then press Enter:
vivetool.exe /enable /id:60662124 - Wait for the command to finish and check the output for any error message. Then restart your computer to apply the change.
If the Screen tint page is still missing after the restart, the feature may not be available on your Windows 11 build. Make sure Windows is fully updated and try again.
Change Screen Tint Color in Settings
Once the feature is on, you can pick a preset shade or set your own color, and adjust the strength slider to match. All of it is in the Settings app.
- Open Settings by pressing Win+I.
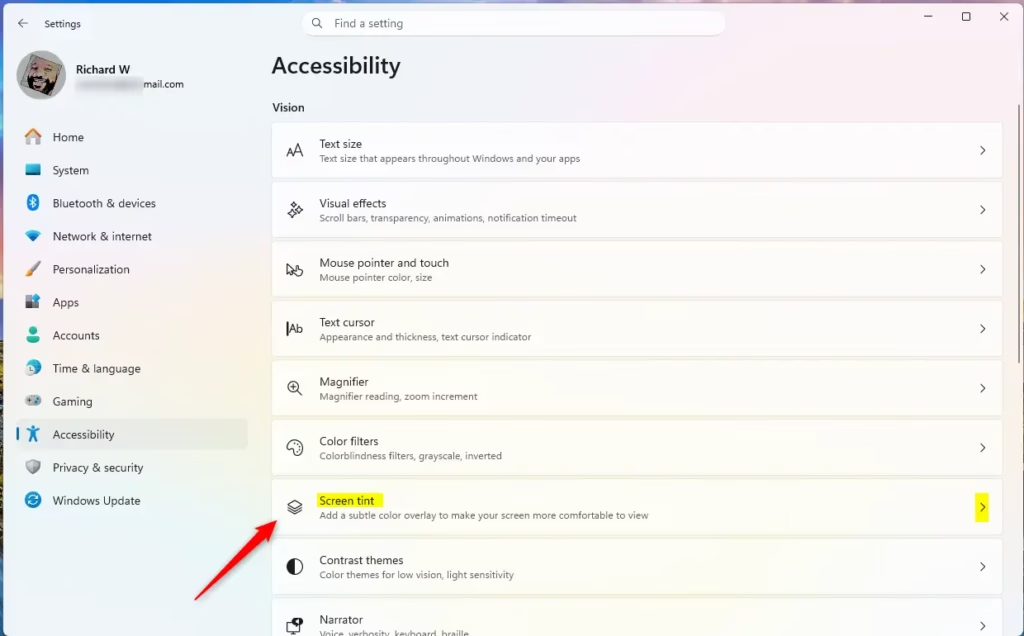
- Click Accessibility on the left, then select Screen tint on the right. Open Screen tint settings. The Screen tint page opens with the color and strength controls.
- Choose a preset color, or select Custom tint to pick a specific shade. The tint shows on your screen right away.
- Drag the Strength slider to control how dark or light the tint appears. Move it a little at a time. A subtle setting is usually easier to live with than a heavy one.
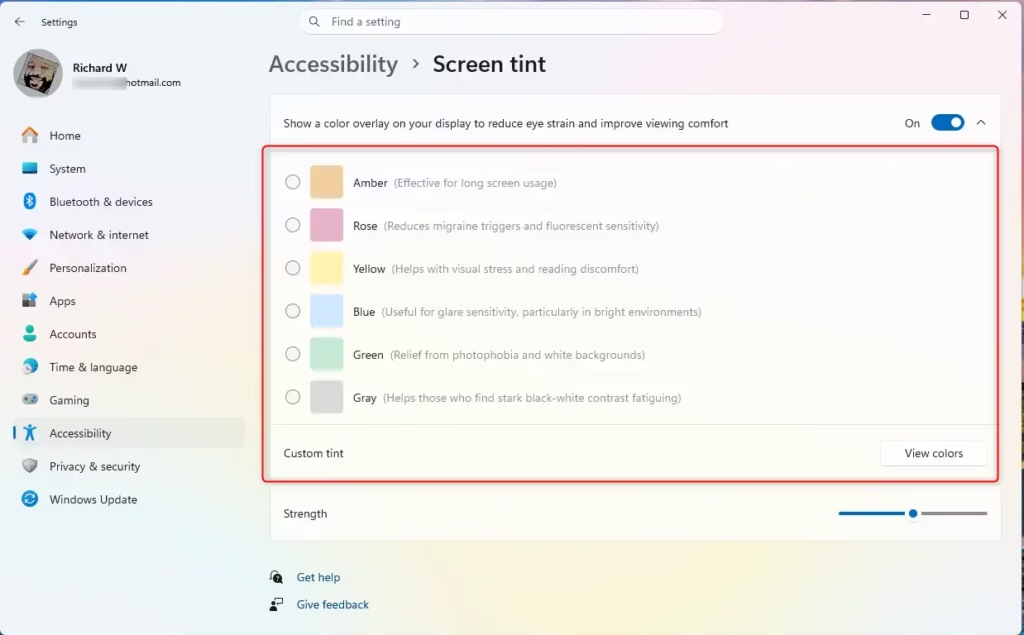
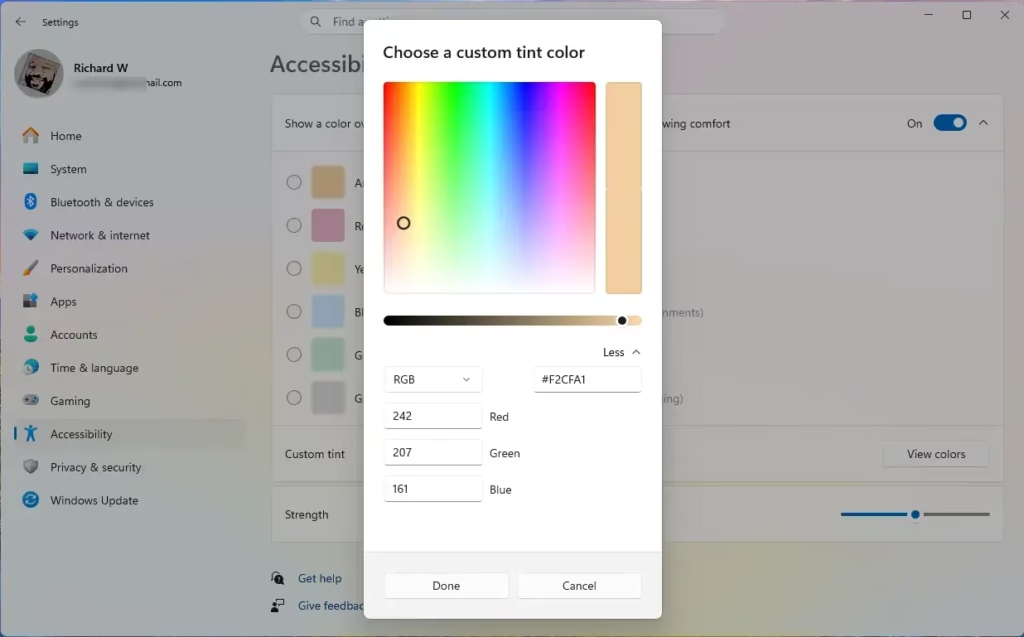
- To create a custom color, click View colors. A color picker opens.
- Pick a shade by hand, or enter specific RGB or HSV codes if you need precise calibration.
If you are not sure where to start, try a warm yellow or orange at low strength and raise it until the screen feels comfortable.
Troubleshooting and Resetting Settings
If your display looks wrong, for example too dark, too orange, or with odd-looking colors, you can fix it without undoing anything else.
- Open Settings Accessibility Screen tint
- Switch the Screen tint toggle off to remove the overlay completely. The screen returns to normal colors.
- Or keep it on and lower the Strength slider, or choose a different color, until the display looks right.
Turning the tint off in Settings doesn't remove the feature, so you can switch it back on later. Only the change you made with the command in the earlier section made the page visible.
Pro Tip: Quick Toggles
Screen tint has no dedicated keyboard shortcut yet. The quickest route is Win+I to open Settings, then Accessibility, then Screen tint.
To speed things up further, you can pin the Accessibility settings page to the Taskbar. Open the Screen tint page, then right-click the Settings icon on the taskbar to reach the pinning option.
Summary
Screen tint reduces eye strain by adding a customizable color overlay to the display. Because it is hidden, you first enable it from an elevated Terminal and restart. After that, you can set the color and strength in Settings Accessibility Screen tint. Switch it off or adjust it whenever the colors don't look right.
Does screen tinting affect performance in games?
Generally, no. Screen Tint is a lightweight overlay handled by the Windows display manager. It does not significantly impact your graphics card or CPU (central processing unit) performance. Gaming sessions continue without noticeable frame rate drops or stuttering while the tint remains enabled.
Can I create custom tint colors in 🪟 Windows 11?
Yes. Selecting the Custom tint option within the Screen Tint settings opens a color picker for any preferred hue. Specific RGB or HSV color codes also work for precise personalization and accessibility needs.
Is Screen Tint available on all versions of 🪟 Windows 11?
Currently, Screen Tint remains an experimental feature found inside specific Windows 11 Insider Preview builds. Standard public releases of Windows 11 do not include it yet. Microsoft may roll the feature out in a future public update, but testing builds remain the sole home for now.
How can I change the screen color in 🪟 Windows 11?
Open Settings, go to Accessibility Display, then select Screen Tint. Toggle it on and pick your color from the dropdown menu. Use the strength slider to adjust how heavy the tint appears. You can also use Night Light for automatic blue light reduction in the evenings.
How do I enable HDR settings in 🪟 Windows 11?
Open Settings and go to System Display. Scroll down to find HDR and Windows HD Color. Toggle HDR on if your monitor supports it. You'll see an option to choose your HDR format. Not all displays support HDR, so this setting may not appear on older monitors.
How to change 🪟 Windows 11 highlight color?
Open Settings and go to Personalization Colors Under Accent color, choose your preferred color or pick a custom one. Toggle on "Show accent color on title bars and window borders" to apply it to window frames. The highlight color affects buttons, links, and selection backgrounds throughout Windows.
How to change window screen color?
Open Settings and go to Personalization Colors. Select your accent color, which changes window title bars and borders. For more control over individual window elements, go to Accessibility Display to adjust Screen Tint or use Night Light for a warmer overall appearance.
Was this guide helpful?

About the Author
Richard
Tech Writer, IT Professional
Richard is a writer at Geek Rewind who turns complex IT tasks into clear, step-by-step guides. He draws on years of hands-on experience in system administration and enterprise IT operations, focusing on Windows, Linux and WordPress: the problems people actually run into, and the fixes that work. His server and WordPress guides come from systems he runs himself. Richard builds and maintains the platform behind Geek Rewind, from its Ubuntu servers and Nginx configuration to its custom WordPress plugins. Many new tutorials start with readers' questions, and he's always glad to answer them in the comments.


No comments yet — be the first to share your thoughts!