How to Adjust Projecting Settings in Windows 11

Adjusting projecting settings in Windows 11 lets you control how other devices connect wirelessly to your PC.
This feature, often called “Projecting to this PC,” allows you to mirror your phone, tablet, or another computer’s screen onto your Windows 11 computer.
You can manage these settings to decide when you want to allow these connections. For example, you can choose to be asked every time someone tries to project to your PC.
This is useful for sharing presentations, watching videos from your phone, or even using your PC’s keyboard and mouse to control another device.
Open Settings, then go to System and click Projecting to this PC. Use the “Ask to project to this PC” dropdown to select “First time only” or “Every time a connection is requested”.
How to change when to ask to project to this PC in 🪟 Windows 11
When someone tries to project to your Windows PC, you’ll see a notification asking for permission. These projection settings are controlled within Windows itself.
Here’s how to adjust them in Windows 11.
Windows 11 has a centralized location for the majority of its settings. Everything can be done, from system configurations to creating new users and updating Windows from its System Settings pane.
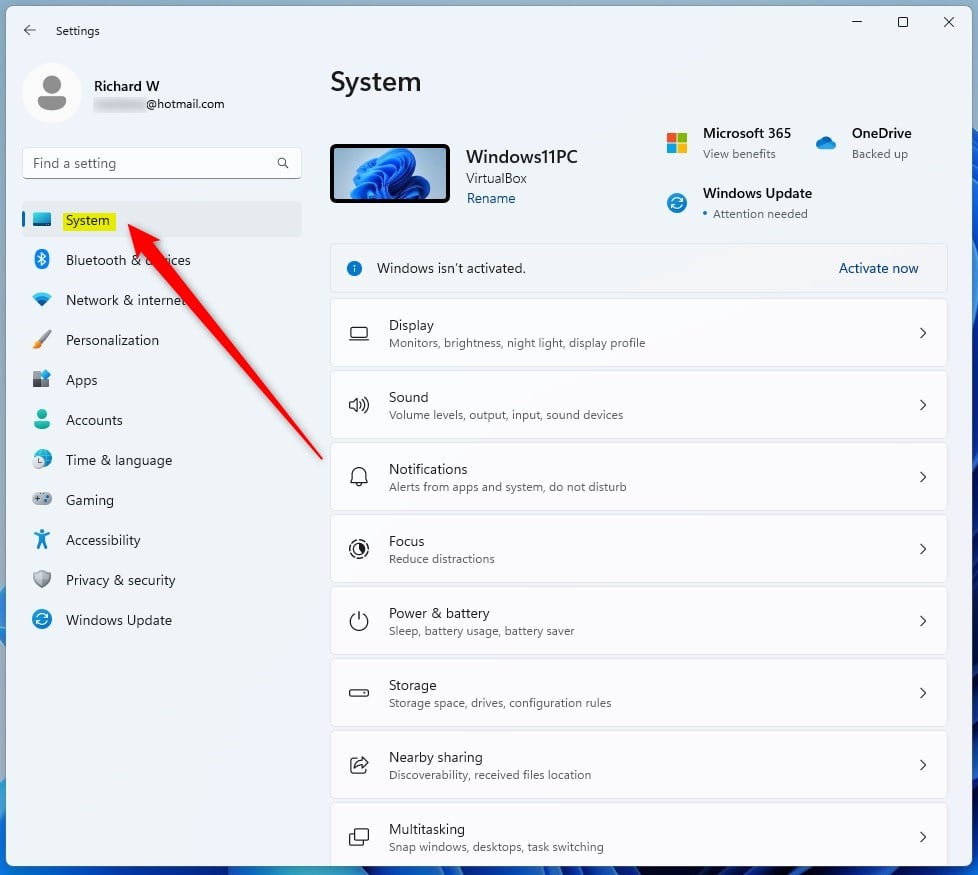
To get to System Settings, you can use the Windows key + I shortcut or click on Start ==> Settings, as shown in the image below:

Alternatively, you can use the search box on the taskbar to search for Settings. Then select to open it.
Once open, your Windows Settings pane should look similar to the image below. In the Windows Settings app, click System on the left.
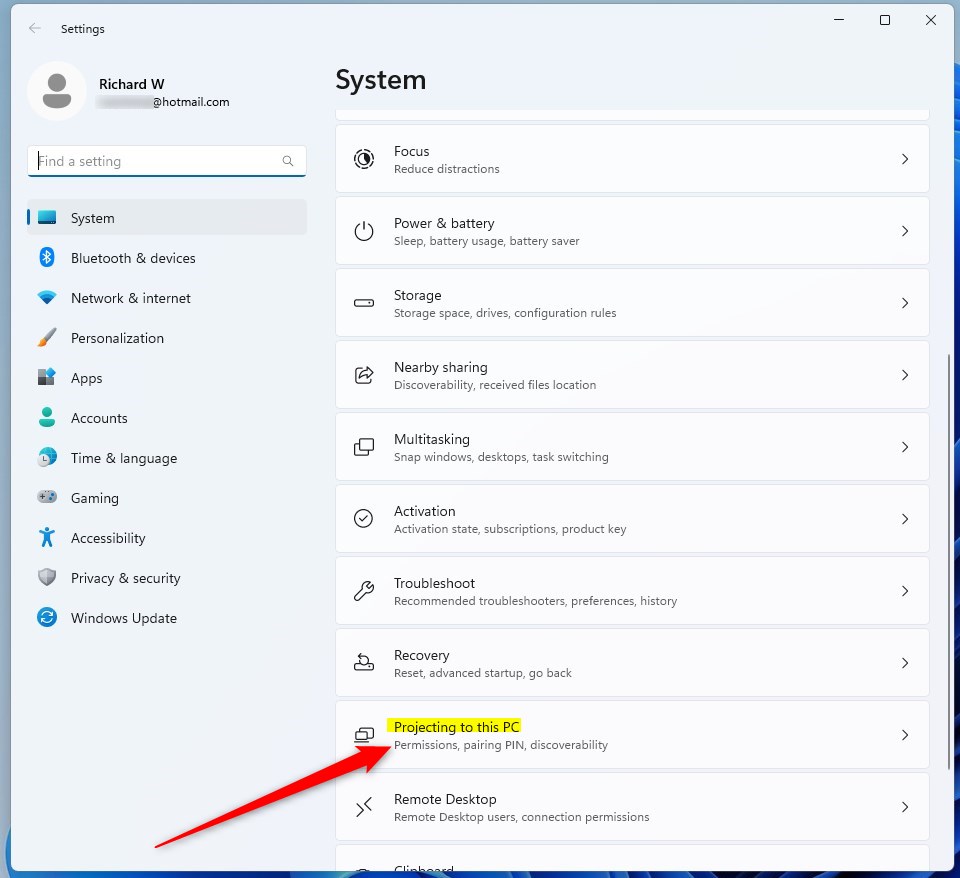
On the right, select Projecting to expand this PC tile.
On the System -> Projecting to this PC settings panel, under “Ask to project to this PC“, choose the option from the dropdown list.
- First time only
- Every time a connection is requested
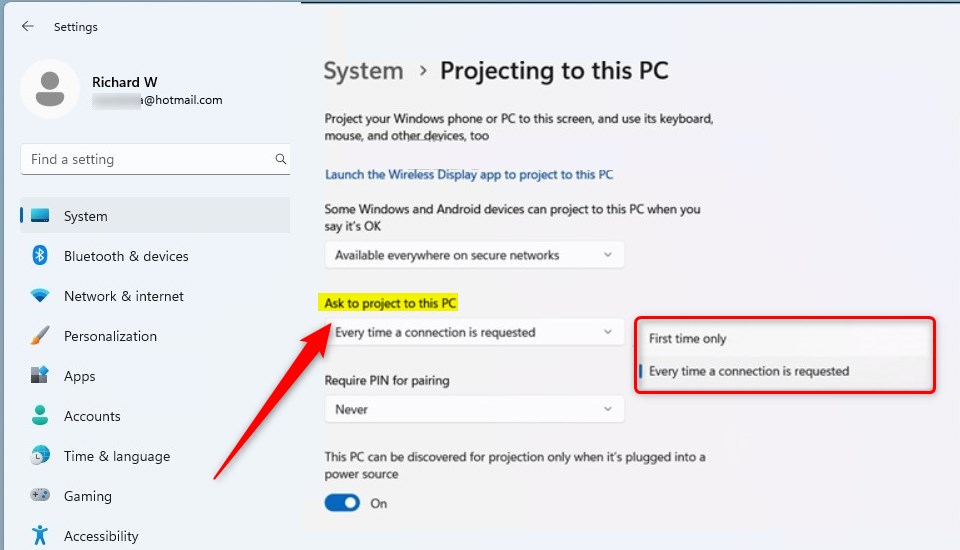
Whatever option you select will apply when a device wants to project to Windows.
That should do it!
Conclusion:
- Windows 11 provides the option to control how often to prompt for projecting to the PC, allowing users to choose between “First time only” or “Every time a connection is requested”.
- Users can easily adjust their preferences for projecting to their Windows 11 PC by following the simple steps within the System Settings.
- We hope this guide has helped customize your Windows 11 experience. If you have any feedback or additional insights, feel free to share them through the comment section below.
How to change projection Settings in Windows?
If you want to change the order of your displays. Or see additional display settings. Select more display settings at the bottom of the quick menu.
Was this guide helpful?

About the Author
Richard
Tech Writer, IT Professional
Richard, a writer for Geek Rewind, is a tech enthusiast who loves breaking down complex IT topics into simple, easy-to-understand ideas. With years of hands-on experience in system administration and enterprise IT operations, he’s developed a knack for offering practical tips and solutions. Richard aims to make technology more accessible and actionable. He's deeply committed to the Geek Rewind community, always ready to answer questions and engage in discussions.


No comments yet — be the first to share your thoughts!