How to Enable or Disable Projecting to This PC in Windows 11


Projecting to this PC in Windows 11 turns your computer monitor into a wireless display so you can mirror your phone, tablet, or another laptop without cables.
This built-in feature uses Miracast (a wireless screen-sharing standard) to let you send photos, videos, and apps straight from a mobile device to your main screen. You can turn this setting on or off anytime inside your Windows 11 Apps settings under Optional features.
Open Settings , go to System, then select Projecting to this PC. Configure the dropdown menu to enable or disable the feature. Ensure the Wireless Display optional feature is installed if the option is greyed out.
Prerequisites for Wireless Display
Before you start, your hardware must support Wi-Fi Direct and Miracast. Most modern computers support this, but older hardware might not. You also need the Wireless Display feature installed as an Optional Feature in Windows.How to check if your PC supports Miracast
1. Press Win+R, type dxdiag, and hit Enter. 2. Click Save All Information and open the text file. 3. Search for Miracast. If it says Available, your PC is ready.How to Enable or Disable Projecting to this PC
Follow these steps to manage your settings. Note: This process requires admin privileges to modify system-wide display settings.-
- Open Settings by pressing Win+I.
-
-
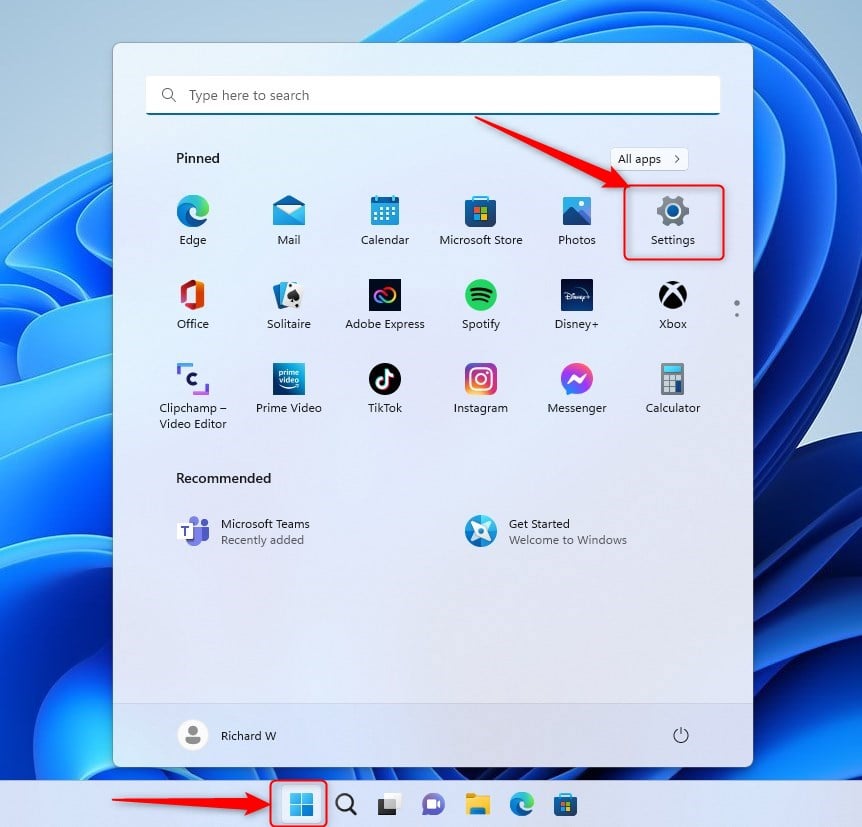
windows 11 new settings button
-
-
- Click System on the left sidebar.
-
-
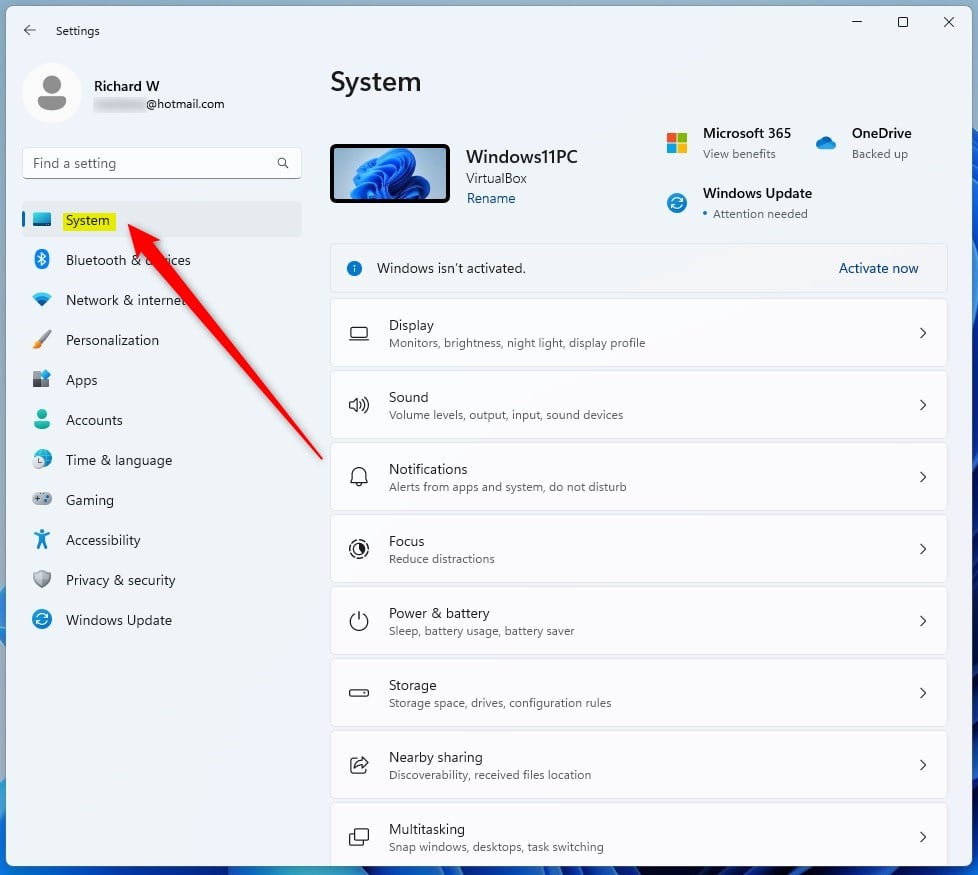
windows 11 system tile
-
-
- Select Projecting to this PC.
-
-
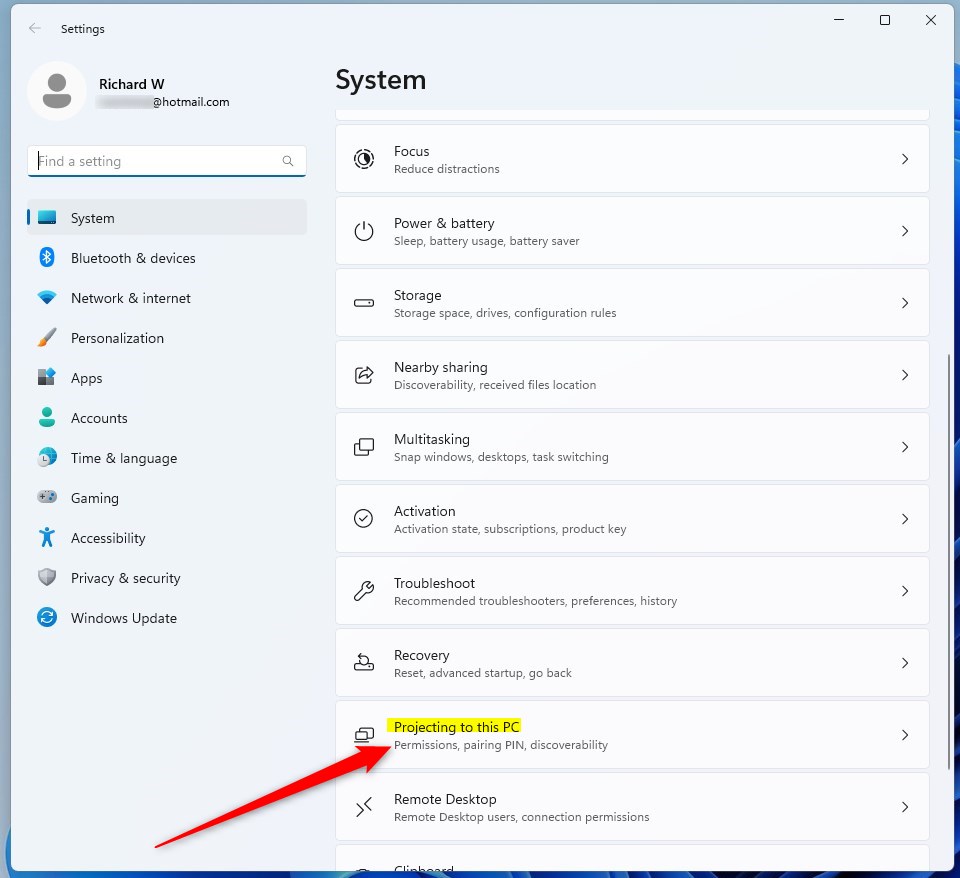
windows 11 projecting to this pc tile
-
-
- Choose your preferred connection mode from the dropdown menu.
-
-
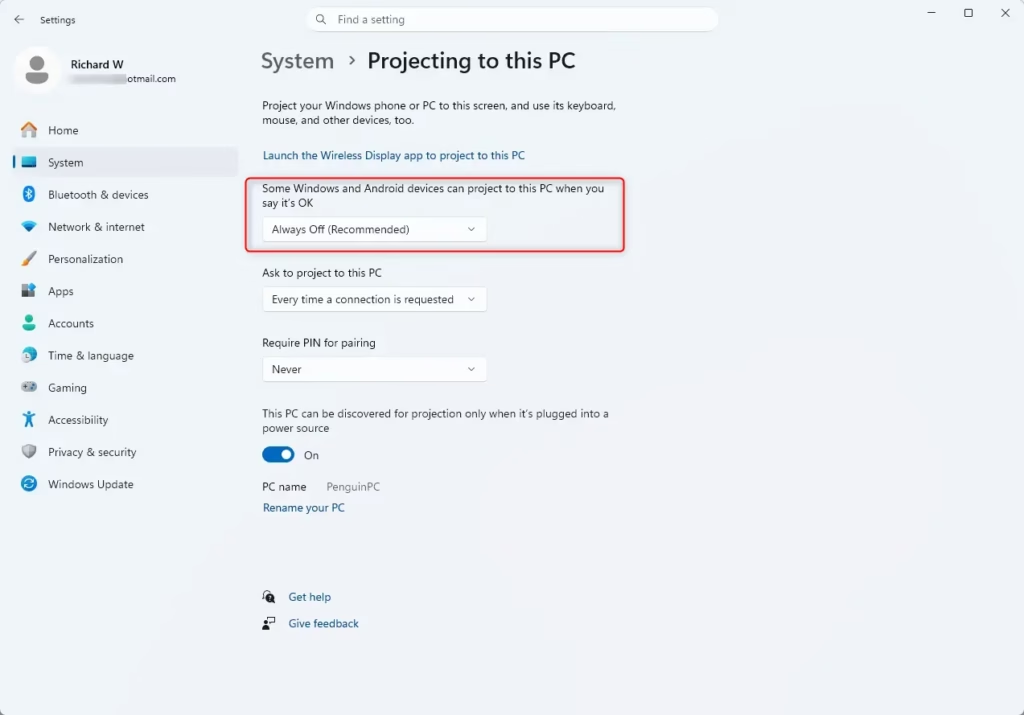
Windows 11 settings screen for Projecting to this PC, currently disabled.
-
Troubleshooting Connection Issues
Projecting to this PC greyed out usually happens when Windows is missing the optional component needed for wireless displays. You can fix this issue by opening Settings, going to Apps, selecting Optional features, and installing the Wireless Display feature so that the screen sharing option becomes available to click. If the Projecting to this PC option is greyed out, you likely need to install the Wireless Display feature. Go to Settings Apps Optional features View features and search for Wireless Display. Install it and restart your computer. If you experience lag, ensure both devices are on the same 5GHz Wi-Fi network to improve bandwidth.Summary
Projecting to this PC is a built-in Windows feature that lets you display your phone or another computer’s screen wirelessly on your monitor using Miracast (a wireless technology that sends video and audio between devices). It works well for showing photos, videos, and presentations on a larger screen without dealing with HDMI cables or adapters. Projecting to this PC is a powerful way to share screens wirelessly using Miracast. By ensuring your hardware supports the Wireless Display feature and configuring your network settings, you can easily mirror devices. Remember to keep your settings on ‘Always Off’ when not in use to maintain your system’s security. For more details, visit the official Microsoft support page.Was this guide helpful?

About the Author
Richard
Tech Writer, IT Professional
Richard is a writer at Geek Rewind who turns complex IT tasks into clear, step-by-step guides. He draws on years of hands-on experience in system administration and enterprise IT operations, focusing on Windows, Linux and WordPress: the problems people actually run into, and the fixes that work. His server and WordPress guides come from systems he runs himself. Richard builds and maintains the platform behind Geek Rewind, from its Ubuntu servers and Nginx configuration to its custom WordPress plugins. Many new tutorials start with readers' questions, and he's always glad to answer them in the comments.
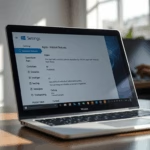


[…] change how often your computer asks for permission to “Ask to project to this PC” when projecting to this PC in Windows […]
[…] guide explains how to turn the “Require PIN for pairing” feature on or off when projecting to this PC in Windows […]