How to Enable or Disable PIN for Projecting in Windows 11


-
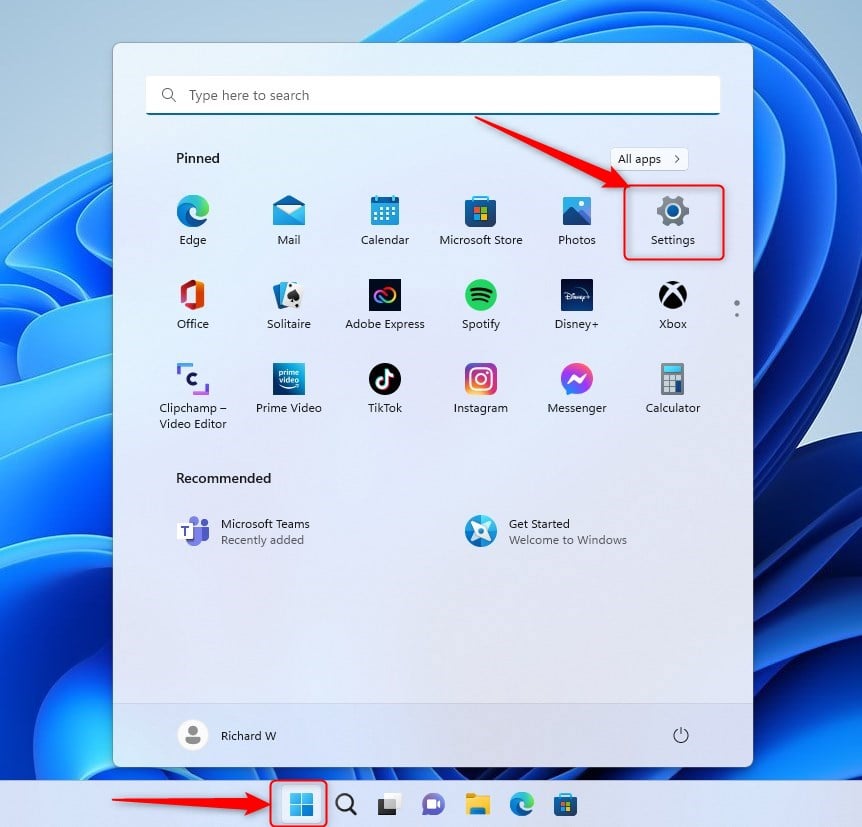
- Open the Settings app by pressing Win+I.
-
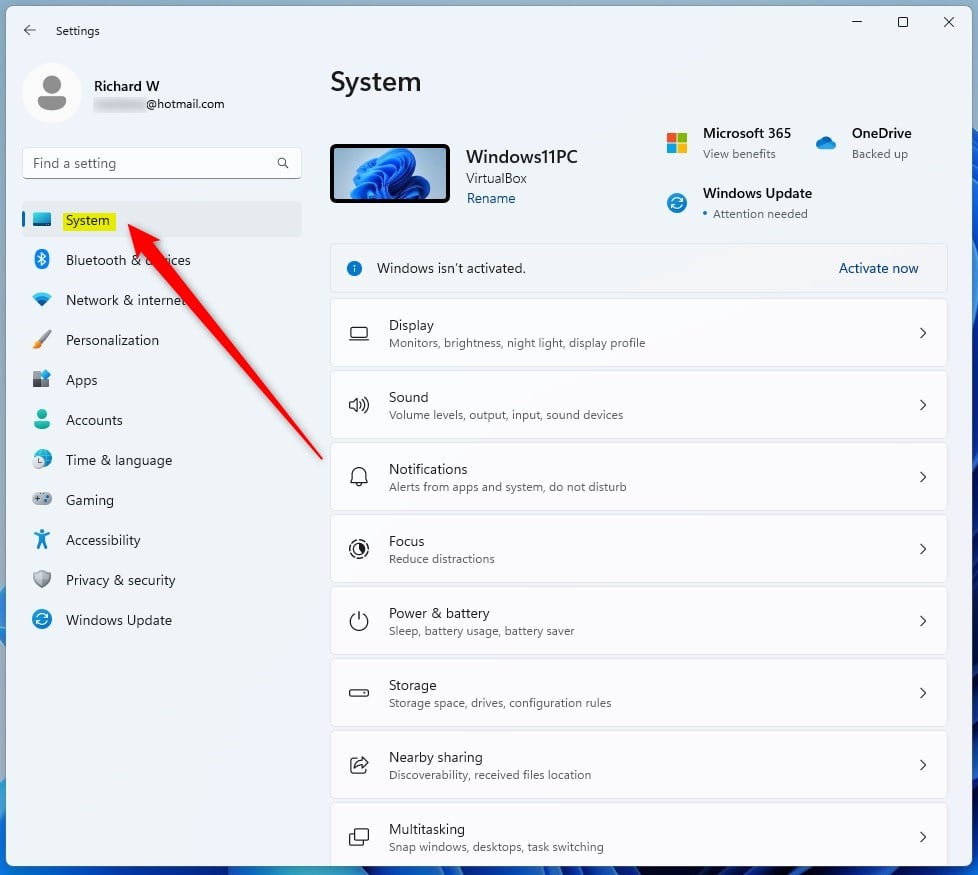
- Click on System on the left sidebar.
-
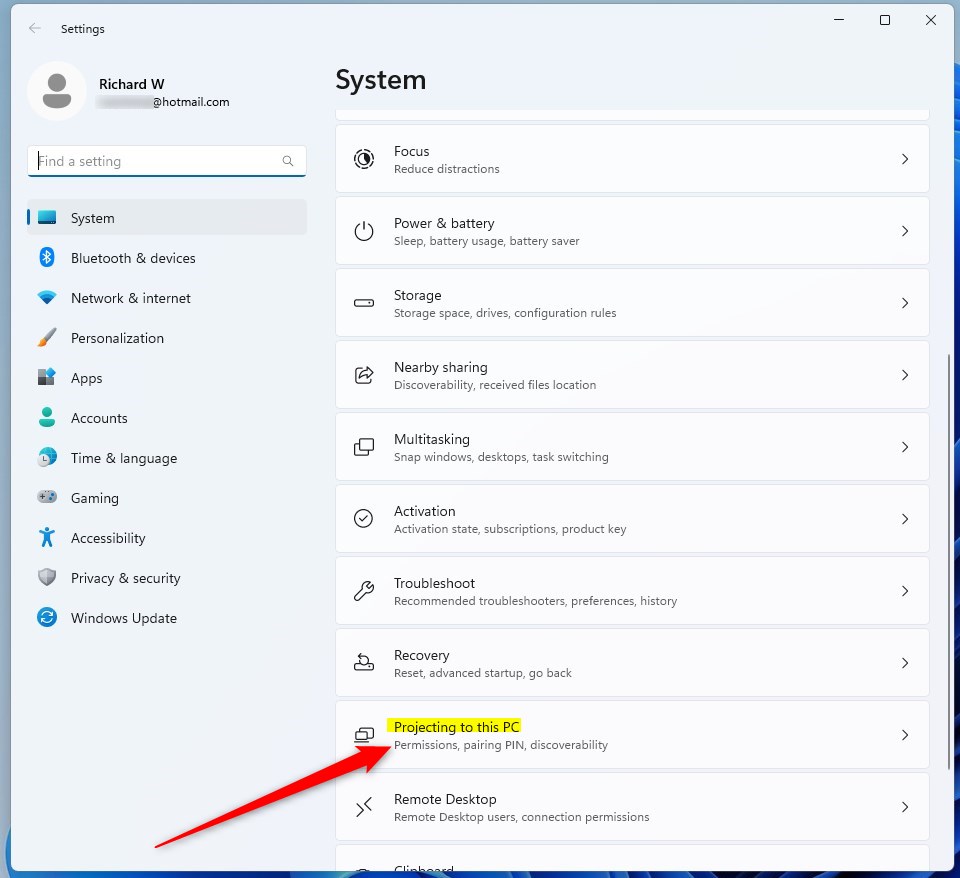
- Select Projecting to this PC.
-
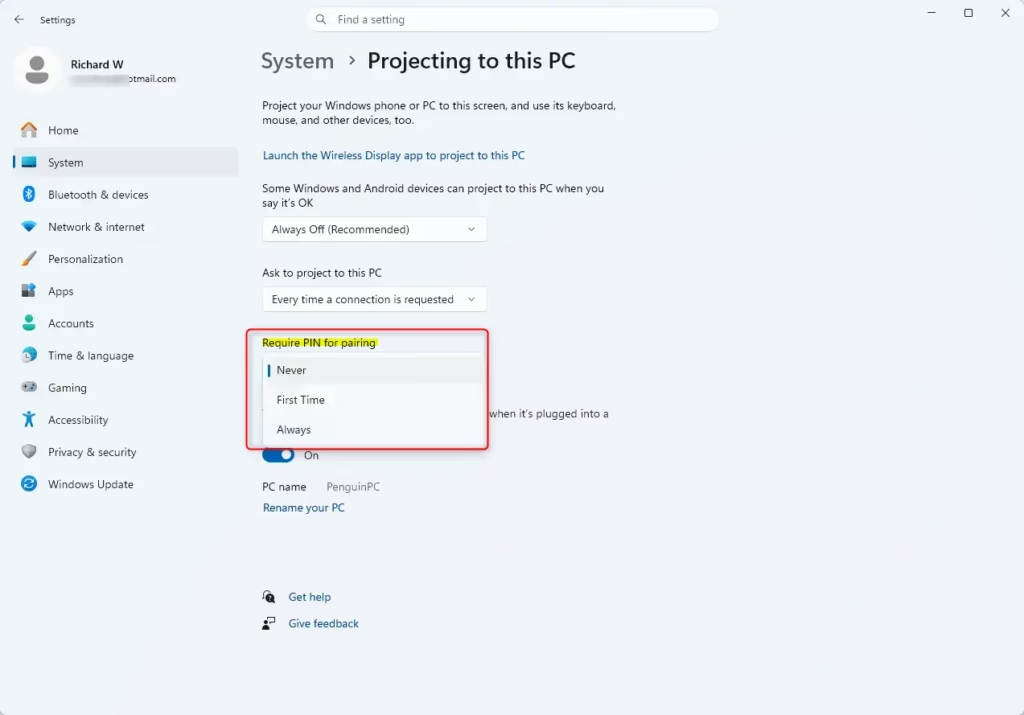
- Under Require PIN for pairing, choose Never, First Time, or Always.
Advanced Configuration: Registry Editor
Warning: Modifying the registry incorrectly can cause system issues. This requires administrative privileges.-
- Press Win+R, type regedit, and press Enter.
-
- Navigate to: 🗝️HKEY_LOCAL_MACHINE\
SOFTWARE\ Microsoft\ MiracastReceiver
- Navigate to: 🗝️HKEY_LOCAL_MACHINE\
-
- Look for a DWORD value named RequirePinForPairing.
-
- Set the value to 0 for Never, 1 for First Time, or 2 for Always.
Summary
You can manage the Require PIN for projecting setting using these steps. By using these steps, you can control who mirrors their screen to your PC. Always ensure your system is updated to maintain the best compatibility with wireless display standards.Pin for projecting in Windows 11 is a security code that stops random devices from wirelessly connecting to your computer screen. When you turn on this feature, your PC asks for a short PIN every time a new phone, tablet, or laptop tries to share its display using Miracast wireless technology.
You can turn this PIN requirement on or off in your main Windows settings . Requiring a PIN keeps your screen safe from nearby devices.
Go to Settings , then System, and select Projecting to this PC. Under Require PIN for pairing, choose Never, First Time, or Always to control wireless display connections. This setting manages the PIN prompt for Miracast screen mirroring.
Prerequisites: Checking the Wireless Display Feature
The Wireless Display feature is a required Windows 11 component that must be installed on your PC before you can set up a require PIN for projecting configuration. Open Settings and go to Apps, Optional features, then View features to check if it is already installed on your system. Open Settings and navigate to Apps Optional features. Click View features next to Add an optional feature, then search for Wireless Display. If it is not listed, the component is missing from your system.-
- Open Settings and go to Apps Optional features.
-
- Click View features next to Add an optional feature.
-
- Search for Wireless Display. If it is not in the list, check your installed features list.
How to Change PIN Settings via Settings App
Note: This requires administrative privileges on your user account.-
- Open the Settings app by pressing Win+I.
-
- Click on System on the left sidebar.
-
- Select Projecting to this PC.
-
- Under Require PIN for pairing, choose Never, First Time, or Always.
Advanced Configuration: Registry Editor
Warning: Modifying the registry incorrectly can cause system issues. This requires administrative privileges.-
- Press Win+R, type regedit, and press Enter.
-
- Navigate to: 🗝️HKEY_LOCAL_MACHINE\
SOFTWARE\ Microsoft\ MiracastReceiver
- Navigate to: 🗝️HKEY_LOCAL_MACHINE\
-
- Look for a DWORD value named RequirePinForPairing.
-
- Set the value to 0 for Never, 1 for First Time, or 2 for Always.
Summary
You can manage the Require PIN for projecting setting using these steps. By using these steps, you can control who mirrors their screen to your PC. Always ensure your system is updated to maintain the best compatibility with wireless display standards.Was this guide helpful?
100% of readers found this helpful (1 votes)

About the Author
Richard
Tech Writer, IT Professional
Richard is a writer at Geek Rewind who turns complex IT tasks into clear, step-by-step guides. He draws on years of hands-on experience in system administration and enterprise IT operations, focusing on Windows, Linux and WordPress: the problems people actually run into, and the fixes that work. His server and WordPress guides come from systems he runs himself. Richard builds and maintains the platform behind Geek Rewind, from its Ubuntu servers and Nginx configuration to its custom WordPress plugins. Many new tutorials start with readers' questions, and he's always glad to answer them in the comments.




No comments yet — be the first to share your thoughts!