How to Use Periods in Windows 11 Date Formats
Periods can replace forward slashes in Windows 11 date formats by changing your regional settings.
Windows 11 usually shows dates like 9/8/21, using forward slashes. You can change this default to make dates appear with periods, such as 9.8.21, if you prefer that look.
For example, setting your short date format to `MM.dd.yyyy` makes your PC show dates like 08.09.2023. This simple change helps you make dates look exactly how you want them on your computer.
Change your short date format in Windows 11’s regional settings to use periods. Go to Settings > Time & Language > Language & Region, then Administrative language settings > Formats > Additional settings > Date, and change the Short date to `dd.MM.yyyy`.
Why Change Your Date Format?
Windows 11 users can change the date format to use periods instead of slashes. This change helps the date format match regional standards or personal readability needs. Adjusting this Windows 11 setting customizes the system clock and date display for a specific workflow.
What happens when you are done?
Once these steps are complete, your taskbar clock and system applications will update to show your new date format. This change is global for your user profile, meaning most apps that pull system time will adopt the new style immediately.
Method 1Using Windows Settings
You can change the Windows 11 date format using the Settings app. This lets you choose exactly how dates show up on your computer, like using periods or dashes.

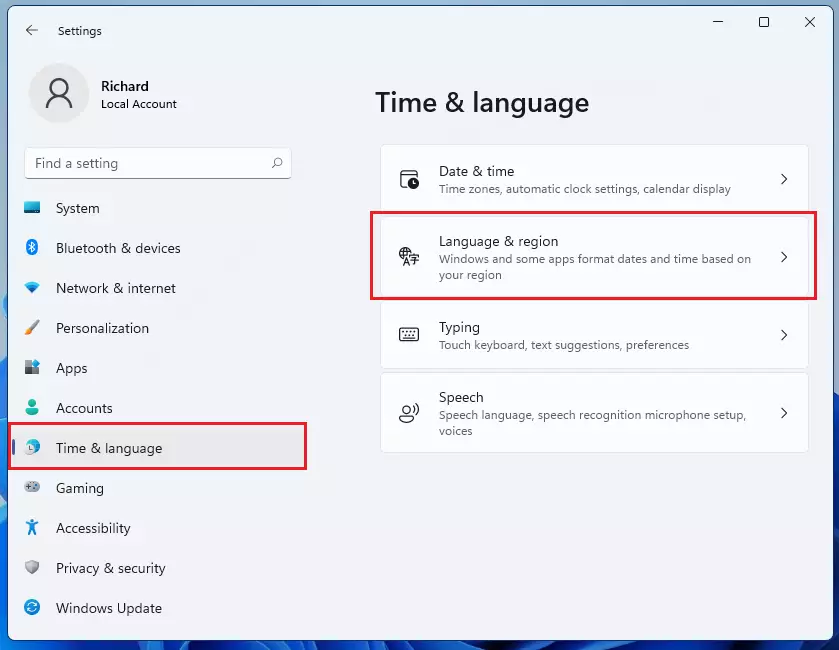
Inside Settings, click Time & Language on the left. Then, on the right side of your screen, select Language & Region.
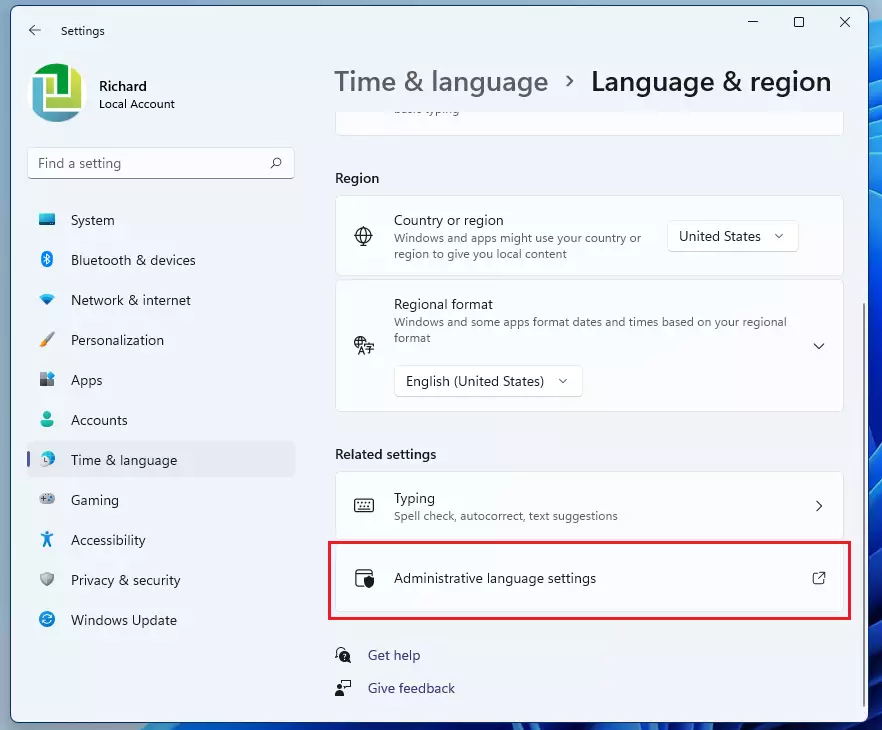
Scroll down to the “Related settings” area and click Administrative language settings. Be aware: This step may require administrator permission.
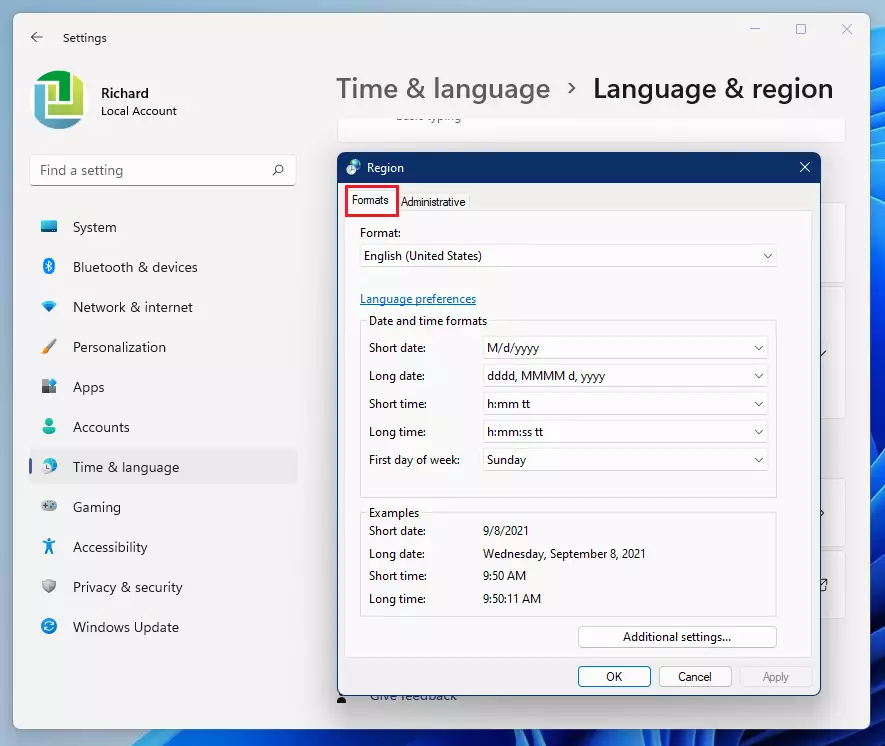
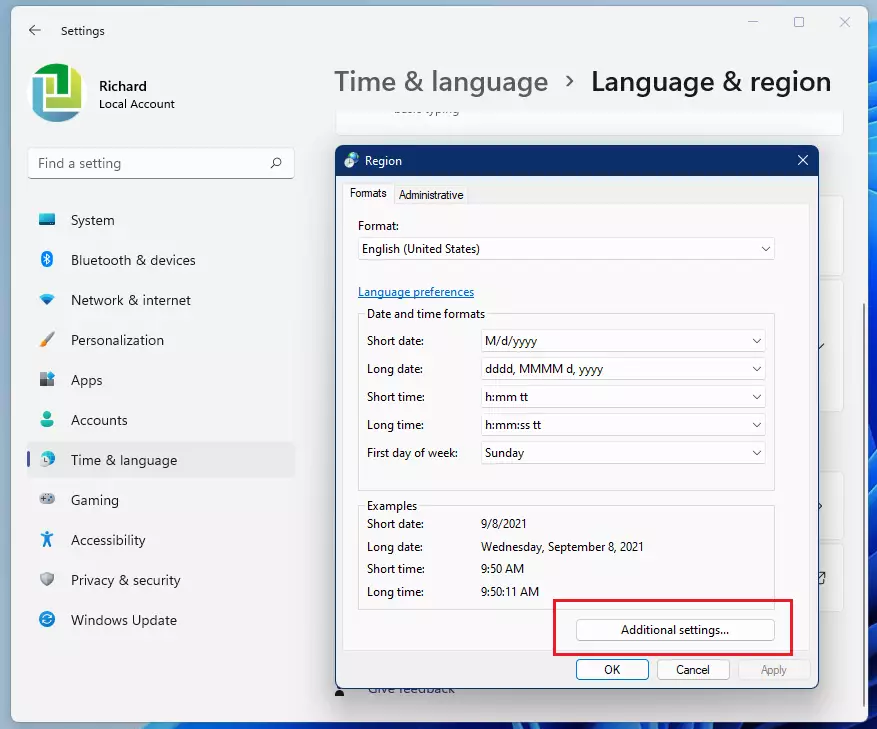
A new box named Region appears. Click on the Formats tab. Because the default options do not include periods, we will need to type the format in manually.
Click the Additional settings button at the bottom of the window.
A new box named Customize Format appears. Click the Date tab at the top.
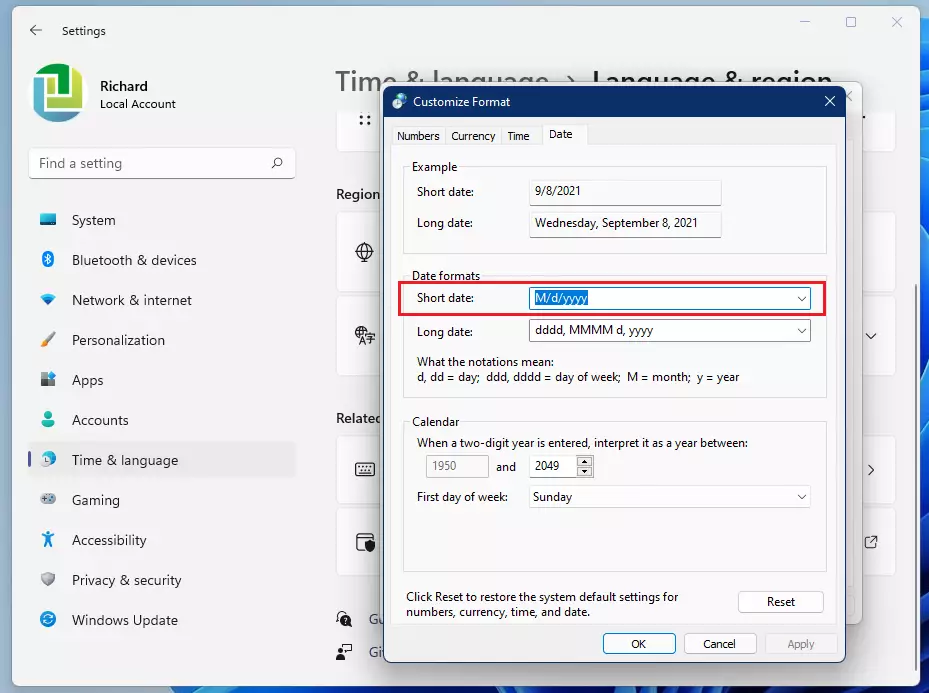
Look for the Short date box. Change the slashes to periods, for example: dd.MM.yyyy. Click Apply to see a preview.
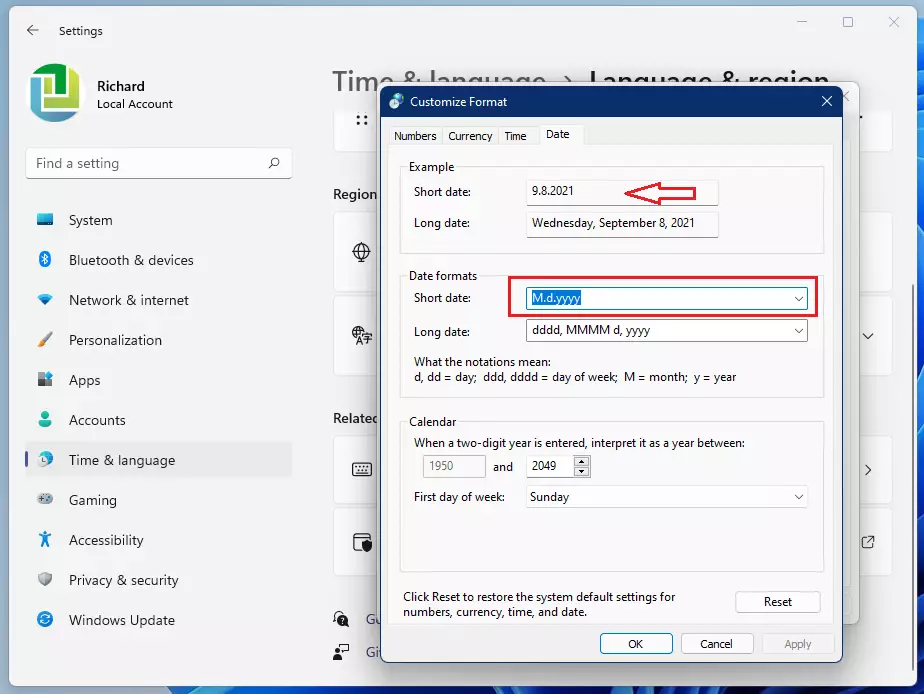
You can also change the Short time format if you wish. Once you are happy with the changes, click OK to save your settings and close the windows.

Method 2Using Control Panel
You can change these settings through the classic Control Panel. Press the Windows key, type Control Panel, and press Enter. Navigate to Clock and Region > Region. This opens the same Region dialog box used in Method 1, allowing you to modify the Short date format directly.
Method 3Using Registry Editor
regedit and press Enter. Navigate to HKEY_CURRENT_USER\Control Panel\International. Locate the sShortDate string value. Double-click it and change the value to dd.MM.yyyy. Restart your computer for changes to take effect.Method 4Using PowerShell
You can change the Windows 11 date format using PowerShell, which is great for setting up multiple computers at once.
How to Revert to Default Settings
If you want to go back to the original format, return to the Region > Additional settings > Date tab. Click the Reset button at the bottom of the window. This restores the default Windows date format for your region.
Summary
Customizing your Windows 11 date format lets you choose how dates appear, making your computer more personal. Whether you prefer using the Settings menu, the Control Panel, or advanced tools like PowerShell, you can switch from slashes to periods in your date display.
Why does my date format keep reverting to default?
This usually happens if your computer is managed by an organization that uses Group Policy (a system for controlling user and computer settings). If your IT department enforces specific regional settings, those policies will override your manual changes every time you sign in or restart your computer. Contact your system administrator to request a change.
Does changing the date format affect system logs or file timestamps?
No. Changing the display format only changes how the date appears to you on your screen. The underlying system logs, file creation dates, and database timestamps remain stored in a standard machine-readable format. Your data remains safe and accurate regardless of how you choose to view it.
Was this guide helpful?

About the Author
Richard
Tech Writer, IT Professional
Richard, a writer for Geek Rewind, is a tech enthusiast who loves breaking down complex IT topics into simple, easy-to-understand ideas. With years of hands-on experience in system administration and enterprise IT operations, he’s developed a knack for offering practical tips and solutions. Richard aims to make technology more accessible and actionable. He's deeply committed to the Geek Rewind community, always ready to answer questions and engage in discussions.


[…] How to change dates and times in Windows 11 […]
[…] post describes the steps to change the date format in Windows […]
[…] How to change the date format in Windows 11 […]