
If you just got a new Windows computer, you might want to give it a personal name. This guide shows you the easiest ways to rename your Windows 11 computer.
Why Rename Your Computer?
Giving your computer a custom name makes it feel more personal. It also helps you identify your device if you have multiple computers on your network.
Method 1: Rename Using Settings
This is the easiest way to rename your computer.
- Open the Windows Settings app. Click the Start menu and select Settings. Or press Windows key + I on your keyboard to open Settings app.
- Look for your computer name in the Home section.
- Click the “Rename” link.

- Type the new name you want for your computer. You can use letters, numbers, and hyphens.
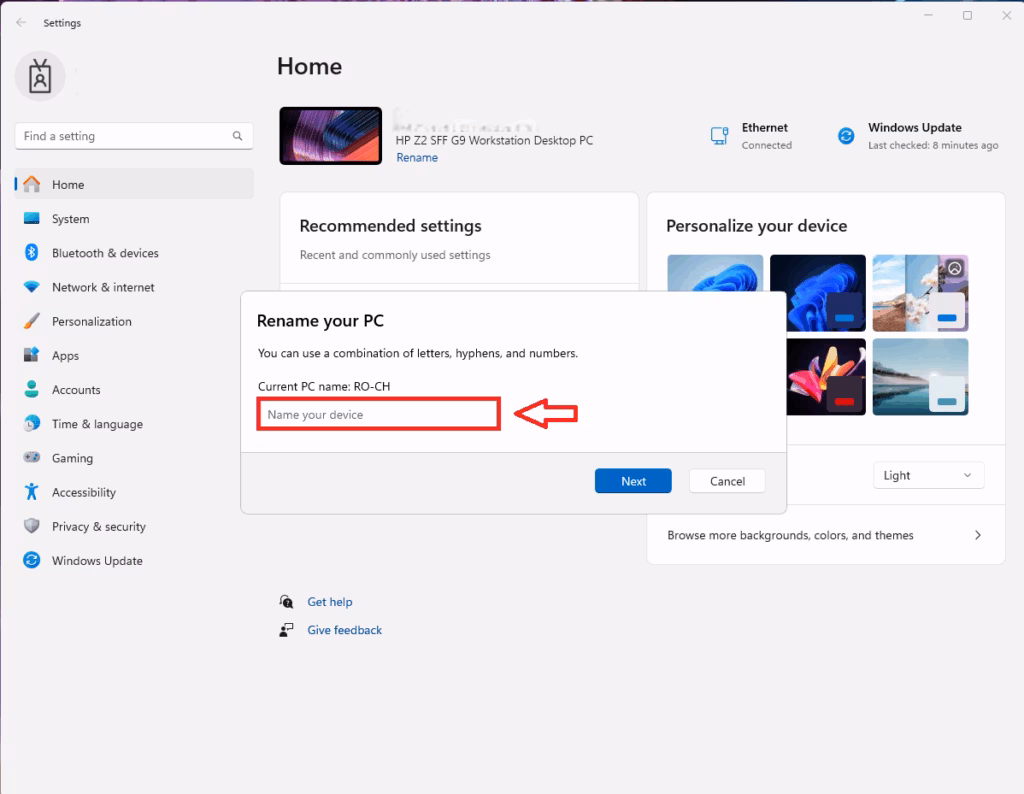
- Click Next to save your change.
- Restart your computer to apply the new name.
Method 2: Rename Using System Properties
This method gives you access to more computer settings.
- [ADMIN REQUIRED] Press Windows key + R on your keyboard.
- Type the following command:
sysdm.cpl
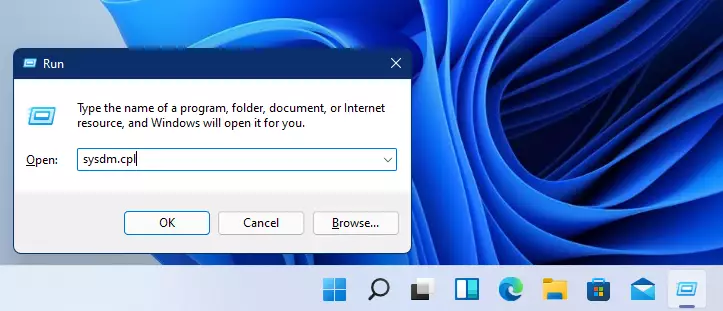
- Press Enter. The System Properties window will open.
- Click the Change button below the computer name.
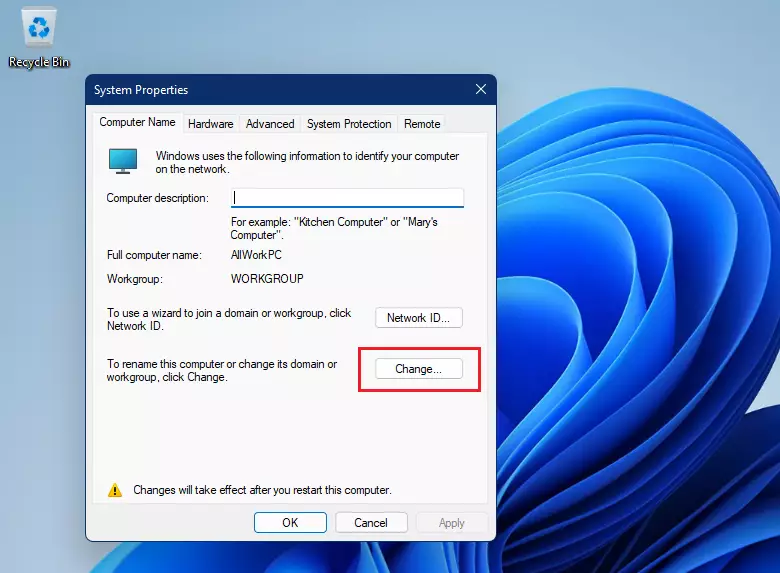
- A new window will appear. Type your new computer name in the Computer name field.
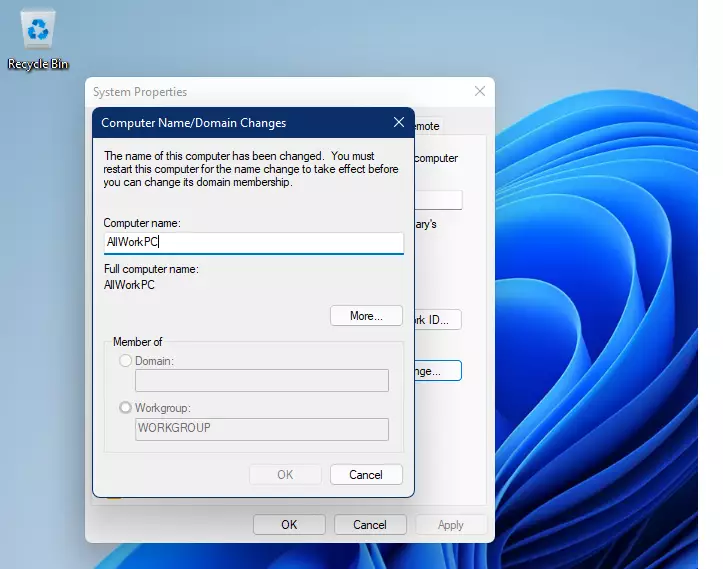
- Click OK to save.
- Restart your computer to apply the new name.
Method 3: Rename Using Command Prompt
The Command Prompt is a text-based tool for advanced tasks.
- [ADMIN REQUIRED] Search for “Command Prompt” using the search bar.
- Right-click Command Prompt and select Run as administrator.

- Type the following command:
wmic computersystem where name="Old_Name" call rename name="New_Name"- Replace Old_Name with your current computer name.
- Replace New_Name with the name you want.
- Press Enter.
When successful, you will see this message:
Executing (\\192.168.1.100\ROOT\CIMV2:Win32_ComputerSystem.Name="GENERICPC")->rename()

Method execution successful.

Out Parameters:

instance of __PARAMETERS

{

        ReturnValue = 0;

};- Restart your computer to apply the new name.
Method 4: Rename Using PowerShell
PowerShell is another tool for managing Windows computers.
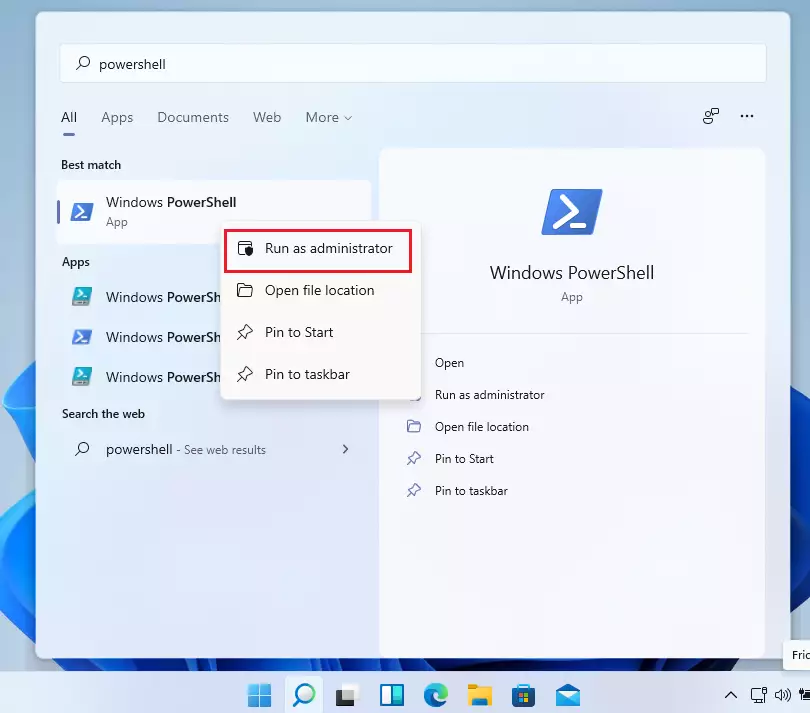
- [ADMIN REQUIRED] Search for “PowerShell” using the search bar.
- Right-click PowerShell and select Run as administrator.
- Type the following command:
Rename-Computer -NewName "NewComputerName"- Replace “NewComputerName” with the name you want.
- Press Enter.
- Restart your computer to apply the new name.
Summary
Renaming your Windows 11 computer is a simple way to personalize your device. You have four easy methods to choose from:
- Settings – The quickest and easiest method
- System Properties – Access more computer settings at the same time
- Command Prompt – For users comfortable with text commands
- PowerShell – Another command-line option for advanced users
No matter which method you choose, remember to restart your computer after making the change. This ensures your new name takes effect properly. Personalizing your computer name makes your device feel more like your own and makes it easier to find on a network with multiple computers.

Leave a Reply to How to Find Printer Details on Windows 11 | Geek Rewind Cancel reply