How to Change Account Types in Ubuntu Linux
Account types in Ubuntu Linux determine your access level, letting you switch between Standard and Administrator roles.
Ubuntu uses these account types to manage permissions, controlling what you can do on your computer. A Standard account has limited privileges for daily tasks, while an Administrator account gives you full system control.
Ubuntu 22.04 LTS, for example, creates new accounts as Standard by default to keep your system safer.
You might need to change an account type to give someone more power, like upgrading a Standard account to Administrator, or to limit access by downgrading an Administrator to Standard.
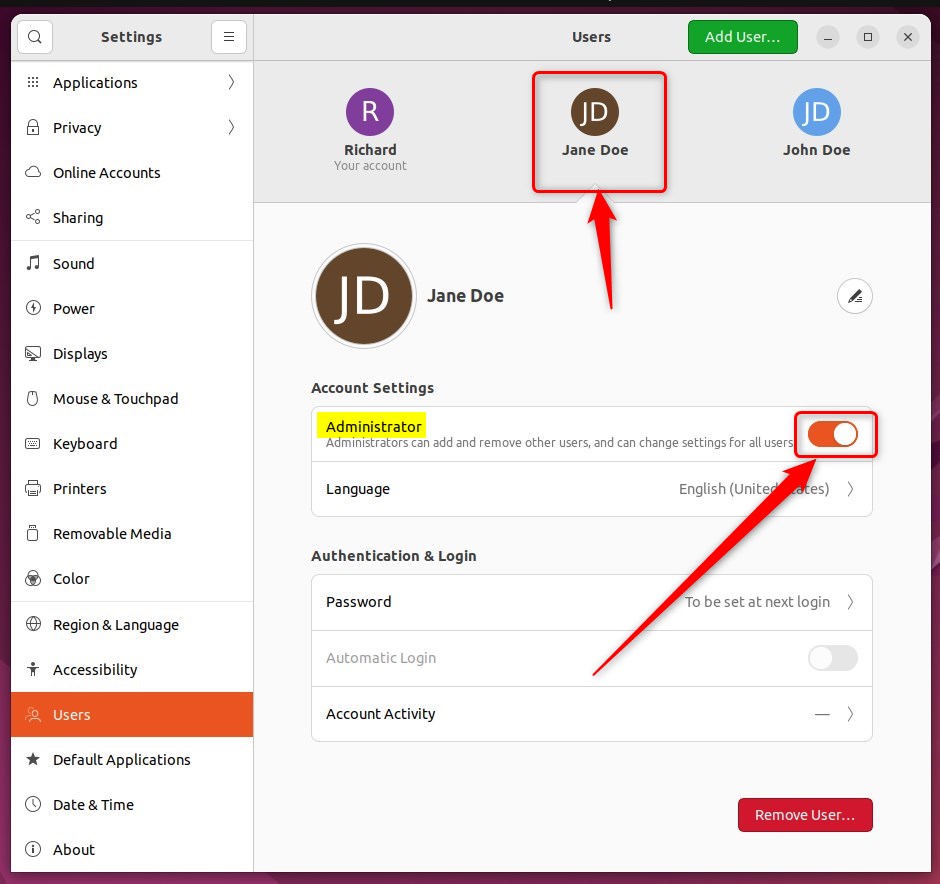
Open System Settings, click Users, and unlock the panel with your password. Select the user, then toggle the Administrator switch to On to grant administrative privileges or Off to remove them.
How to switch account type in Ubuntu Linux
The System Settings tool lets you change an account type in Ubuntu Linux and manage what each user can do on your computer. Open System Settings, select the ‘Users’ section, and then choose the account whose type you want to change.
The System Settings panel is where Ubuntu Linux keeps most of its configuration options. From here, you can manage system settings, create new users, and update your Ubuntu Linux system.
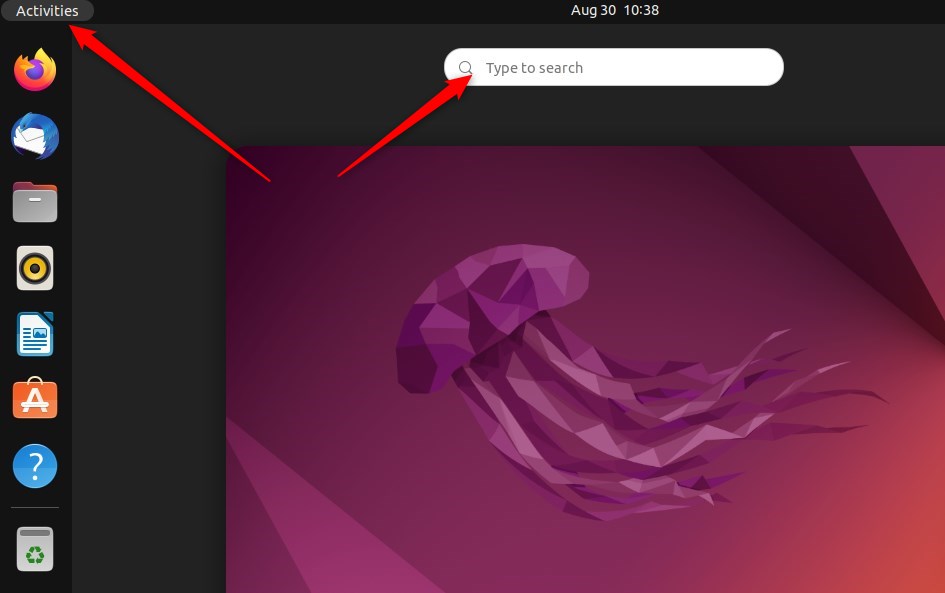
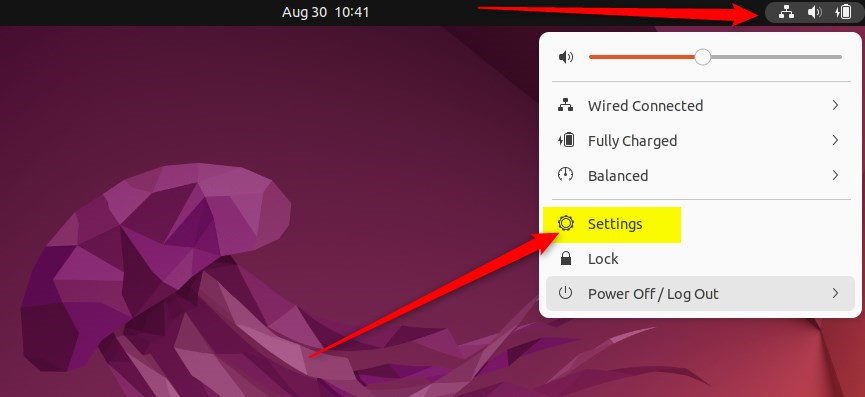
Another way is to click on the System menu in the top-right corner of your desktop’s top bar.
In the System menu, select Settings, as shown below.
Click the Users tile to open the panel within the Settings app.
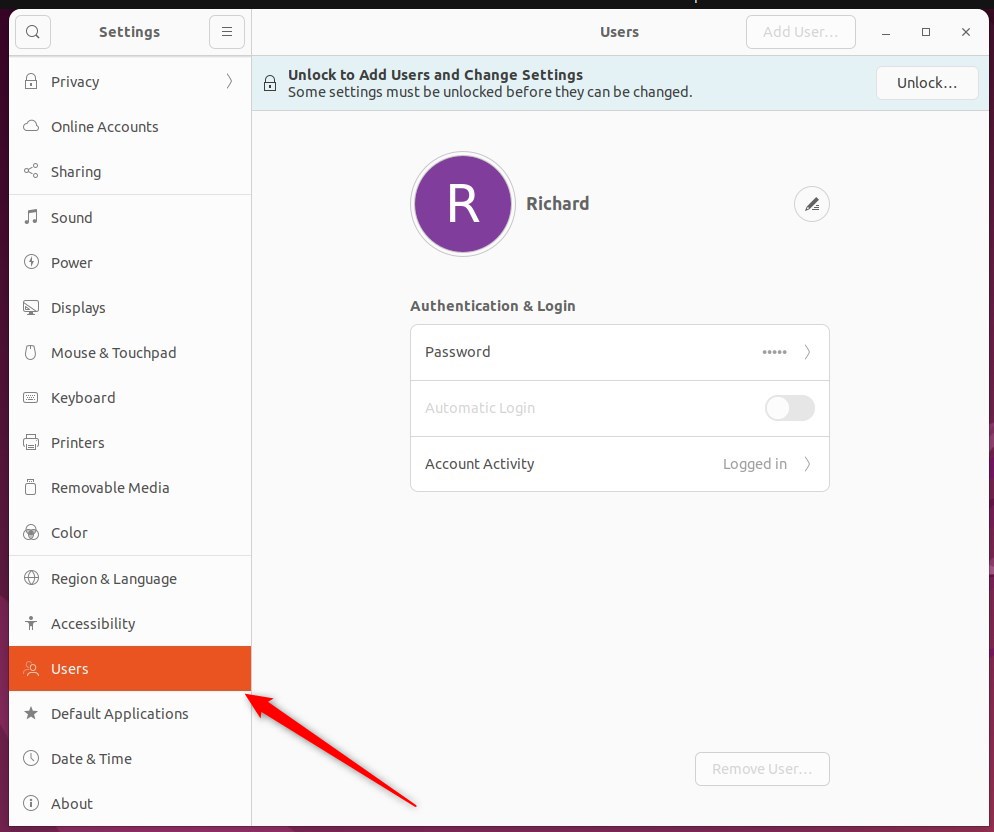
In the ‘Users’ settings panel (you’ll find it under System Settings), click ‘Unlock’ in the top right corner and enter your password when asked.
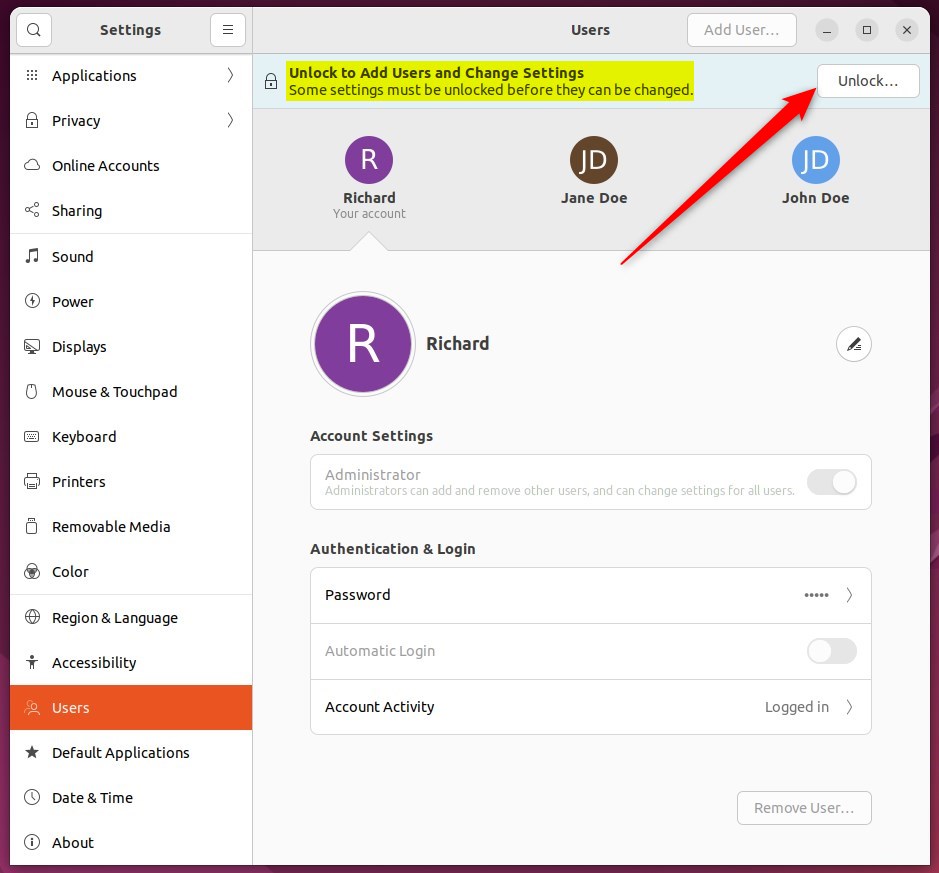
To change an Ubuntu Linux account’s privileges, first choose the specific user whose permissions you wish to adjust. Then, under Account Settings, toggle the Administrator button to On to make that account an administrator.
To take away administrator rights, toggle the button to Off.
Your user’s new account privileges update when they log in again. This account type change allows your user to access different features or permissions on the Ubuntu Linux system.
You can now close the Settings app.
Conclusion:
- Ubuntu Linux offers the flexibility of multi-user functionality, allowing separate and unique accounts and profiles on the same device.
- Users can easily switch between Standard and Administrator account types through the System Settings panel.
- Users can effectively manage account privileges and access to Ubuntu Linux by following the steps provided.
How do I change my account in Ubuntu?
To switch users, click on the system menu, typically located at the top right corner of your screen. Choose the user icon. Another option is to select another user to switch directly (if available) or choose “Power Off/ Log Out” to return to the login screen.
How to switch user as root?
The sudo command lets you run commands as the superuser. sudo -u root achieves the same result. To run a command as a specific user, use sudo -u username. Typing sudo su switches you to a root shell.
How to switch users with sudo?
Another way to switch to another account with sudo is to use the -s option. Running sudo -s will start a shell as root. You can specify a user with the -u option.
How to change normal user to sudo user in Ubuntu?
To create a user with sudo privileges, follow these four steps: log in as root, create a new user with adduser, add them to the sudo group using usermod -aG sudo, and then verify their access with a test command. Group membership controls sudo privileges on Ubuntu.
Was this guide helpful?

About the Author
Richard
Tech Writer, IT Professional
Richard, a writer for Geek Rewind, is a tech enthusiast who loves breaking down complex IT topics into simple, easy-to-understand ideas. With years of hands-on experience in system administration and enterprise IT operations, he’s developed a knack for offering practical tips and solutions. Richard aims to make technology more accessible and actionable. He's deeply committed to the Geek Rewind community, always ready to answer questions and engage in discussions.


[…] you forget your Password, any user with administrator privileges can change it for you. You cannot change your Password if you can’t log […]
[…] You need to be signed in as an administrator on your PC to change these settings. Check your account type […]