How to Change Your Profile Picture in Ubuntu Linux


Changing your profile picture in Ubuntu Linux updates the photo that shows up on your login screen and in system menus. Ubuntu 22.04 LTS and newer versions let you choose a photo from the built-in gallery or upload any image from your files.
Adding a personal photo helps you spot your account fast if multiple people share the same computer. The change takes under a minute, needs no restart, and you can switch back at any time.
Open System Settings, click Users, select your account, and then click the current image to choose a new one or upload your own. This updates your profile picture for login and system identification.
How to add an account picture in Ubuntu Linux
The short version: open the Settings app, go to the Users section, and click your user icon. From there you can pick a new photo from your files, choose one from the built-in gallery, or take one with your webcam. The new picture appears on your login screen and in the system menus whenever you use your computer.
You don’t need an administrator password to change the picture on your own account. Changing another user’s picture is different, and the steps below cover that case.
Most desktop preferences live in the Settings app, so start there. There are two ways to open it. The first is from the system menu.
- Click the system menu in the top-right corner of your screen. It’s the cluster of network, volume and battery icons.
- Select Settings. The Settings window opens, with a list of categories down the left side.
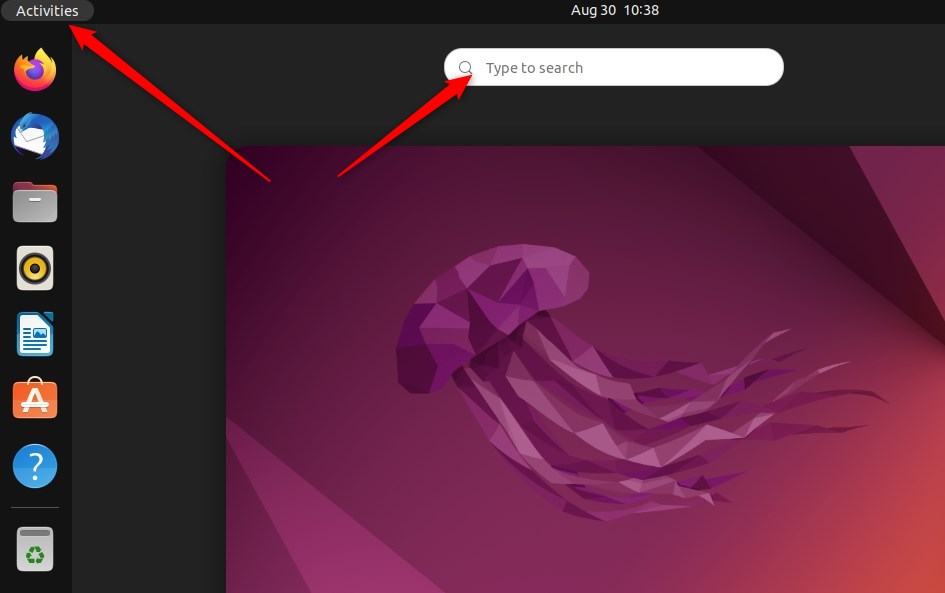
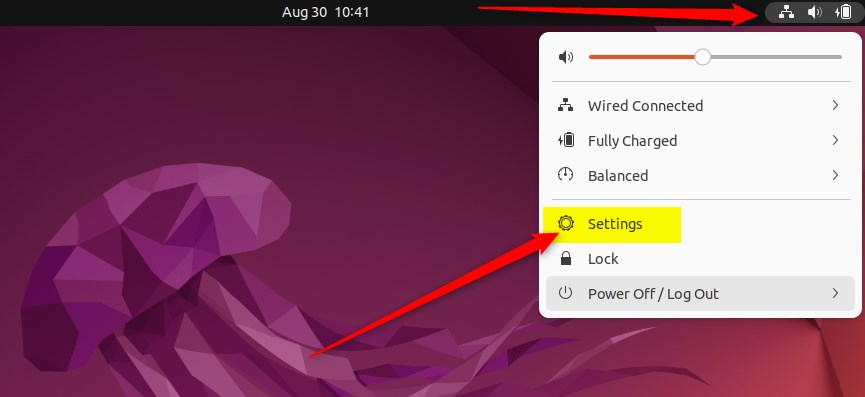
The second way is the same menu, shown in the next two screenshots. Click the System menu at the top-right corner of your desktop’s top bar.
- Click the System menu in the top bar. A panel drops down with the volume slider, quick toggles and power options.
On the System menu, select Settings, as highlighted below.
- Select Settings from the panel. The Settings app opens.
If you prefer the keyboard, press the Super (Windows) key, type “Settings”, and press Enter.
Next, find the Users panel.
- In the Settings window, find the Users tile and click on it. The Users panel opens inside the Settings app and shows your account name and current picture.
On Ubuntu 22.04 LTS, Users is near the bottom of the sidebar. On Ubuntu 24.04 and later, it sits under System, so open that category first. If you can’t find it, use the search box at the top of the Settings window and type “Users”.
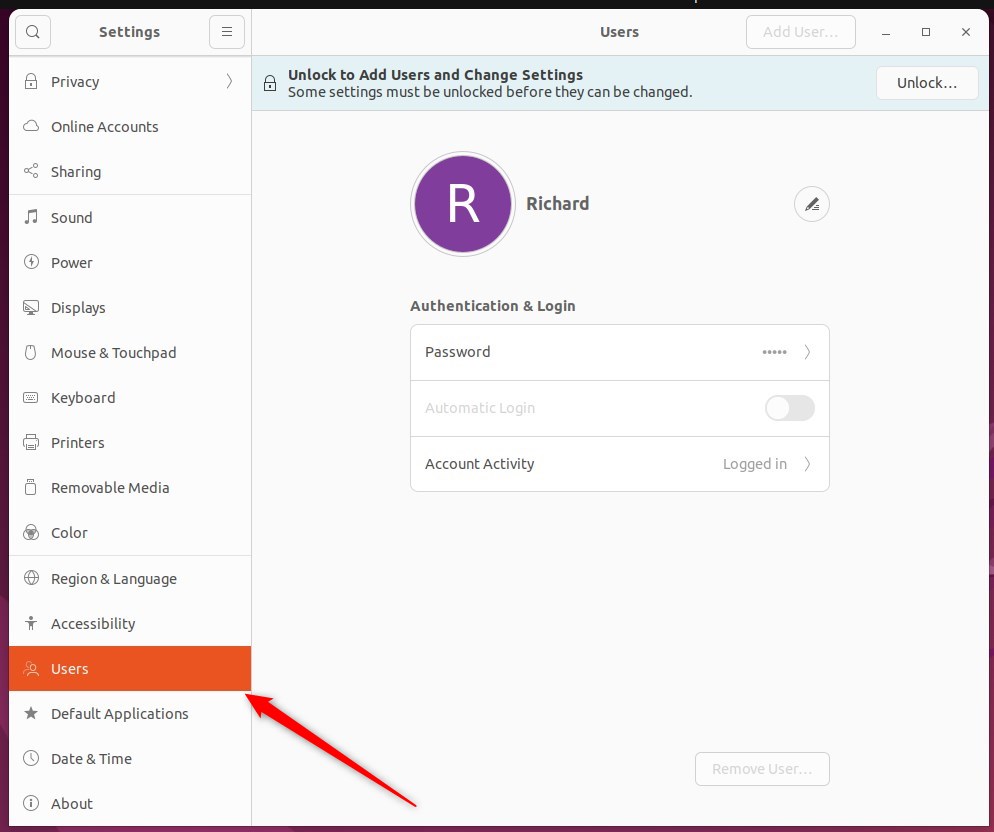
Pick the account you want to update inside the System Settings - Users panel.
- Check the account shown at the top of the panel. On most home computers there is only one, and it’s yours.
- Click the image area next to your account name to see the available pictures. A small chooser opens.
If other accounts exist, you can only edit them after clicking Unlock at the top right of the panel and entering an administrator password. Without that, the picture on those accounts stays locked. A standard user can still change their own picture without unlocking.
Next, click the image area next to your account name to see available pictures.
If nothing happens when you click, make sure you’re clicking the picture itself, not the name beside it. The chooser should show a gallery of built-in images, plus options to pick a file or use a camera.
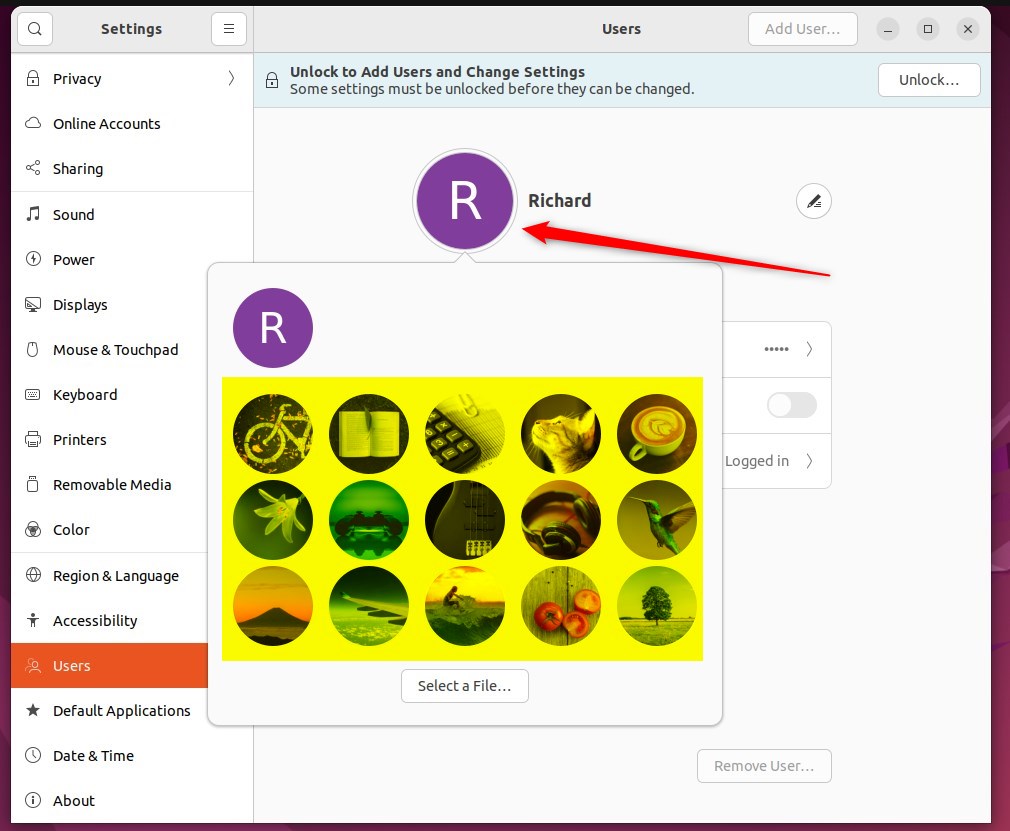
Choose a built-in graphic, or click to upload a photo from your computer or camera.
- To use a built-in graphic, click one in the gallery. It’s applied right away.
- To use your own photo, click Select a File…, browse to the image, and open it. Some versions then show a crop box. Drag it over the part of the photo you want, then confirm.
- To use your webcam, click Take a Picture…. This option only appears if Ubuntu detects a camera. Follow the on-screen prompt to capture the shot.
A square image of at least a few hundred pixels works best, because the picture is shown as a small square or circle. JPEG and PNG files both work. The new picture should now appear next to your name in the Users panel.
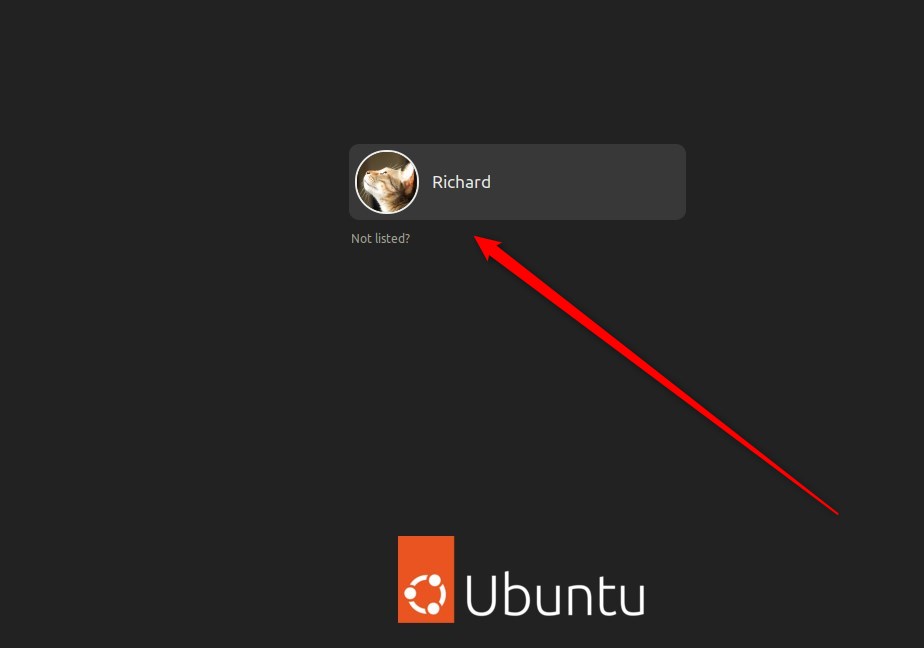
Closing the Settings app finishes the process.
- Close the Settings window with the X in its title bar. Nothing needs saving, because the change was applied when you chose the picture.
You don’t need to restart. To see the new picture on the login screen, lock the session with Super+L or log out. To undo the change, open the same panel and pick a different picture.
Wrapping Up:
- Adding or changing your account profile picture in Ubuntu Linux is a simple process that allows for personalization and easy identification.
- Whether using an existing image or one directly from your camera or computer, the new picture can be easily set through the System Settings panel. The change applies immediately and needs no restart.
- Following these steps, users can ensure their account is visually distinguished on the login screen while using Ubuntu Linux. If you change your mind, repeat the steps and choose another picture.
Have a question about this guide?
Answered by AI from this guide. Good questions may be added to this page — please don't include personal details.
Did this guide fix your problem?

About the Author
Richard
Tech Writer, IT Professional
Richard is a writer at Geek Rewind who turns complex IT tasks into clear, step-by-step guides. He draws on years of hands-on experience in system administration and enterprise IT operations, focusing on Windows, Linux and WordPress: the problems people actually run into, and the fixes that work. His server and WordPress guides come from systems he runs himself. Richard builds and maintains the platform behind Geek Rewind, from its Ubuntu servers and Nginx configuration to its custom WordPress plugins. Many new tutorials start with readers' questions, and he's always glad to answer them in the comments.
No comments yet — be the first to share your thoughts!