Enable or Disable Camera in Ubuntu Linux


Disabling the camera in Ubuntu Linux blocks all apps from using your webcam to secure your privacy, and you can turn the device back on at any time for video calls.
Ubuntu sets up most webcams, such as the Logitech C920, the second you plug them in. You can open the built-in Cheese app (a webcam program that lets you take pictures and record videos) to check if your camera works right away.
Disable your Ubuntu camera by removing the uvcvideo kernel module using the command sudo modprobe -r uvcvideo. To permanently disable it, add ‘blacklist uvcvideo’ to /etc/modprobe.d/blacklist.conf. Re-enable by removing the blacklist entry and running sudo modprobe uvcvideo.
How to enable or disable the camera in Ubuntu Linux
Administrator access allows disabling and enabling cameras for all users on the device. Managing Ubuntu camera settings follows a specific process.
Find the Camera driver module
The uvcvideo driver manages most webcams in Ubuntu Linux, controlling your Ubuntu camera settings. You need to check if this driver is active before you can change your Ubuntu camera settings or turn off your webcam. Most webcams use this standard driver, so confirming it is loaded lets you know your system recognises the hardware.
Most modern webcams use UVC (USB Video Class) drivers, which follow a universal standard for video hardware. The generic uvcvideo kernel driver module in Ubuntu supports these devices.
Checking this requires a command to list the uvcvideo kernel driver module:
sudo lsmod | grep 'uvcvideo'
Blank output indicates Ubuntu does not recognize the camera or lacks a installed driver. Identified cameras with loaded drivers display lines similar to these:
uvcvideo              106496  0
videobuf2_vmalloc      20480  1 uvcvideo
videobuf2_v4l2         32768  1 uvcvideo
videobuf2_common       77824  4 videobuf2_vmalloc,videobuf2_v4l2,uvcvideo,videobuf2_memops
videodev              258048  3 videobuf2_v4l2,uvcvideo,videobuf2_common
mc                     65536  4 videodev,videobuf2_v4l2,uvcvideo,videobuf2_common
Different results often point to an alternate camera driver installation. Consulting Kernel documentation and the LinuxTV wiki provides additional driver information.
Remove camera drivers from Ubuntu
Disabling the camera in Ubuntu involves removing its driver via terminal. You can turn off your webcam completely by unloading the driver from the Linux kernel. This stops any app from using the camera until you turn it back on, which is useful for privacy or fixing frozen video feeds.
sudo modprobe -r uvcvideo
Replacing uvcvideo with any other driver names found on the system remains necessary.
Active camera usage triggers an error message resembling this:
To disable the camera in Ubuntu Linux, first close any application currently using the camera. Then, run the specific command to disable the camera device. This action prevents the camera from being accessed by any software until it is re-enabled.
These commands temporarily remove the driver. A reboot restores functionality. Blocking the driver indefinitely requires adding it to a configuration file. Run these commands to add the driver to /etc/modprobe.d/blacklist.conf.
Drivers listed here remain blocked indefinitely, preventing apps from accessing the camera.
echo 'blacklist uvcvideo' | sudo tee -a /etc/modprobe.d/blacklist.conf
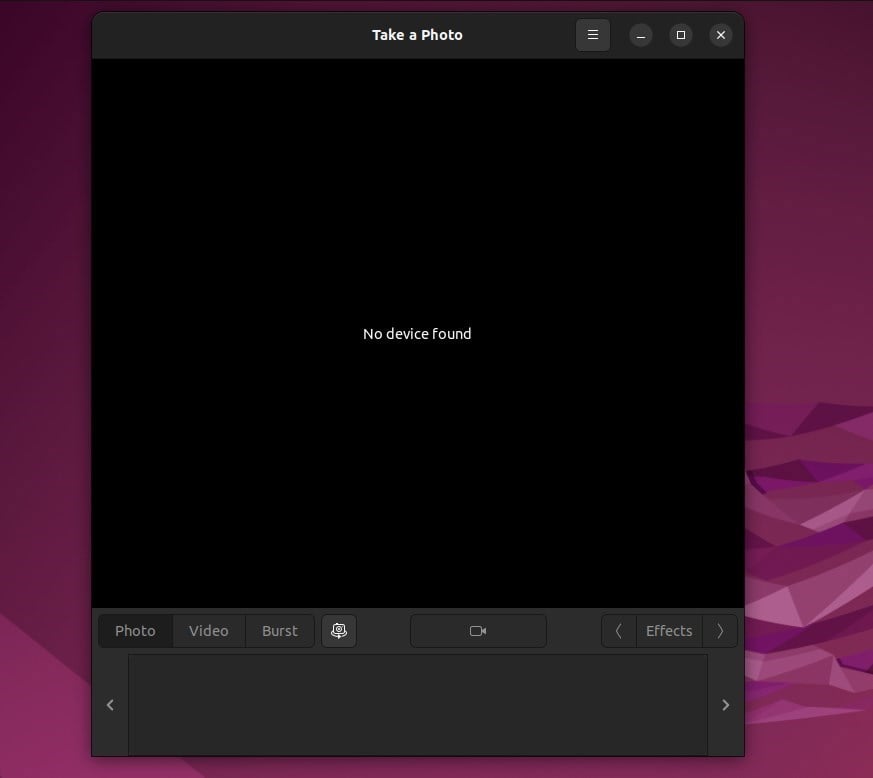
Enable camera in Ubuntu Linux
Reviving a previously disabled camera requires loading its driver again. You can turn your webcam back on in Ubuntu Linux by reloading the camera driver into the system memory. Once you run the command, apps like video call software can use the camera again right away without restarting your computer.
sudo modprobe uvcvideo
Configuration is complete.
Conclusion:
- Enabling or disabling the camera in Ubuntu Linux requires administrator access
- The uvcvideo kernel driver module is commonly used for recent camera and webcam drivers in Ubuntu
- Removing a camera driver using the modprobe command may require exiting the app using the camera
- Re-enabling the camera driver involves removing the blocklist entry and using the modprobe command
- Once disabled, apps will not have access to the camera
Was this guide helpful?

About the Author
Richard
Tech Writer, IT Professional
Richard is a writer at Geek Rewind who turns complex IT tasks into clear, step-by-step guides. He draws on years of hands-on experience in system administration and enterprise IT operations, focusing on Windows, Linux and WordPress: the problems people actually run into, and the fixes that work. His server and WordPress guides come from systems he runs himself. Richard builds and maintains the platform behind Geek Rewind, from its Ubuntu servers and Nginx configuration to its custom WordPress plugins. Many new tutorials start with readers' questions, and he's always glad to answer them in the comments.



No comments yet — be the first to share your thoughts!