How to Record Videos on Ubuntu with Cheese


Cheese is a free webcam app for Ubuntu that lets you record videos and snap photos using your laptop camera or a USB webcam. Fresh installations of Ubuntu often leave the program off your computer, but you can add it in seconds by opening the Ubuntu Software Center or typing sudo apt install cheese into the terminal (the Ubuntu command-line interface).
The program saves all your recordings as .webm video files by default inside the Videos/Webcam folder of your Home directory. You can jump straight into recording short clips or fun photo booths without digging through complicated settings or editing menus.
Open the Cheese application from your Ubuntu dock or search. Ensure Video mode is selected, then click the Record button or press Space to start and stop. Your recordings automatically save to your Videos/Webcam folder.
How to record video with Cheese in Ubuntu Linux
You can record videos Ubuntu Cheese by opening the application from your app menu, switching to video mode, and clicking the red record button. Cheese is a built-in webcam program that makes capturing clips simple without needing to install extra software.
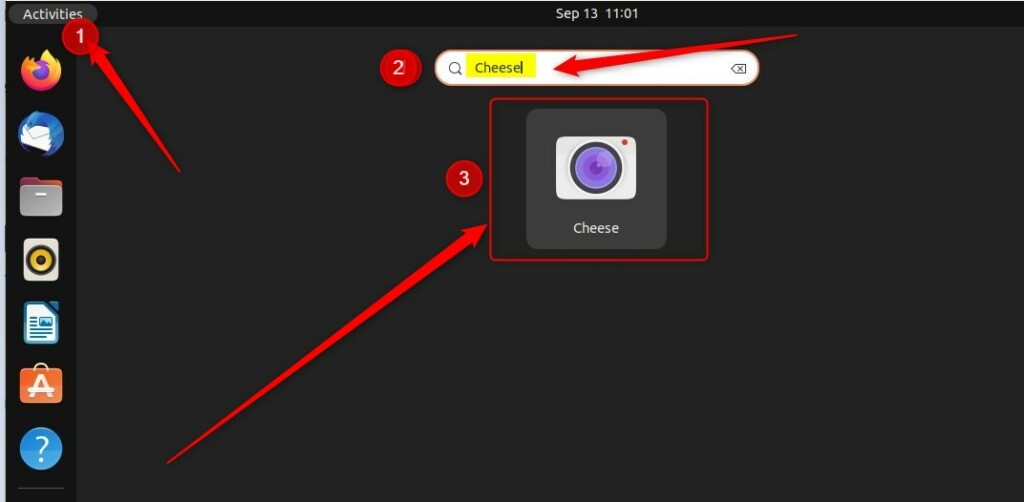
Launching the application brings up the primary interface window. Access the menu by clicking the ‘Show Applications’ icon at the bottom of the screen, typing ‘Cheese’ into the search field, and clicking the resulting program icon.
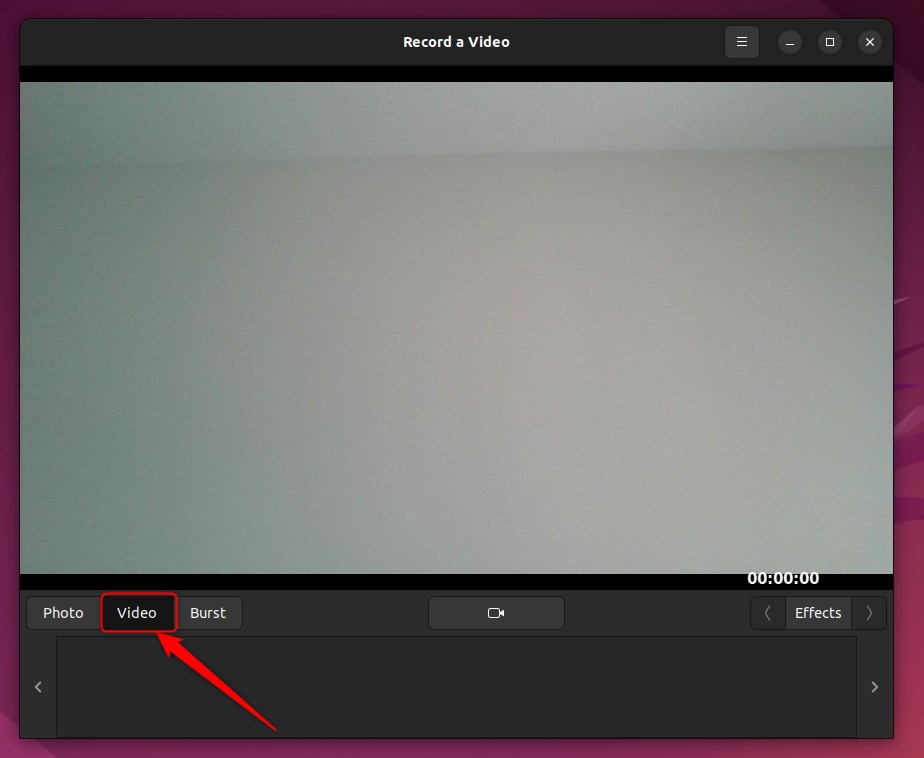
Look at the side of the window. Confirm that Video mode is active by checking for a highlighted Video button.
Changing the default save location requires opening the menu through the three-line button in the top right corner and selecting Preferences. Type or paste your new folder path into the folder box.
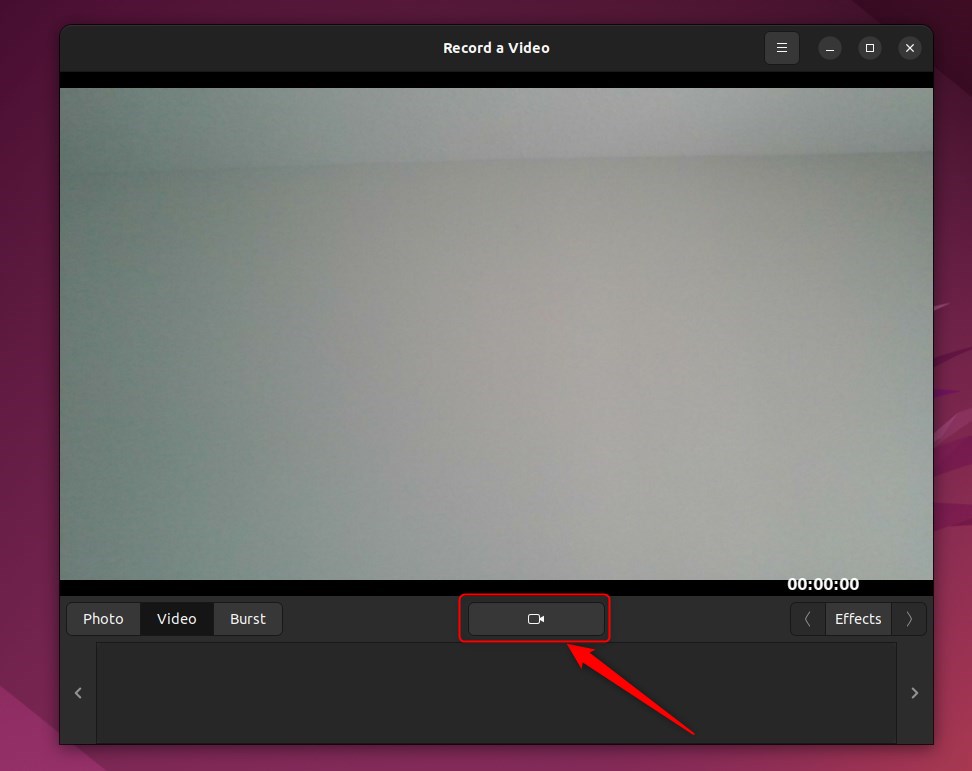
Click the large Record a video button at the bottom of the screen to start recording. Pressing the Space key on the keyboard achieves the same result.
Ending a recording requires clicking the capture button a second time or pressing the Space or Esc key.
Finished recordings appear in the thumbnail bar at the bottom of the window. Double-click a thumbnail to play the clip, or right-click it to delete unwanted footage.
That covers the entire capture workflow.
Summary
- Record Fun Moments: Use your webcam to capture quick clips easily.
- Automatic Saving: Your videos save automatically to your chosen folder.
- Special Effects: Use the Effects menu in Cheese to add filters to your video.
Was this guide helpful?
0% of readers found this helpful (2 votes)

About the Author
Richard
Tech Writer, IT Professional
Richard is a writer at Geek Rewind who turns complex IT tasks into clear, step-by-step guides. He draws on years of hands-on experience in system administration and enterprise IT operations, focusing on Windows, Linux and WordPress: the problems people actually run into, and the fixes that work. His server and WordPress guides come from systems he runs himself. Richard builds and maintains the platform behind Geek Rewind, from its Ubuntu servers and Nginx configuration to its custom WordPress plugins. Many new tutorials start with readers' questions, and he's always glad to answer them in the comments.



No comments yet — be the first to share your thoughts!