Capture Photos with Cheese on Ubuntu Linux
Cheese lets you take photos with your webcam on Ubuntu Linux.
It’s a free program that makes using your webcam easy, letting you snap pictures and record videos with special effects.
On Ubuntu 22.04 LTS, for example, Cheese is a go-to app for grabbing quick shots with your camera. You can even add fun filters.
Cheese saves your photos right to your computer, so they are ready to use or share immediately.
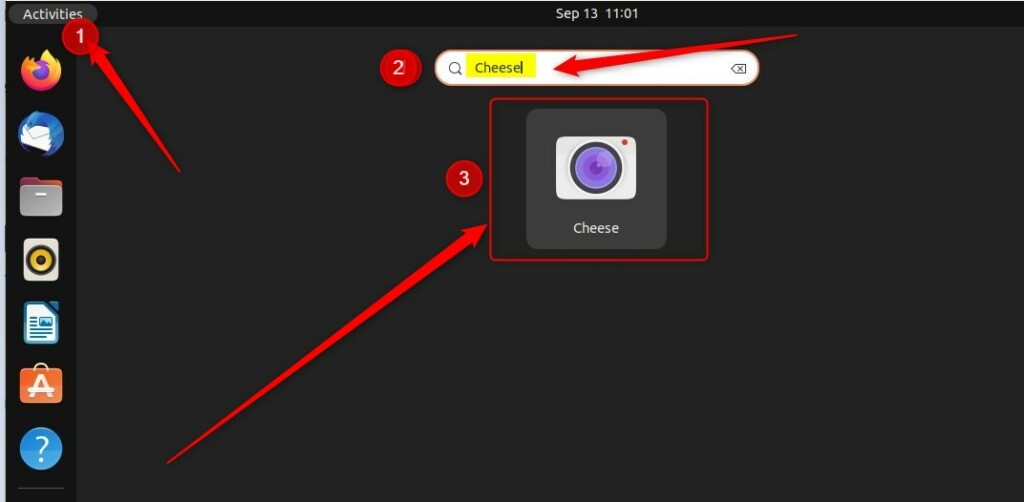
Open the Cheese application by searching for it in the Ubuntu application grid. Select Photo mode, then click the Take a photo button or press Spacebar to capture your image. Photos are saved by default to the Pictures/Webcam folder.
How to take pictures with Cheese in Ubuntu Linux
You can easily take pictures using the Cheese webcam app on Ubuntu Linux. First, open the Cheese application and ensure it’s set to ‘Photo’ mode. This simple tool lets you capture still images directly from your computer’s camera.
Cheese, a photo-taking application for Ubuntu Linux, opens when you click the Cheese icon. To start Cheese, click the grid icon at the bottom of your dock, type "Cheese" into the search bar, and then click the Cheese icon to open the application.
Make sure you are in Photo mode. You can check this by looking for the Photo button on the right side of the screen.


The app will count down from three, the screen will flash, and your photo will appear in the stream at the bottom of the window.
Conclusion
Taking photos on your Ubuntu machine is quick. By default, your files save as JPEG images in your Pictures folder.
Troubleshooting
If your Cheese webcam isn’t showing an image in Ubuntu, the first thing to check is your system’s privacy settings.
Feel free to share feedback or additional tips using the comment form below.
What is Cheese on Ubuntu?
Cheese on Ubuntu is a fun and easy-to-use program for your webcam that lets you take photos and videos right from your desktop.
What is the alternative to Cheese in Ubuntu?
Webcamoid is a full featured and multiplatform webcam suite. Kamoso is a simple and friendly program to use your camera. "guvcview" is much better than cheese.
Was this guide helpful?

About the Author
Richard
Tech Writer, IT Professional
Richard, a writer for Geek Rewind, is a tech enthusiast who loves breaking down complex IT topics into simple, easy-to-understand ideas. With years of hands-on experience in system administration and enterprise IT operations, he’s developed a knack for offering practical tips and solutions. Richard aims to make technology more accessible and actionable. He's deeply committed to the Geek Rewind community, always ready to answer questions and engage in discussions.

No comments yet — be the first to share your thoughts!