
This article explains how to automatically turn on an Outlook feature to translate messages received in other languages on Windows 11.
The new Outlook for Windows brings the latest features and a modern and simplified design with support for Exchange-backed Microsoft 365 work or school, Outlook.com, Hotmail, and Gmail accounts.
The app has many features, including support for email signatures, external email accounts, setting out-of-office automatic replies, email sorting, subscription management, email forwarding, setting default From address, backing up your mailbox, changing the reading pane, opening a new window for a message, and more.
You can also choose to handle messages received in other languages. Options available are to “Always translate, “Ask me before translating,” and “Never translate.”
People would want to translate messages received in other languages for many reasons. For instance, it could be better understanding the message, especially in a business or work context where clear communication is crucial. It could also be because the recipient prefers to read messages in their native language or wants to learn a new language.
Whatever the reason, having the ability to translate messages in Outlook automatically can be a helpful feature for many users.
Turn on or off automatic translation of other languages in Outlook
As mentioned above, your Outlook has a feature that allows users to translate messages received in other languages automatically.
Those who do not want to translate foreign languages in Outlook automatically can turn it off.
Here’s how to do that.
First, open the new Outlook app on Windows 11.
You can do that by clicking Start -> All app -> Outlook app. Or use the Start menu search box to search for Outlook and open it.

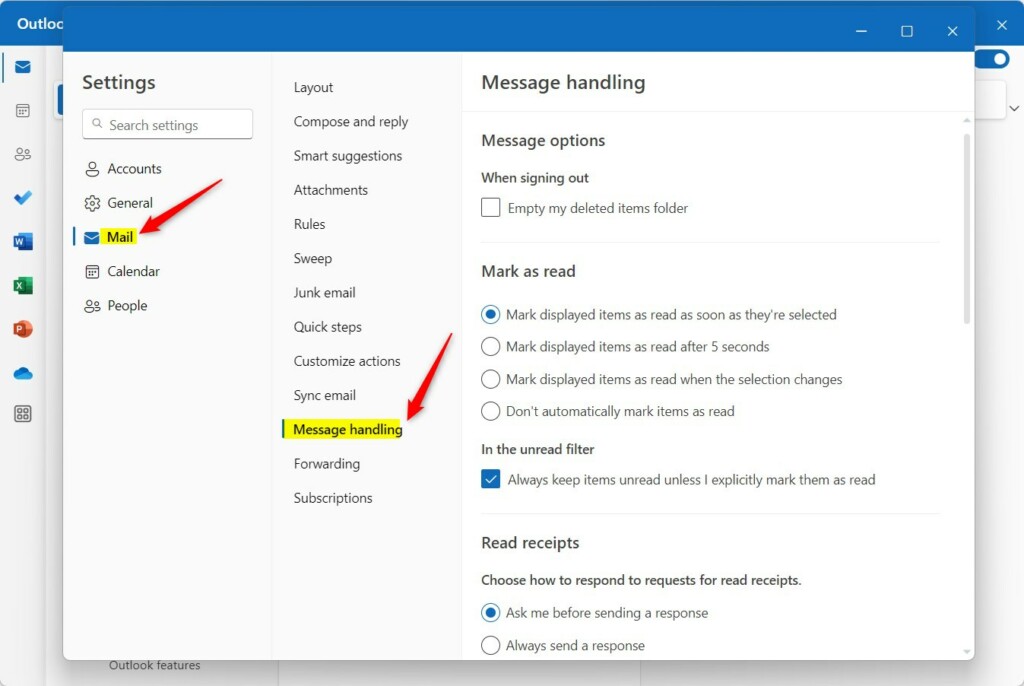
When the app opens, click the Settings button (gear on the top right) to proceed.

On the Settings page, click the Mail tab on the left sidebar and select Message handling on the right.
On the Message handling setting page, scroll down to the Translate section. Choose one of the options available:
- Always translate – Always translate messages received in other languages.
- Ask me before translating – Shows a message to confirm whether to translate messages received in other languages.
- Never translate – Never translate messages received in other languages.
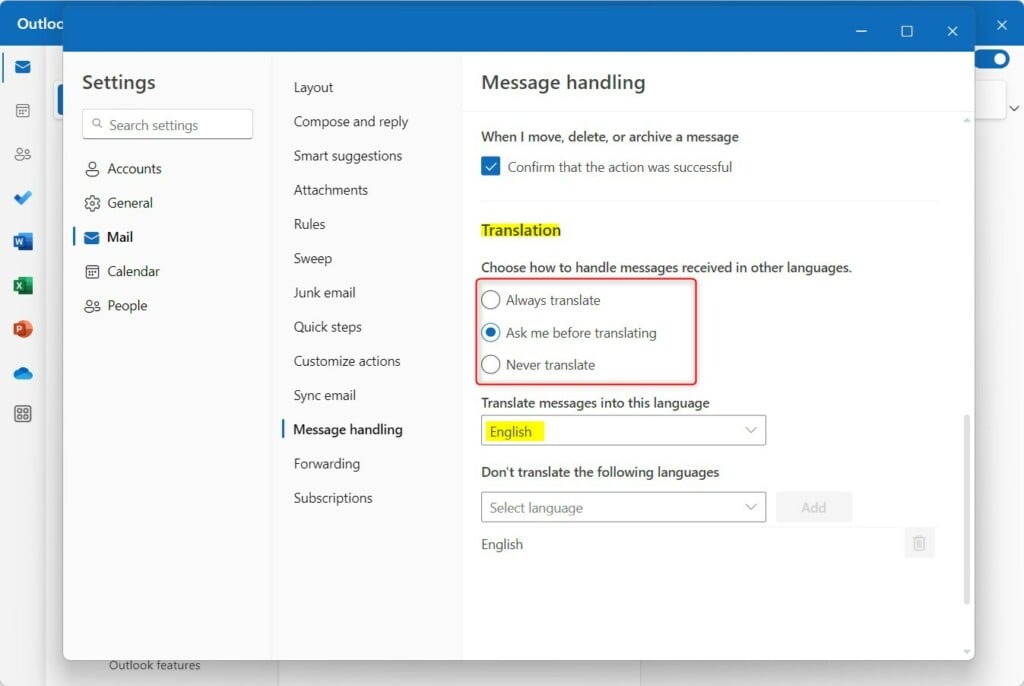
Once you select whether to translate foreign languages or not, choose the language you want to translate into. By default, it’s the default language set in Windows.
That should do it!
Conclusion:
- The new Outlook for Windows brings modern design and supports various email accounts, including Exchange-backed Microsoft 365 work or school, Outlook.com, Hotmail, and Gmail.
- Users can access features like email signatures, out-of-office automatic replies, email sorting, subscription management, email forwarding, and more.
- With the ability to translate messages in Outlook automatically, users can improve their understanding of business communication or read messages in their preferred language.
- Following the steps outlined, users can easily configure the automatic translation feature according to their preferences.


Leave a Reply