How to Exclude Files from Microsoft Defender on Windows 11
Excluding files from Microsoft Defender on Windows 11 tells the antivirus not to scan specific items, which helps trusted programs run faster and avoids mistaken security alerts.
Microsoft Defender is Windows 11’s built-in protection that scans your computer for threats. When you set up an exclusion, you’re telling Defender to ignore a particular file, folder, or program. This is useful if Defender wrongly flags something safe, like a game installer or a tool you use for work.
For instance, if you’re installing a new software that Defender incorrectly identifies as a threat, adding it to the exclusion list stops Defender from interfering. You can set exclusions based on file types, specific locations on your PC, or even running processes.
Exclude files from Microsoft Defender by opening Windows Security, navigating to Virus & threat protection, then Manage settings, and finally Add or remove exclusions. Click Add an exclusion and choose the type of item to exclude.
How to add exclusions in 🪟 Windows 11
You can tell Microsoft Defender to ignore certain files or folders on your Windows 11 computer by adding those files or folders to an exclusion list. Microsoft Defender exclusion list management is done directly within the Windows Security app. This direct management in the Windows Security app makes it easy to manage what Defender scans.
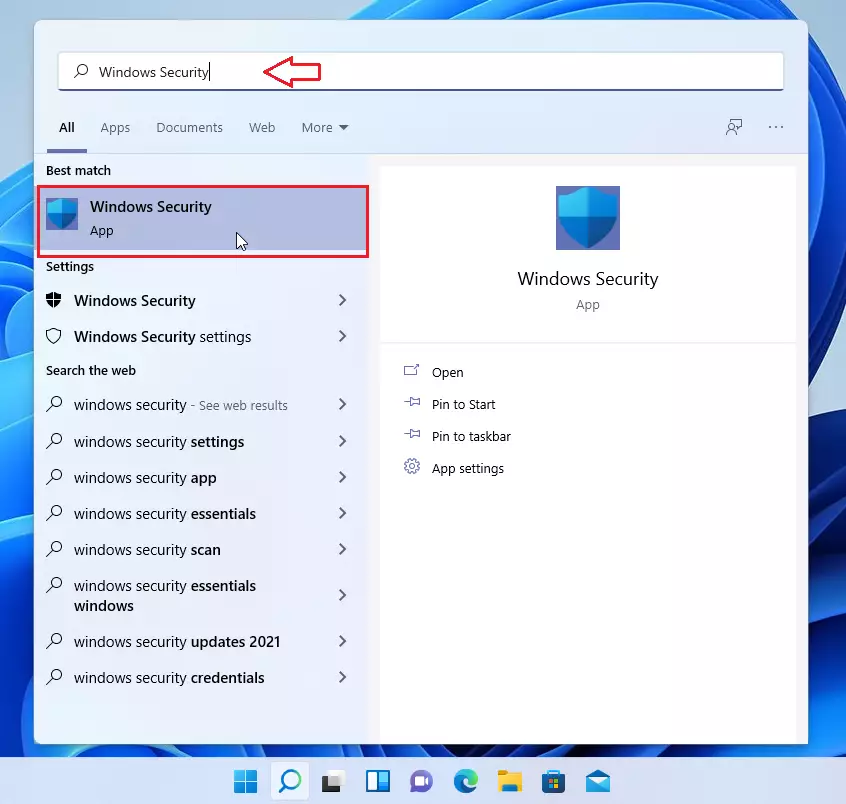
1. Click the Start button and type Windows Security. Open the app.
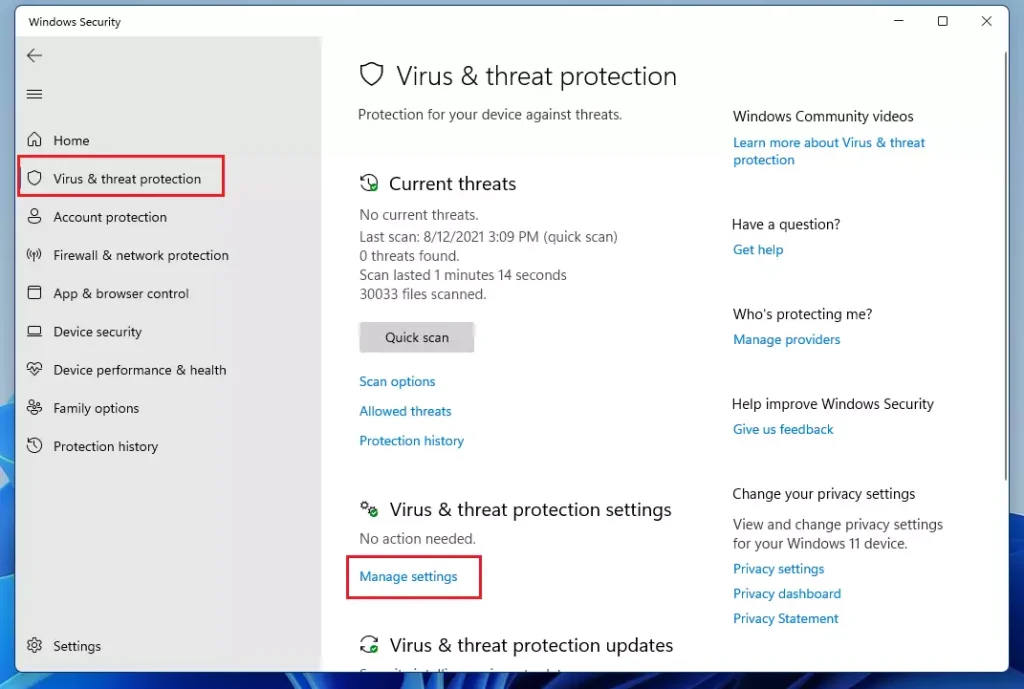
2. Click Virus & threat protection. Then, click Manage settings.
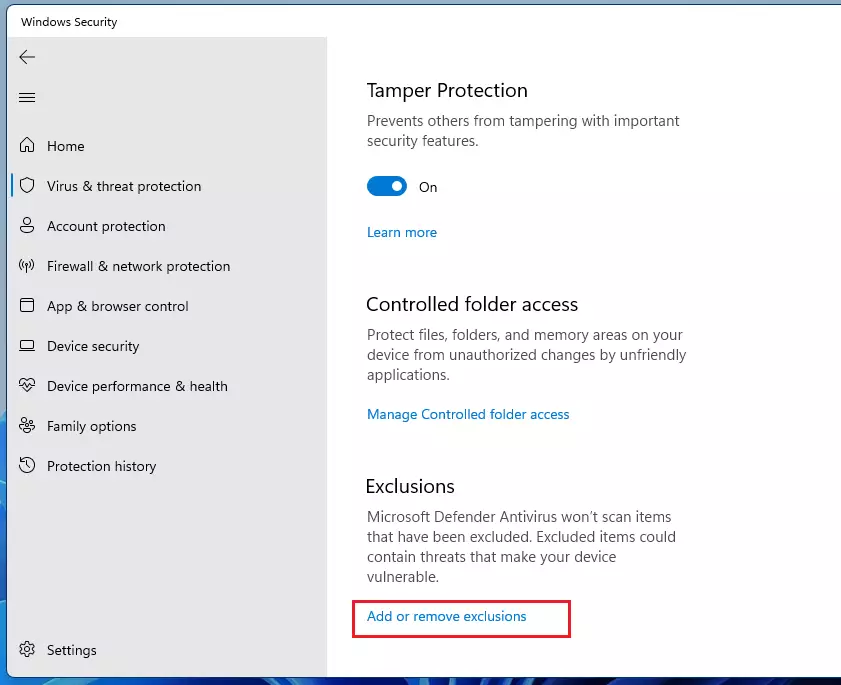
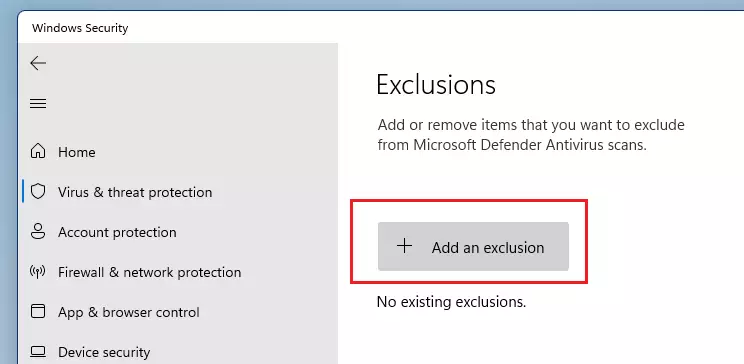
3. Scroll down and click Add or remove exclusions.
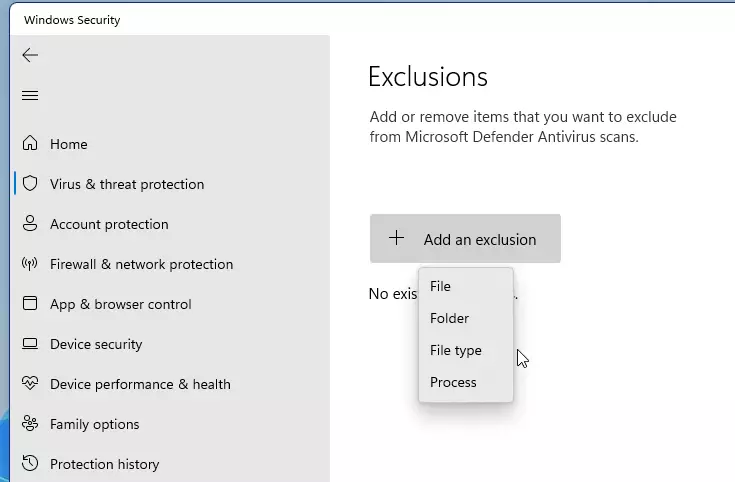
4. Click the Add an exclusion button and choose File, Folder, File type, or Process.
5. Select your item and confirm the change.
Comparison of Exclusion Methods
| Method | Best For | Difficulty |
|---|---|---|
| Windows Security App | Home users | Easy |
| PowerShell | Advanced users | Medium |
| Intune/GPO | IT Administrators | High |
Advanced Configuration and Enterprise Management
For businesses, managing Microsoft Defender exclusions across many computers is possible using tools like Configuration Manager or Intune. PowerShell also allows quick changes to exclusion lists on individual machines or groups of files.
Add-MpPreference -ExclusionPath "C:\Projects\Development"
And if you need to exclude entire groups of files, you can use wildcards. For instance, using C:\Projects\*\bin will exclude the ‘bin’ folder inside every subfolder of your projects directory.
Validation and Verification
You can check if your Microsoft Defender exclusions are working correctly by viewing the current list of ignored paths in PowerShell. You can also use the MpCmdRun.exe tool to run manual scans and confirm that your excluded files are being skipped.
Get-MpPreference | Select-Object -ExpandProperty ExclusionPath
This command lists all paths currently ignored by Defender. You can also use the MpCmdRun.exe tool to perform manual scans and verify that your excluded files are skipped during a scheduled scan.
Best Practices for Security
C:\ or common system folders. Prefer file-specific exclusions over folder-wide ones to keep your system as safe as possible.Summary
Adding exclusions to Microsoft Defender can speed up trusted apps, and these settings are managed through Windows Security or PowerShell.
Are exclusions safe for all file types?
No, exclusions are not inherently safe. When you exclude a file, you remove the security layer for that specific item. Only exclude files that you trust completely, such as your own source code or trusted game files, to minimize the risk of malware infection.
What is the difference between file and process exclusions?
A file exclusion tells Defender to ignore a specific file or folder on your hard drive. A process exclusion tells Defender to ignore everything a specific program does while it is running, such as ignoring all activity from a specific database engine.
Was this guide helpful?

About the Author
Richard
Tech Writer, IT Professional
Richard, a writer for Geek Rewind, is a tech enthusiast who loves breaking down complex IT topics into simple, easy-to-understand ideas. With years of hands-on experience in system administration and enterprise IT operations, he’s developed a knack for offering practical tips and solutions. Richard aims to make technology more accessible and actionable. He's deeply committed to the Geek Rewind community, always ready to answer questions and engage in discussions.


No comments yet — be the first to share your thoughts!