How to Access UEFI BIOS in Windows 11 – Easy Steps

- 3 ways to do it
- Needs administrator rights
- Includes a restart or sign-out
UEFI BIOS is the low-level firmware that checks your hardware before Windows starts. On a Windows 11 PC you can reach it through the Windows Recovery Environment, or by pressing a key during startup.
You need this screen to change the boot order, turn on hardware features, or fix system problems. The fastest route takes under 10 seconds. Hold down the Shift key while you click Restart in the Start menu. Windows restarts into a blue recovery screen, and from there you pick the firmware option (the full steps are in the second method below).
On Windows 11, hold Shift and click Restart in the Start menu to reach the blue recovery screen, then select Troubleshoot Advanced options UEFI Firmware Settings to open the BIOS. Alternatively, restart your PC and tap F2, Del, or F12 immediately as it powers on, depending on your manufacturer.
Method 1Use Keyboard Keys When Starting Your Computer
The first method is the startup shortcut key. Press your manufacturer’s key right as the machine powers on. The right key depends on the motherboard or PC brand. If you miss the timing, restart and try again.
- Shut down the PC completely, or restart it.
- Press the power button, then start tapping the key straight away. Tap it repeatedly rather than holding it down.
- Keep tapping until the firmware screen appears. If Windows starts loading instead, you were too late. Restart and try again.
Check the manufacturer’s logo screen. Many PCs show a short line such as “Press F2 to enter Setup”. The manual or support page for your model will also list the key.
Common keys to try include:
- Esc
- Delete
- F1
- F2
- F10
- F11
- F12
Delete, F2, Esc and F1 are the most common. On some laptops you may need to hold the Fn key as well, depending on how the function keys are set.
If this method keeps failing, the PC is probably booting too fast to catch the key. Use the Advanced startup method below instead.
For a tablet, hold the Volume Up or Volume Down button while you power it on. Which button works depends on the model, so try the other one if the first doesn’t. This starts the UEFI BIOS sequence directly.
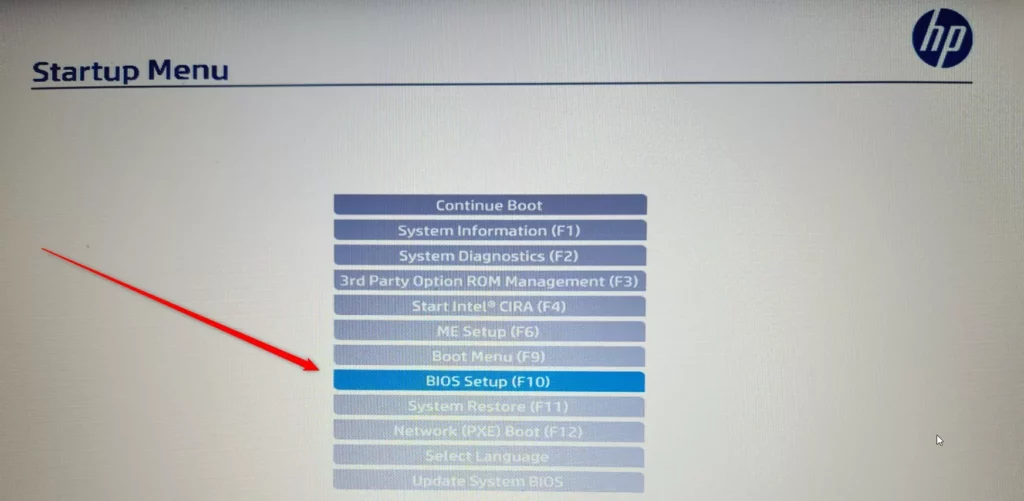
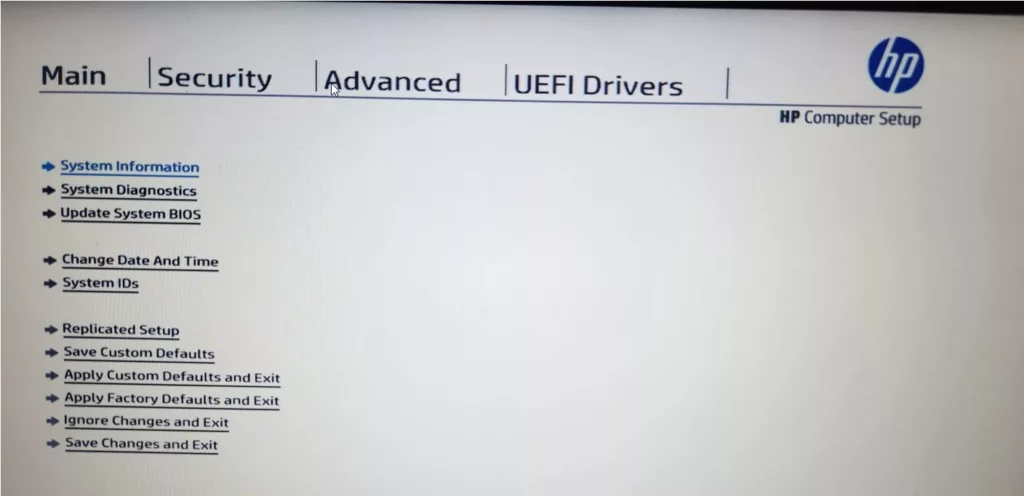
Once you are inside the UEFI BIOS screen, you can adjust the boot order or turn on hardware features. The layout differs between manufacturers. Most screens use the keyboard, and many newer ones also accept the mouse.
Most firmware shows a key legend at the bottom of the screen, often F10 for save and exit. If you change your mind, choose the option to discard changes or load default settings. Then exit without saving.
A wrong boot order or a disabled drive controller can stop Windows from starting. If the PC uses BitLocker, changing some firmware settings may cause Windows to ask for your recovery key at the next boot. Make sure you know where that key is saved.
Method 2Use 🪟 Windows 11 Advanced Startup Settings
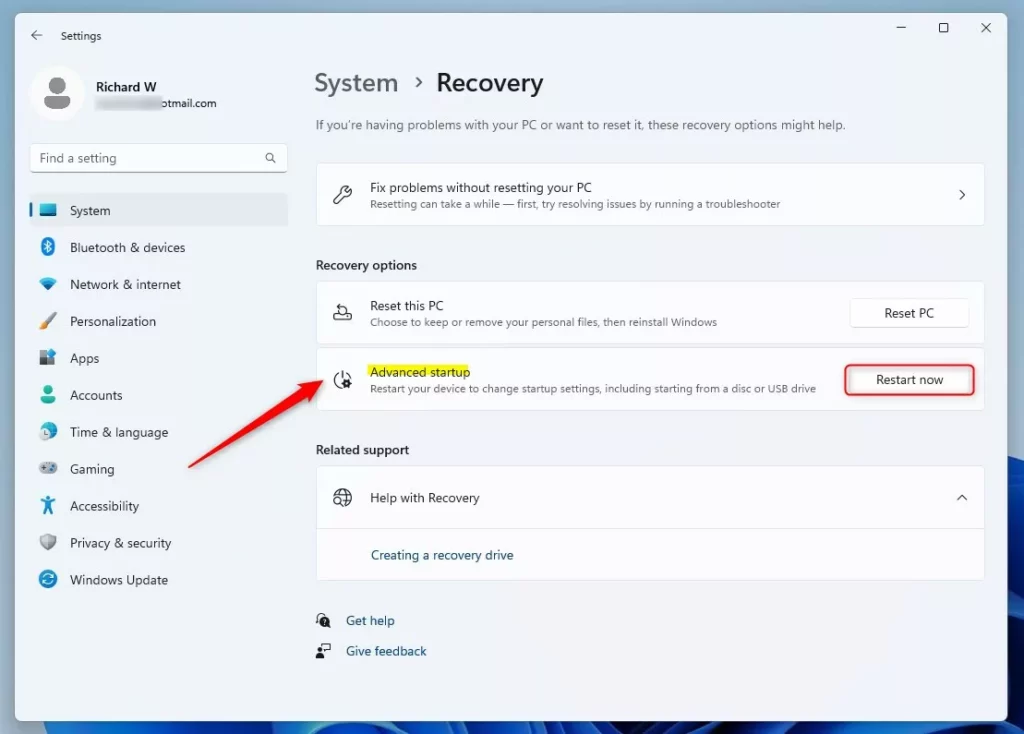
The second method works from inside Windows, using the Advanced startup option in Settings. It helps when the keyboard shortcut fails or the PC boots too fast to catch the key. It works the same on Windows 11 Home and Pro.
- Click the Start button, then open Settings.
- Choose System Recovery.
- Under Advanced startup, click Restart now. Windows warns that it will restart your device, so save your work and close your apps first. Confirm by clicking Restart now again.
The shortcut from earlier does the same thing. Hold Shift and click Restart in the Start menu, and you land on the same blue screen.
After your computer restarts, you will see a blue screen titled Choose an option. Follow these steps:
- Select Troubleshoot.
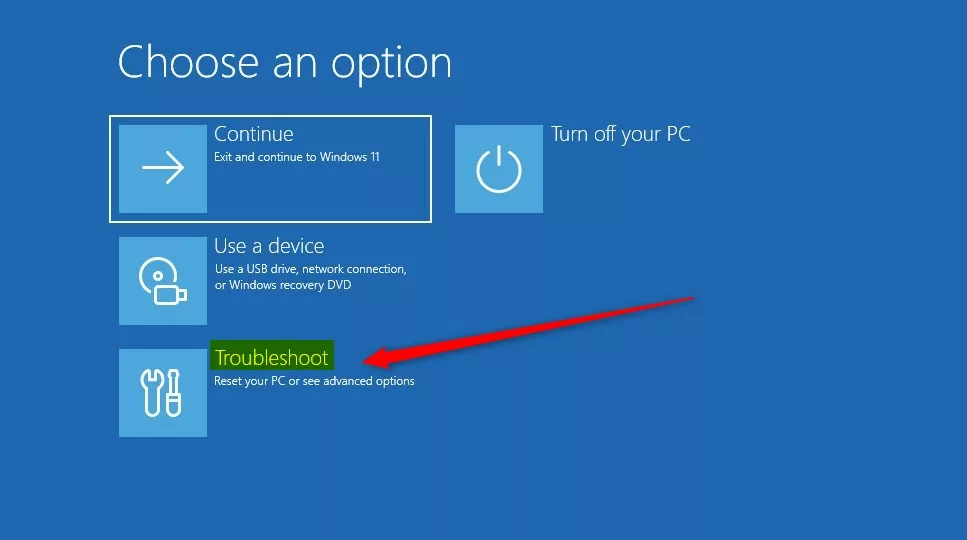
windows 11 advanced startup boot troubleshoot - Select Advanced options.
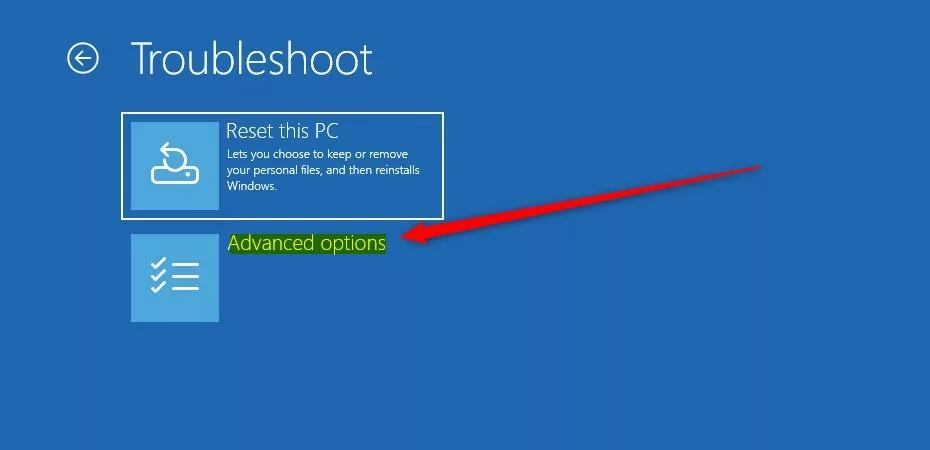
windows 11 advanced startup boot advanced options - Select UEFI Firmware Settings.
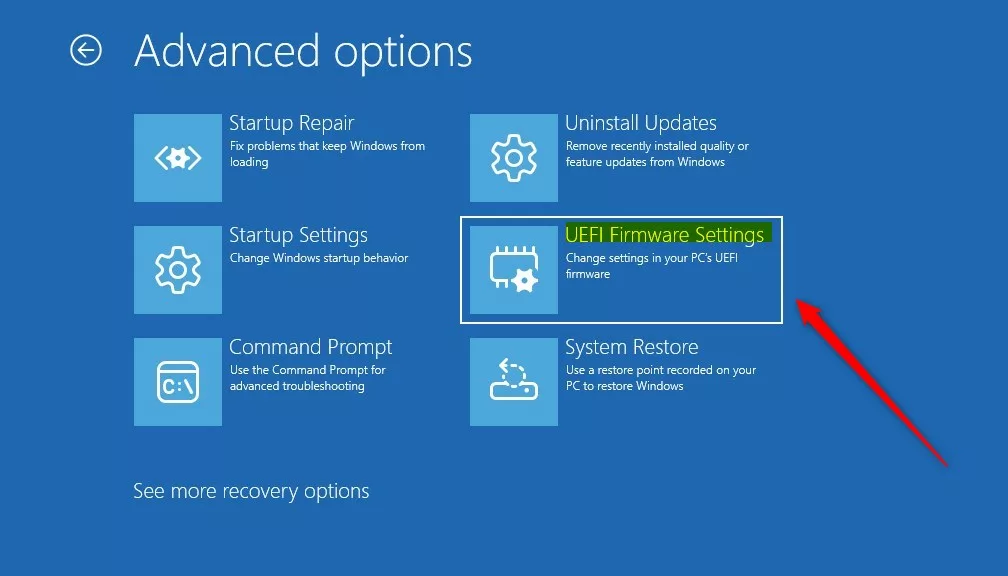
windows advanced startup uefi firmware settings
Your computer restarts and opens the UEFI BIOS menu automatically. On some PCs you also have to click a Restart button on this last screen to confirm.
If UEFI Firmware Settings is missing, the PC is probably running in legacy BIOS mode, or the hardware doesn’t support this option. In that case, use the startup key method instead.
Method 3Use a Command to Restart into UEFI BIOS
The third method is a single command run from an administrator terminal. It restarts the PC right away and takes you straight to the firmware settings, skipping the normal Windows load. Open a terminal with administrative rights, run the command shown below, and press Enter.
shutdown /r /fw /t 0Here’s how:
- [Admin Required] Right-click the Start button and select Windows Terminal (Admin). You can also open Command Prompt or PowerShell as administrator. If a User Account Control prompt appears, click Yes.
- Type or paste the command above and press Enter. The restart starts at once, so save your work first.
- Wait for the restart. Your PC takes you straight to the UEFI BIOS settings.
If the command fails or the PC just reboots into Windows, check that the terminal is running as administrator. A PC without UEFI firmware, or one in legacy BIOS mode, can’t use this method.
Summary
- UEFI BIOS lets you control how your computer starts and runs.
- You can enter UEFI BIOS using keyboard keys during startup, Windows Advanced Startup, or a simple command.
- Knowing how to access UEFI BIOS helps you customize and fix your device.
You can reach UEFI BIOS in Windows 11 in three main ways, depending on whether the PC is already running or starting from cold. You can tap keys during boot, use the Advanced startup option in Settings, or run a command from an administrator terminal. Each one ends at the same firmware screen, where you can change hardware settings and the boot order. If one method doesn't work on your PC, try another.
Have a question about this guide?
Answered by AI from this guide. Good questions may be added to this page — please don't include personal details.
Did this guide fix your problem?

About the Author
Richard
Tech Writer, IT Professional
Richard is a writer at Geek Rewind who turns complex IT tasks into clear, step-by-step guides. He draws on years of hands-on experience in system administration and enterprise IT operations, focusing on Windows, Linux and WordPress: the problems people actually run into, and the fixes that work. His server and WordPress guides come from systems he runs himself. Richard builds and maintains the platform behind Geek Rewind, from its Ubuntu servers and Nginx configuration to its custom WordPress plugins. Many new tutorials start with readers' questions, and he's always glad to answer them in the comments.
No comments yet — be the first to share your thoughts!