How to Enable or Disable Snap Windows in Windows 11
Snap Windows in Windows 11 lets you easily arrange multiple app windows on your screen.
This feature automatically resizes and positions your open programs into neat side-by-side layouts or predefined arrangements, helping you use your screen space efficiently. It’s great for when you’re working with several apps at once.
For example, Snap Windows can quickly set up two apps to take up half your screen each. You can even arrange up to four windows into perfect corners. You find this setting in the main Windows 11 Settings app.
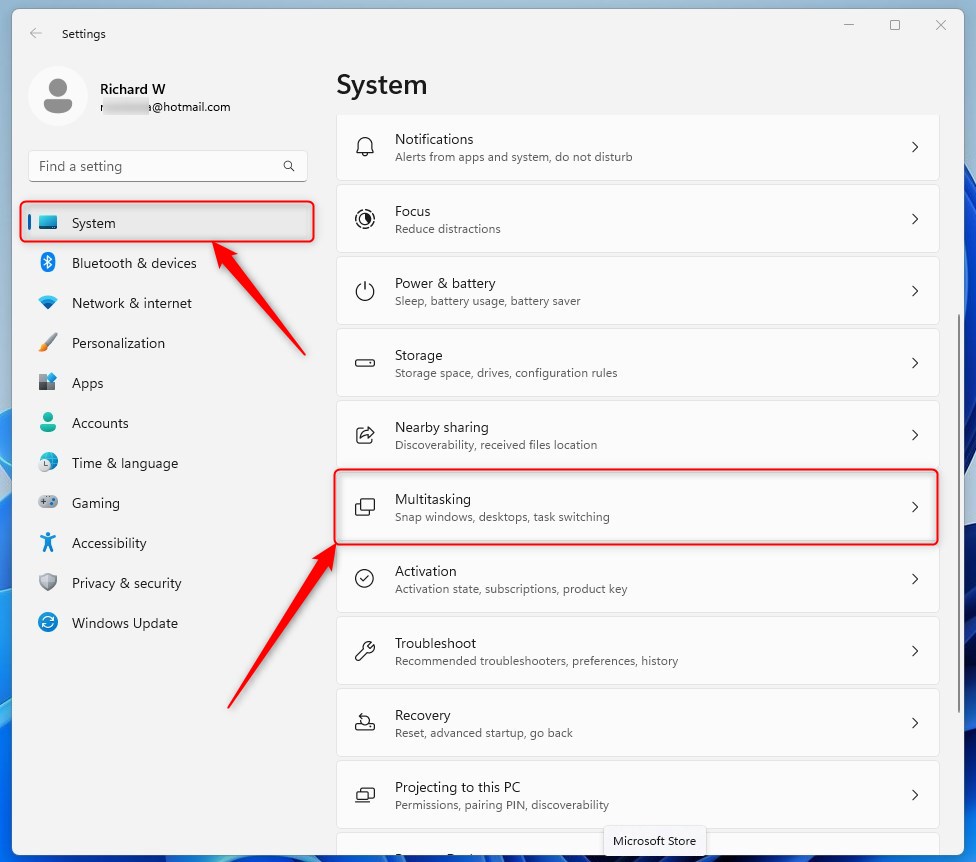
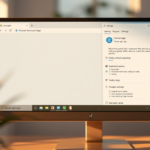
Open Settings, navigate to System, then Multitasking. Toggle the “Snap windows” switch to On or Off to control automatic window arrangement. This feature helps organize multiple application windows on your screen.
What is Snap Windows?
Snap windows in Windows 11 is a feature that helps you arrange your open apps on your screen, placing them side-by-side or in different layouts. This makes it simpler to see and switch between programs, which is great for multitasking.
For more in-depth guidance, Microsoft’s official support page, titled “Snap Your Windows,” offers detailed instructions on managing the Snap feature. This page provides guidance for users who want to learn how to turn Snap windows on or off, a function that helps organize open application windows on the screen. Accessing this resource helps users understand how to control window layouts effectively.
Why Use Snap Windows?
Snap windows saves you time. Instead of manually resizing windows, you let Windows do the work. This is helpful when you need to compare information or work between two programs at once.
How to Turn Snap Windows On or Off in Settings
- Click on System on the left side.
- Click on Multitasking on the right side.
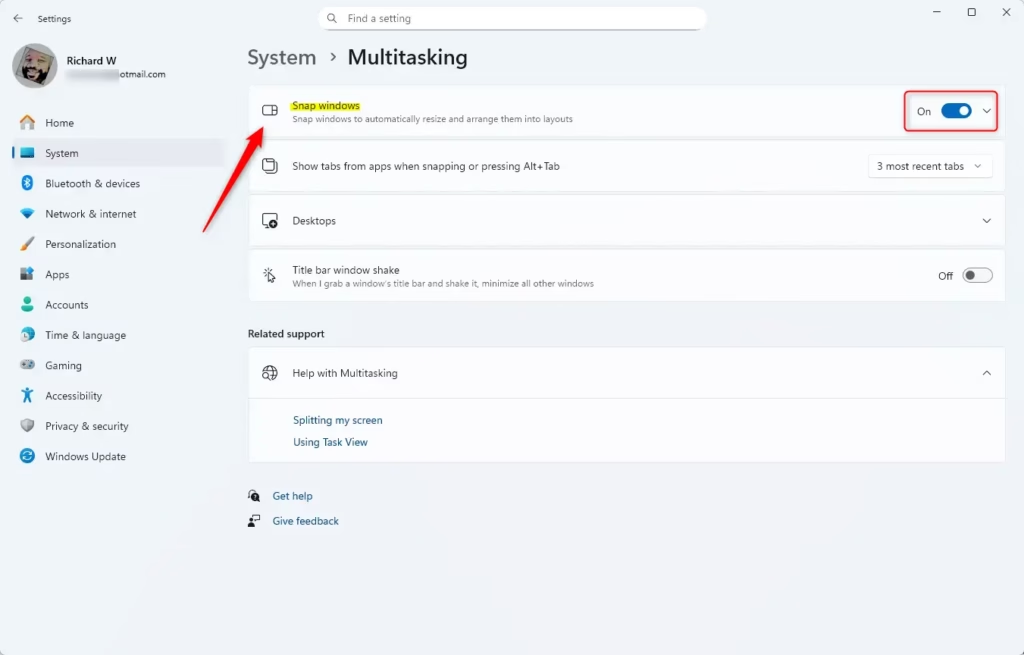
- Under Snap windows, toggle the switch to On to enable it , or Off to disable it .
To turn Windows 11 snap windows on or off using the Settings app, open Settings and navigate to System, then Multitasking. Locate the Snap windows option; you’ll find a switch to toggle it On or Off.
What happens when disabled: When Snap windows is turned off, you won’t be able to drag windows to screen edges to snap them. You also can’t double-click the top edge to maximize vertically. You’ll need to resize windows by hand.
How to Turn Snap Windows On or Off Using Control Panel
- Open the Control Panel. You can search for it in the Start menu.
- Make sure your Control Panel view is set to Small icons or Large icons.
- Click on Ease of Access Center.
- Click on any of these links:
- Make the mouse easier to use
- Make the keyboard easier to use
- Make it easier to focus on tasks
- Look for the option Prevent windows from being automatically arranged when moved to the edge of the screen.
- Check this box to turn off Snap windows, or uncheck it to turn on Snap windows.
- Click OK to save your choice.
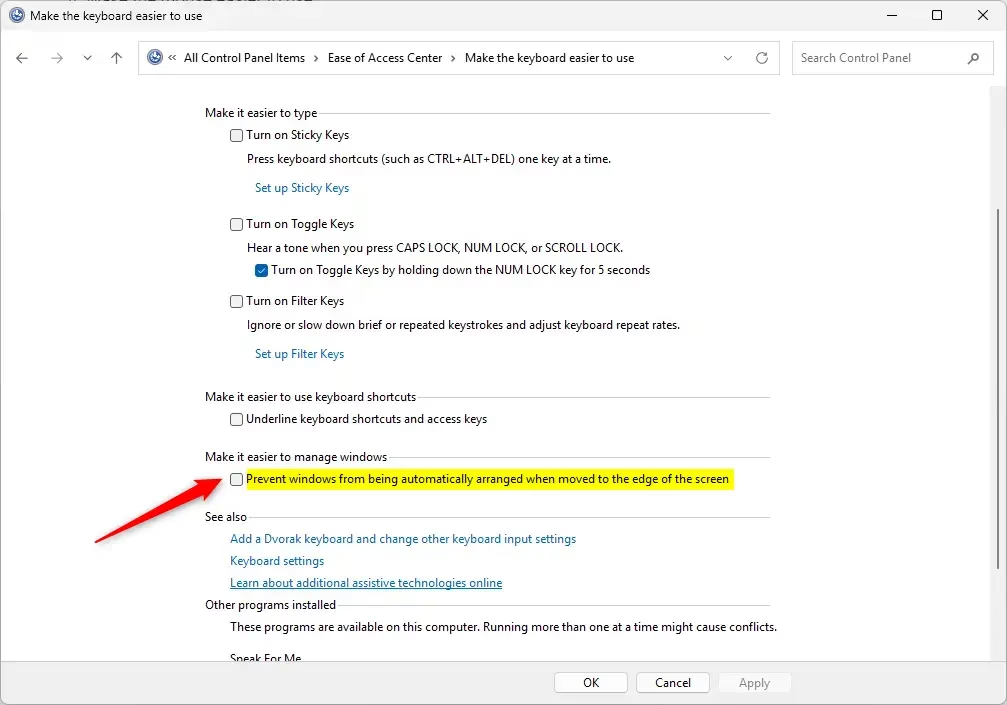
Snap windows can also be controlled through the Control Panel. First, open the Control Panel and ensure your view is set to Small icons or Large icons. Then, click on Ease of Access Center and look for options related to making windows easier to manage.
How to Turn Snap Windows On or Off Using the Registry (Advanced)
Flag: You’ll also need administrator access for the steps that follow.
Turn On Snap Windows (Default)
reg add "HKCU\Control Panel\Desktop" /v WindowArrangementActive /t REG_SZ /d 1 /fTurn Off Snap Windows
reg add "HKCU\Control Panel\Desktop" /v WindowArrangementActive /t REG_SZ /d 0 /fThings to Know About Snap Windows
For Windows 11 snap windows to work correctly, your screen resolution is important. It should be at least 1024×768 pixels, with 1366×768 or higher being recommended. Newer updates also add helpful tips when you use the snap feature.- Screen Size: Your screen resolution should be at least 1024×768 for Snap windows to work well. Windows 11 recommends 1366×768 or higher.
- New Features: Recent Windows 11 updates show helpful tips when you use Snap. They also suggest Microsoft Edge tabs for snapping side by side.
- What Happens When Disabled: Turning Snap off stops windows from snapping when dragged to edges. It also disables vertical maximize by double-clicking the top edge.
Summary
Snap windows in Windows 11 is a helpful tool for organizing your apps and getting more done. You can turn this feature on or off using the Settings app or the Control Panel. This summary shows you the main ways to manage your snap windows settings.
Snap windows can be turned on or off in three ways:
- Using the Settings app (quick and easy)
- Through the Control Panel’s Ease of Access Center
- By editing the Windows Registry (for advanced users)
Snap windows in Windows 11 help you multitask by automatically arranging open applications. You can turn Snap windows off if you prefer to arrange windows manually on your screen.
Was this guide helpful?

About the Author
Richard
Tech Writer, IT Professional
Richard, a writer for Geek Rewind, is a tech enthusiast who loves breaking down complex IT topics into simple, easy-to-understand ideas. With years of hands-on experience in system administration and enterprise IT operations, he’s developed a knack for offering practical tips and solutions. Richard aims to make technology more accessible and actionable. He's deeply committed to the Geek Rewind community, always ready to answer questions and engage in discussions.


No comments yet — be the first to share your thoughts!