How to Setup PuTTY for SSH Key Authentication on Windows 11
You can set up PuTTY for SSH key authentication on Windows 11 by generating a key pair and configuring PuTTY to use your private key. SSH key authentication offers superior security compared to password-based logins, making it significantly harder for unauthorized access.
This method employs a cryptographic two-part system, a public key and a private key, eliminating the vulnerability of password guessing or phishing attacks. You’ll gain the convenience of automatic logins to your SSH servers without repeatedly typing your password.
This article guides you through generating your SSH key pair using PuTTYgen and then configuring PuTTY itself to utilize your private key for secure, passwordless authentication. This is essential for securing your server access.
Generate an SSH key pair using PuTTYgen, save both keys, and copy the public key to your server. Then, configure PuTTY by navigating to Connection > SSH > Auth, browsing to your private key file, and saving the session.
How to download and install PuTTY on 🪟 Windows 11
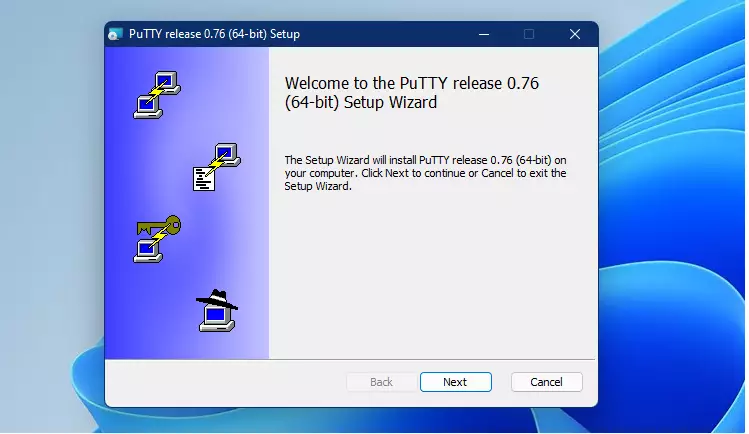
PuTTY is a popular tool for connecting to remote servers. To get started, download it from the official site using the link below.
Choose the 64-bit installer and save it to your Downloads folder.

Open your Downloads folder and double-click the installer file to begin.
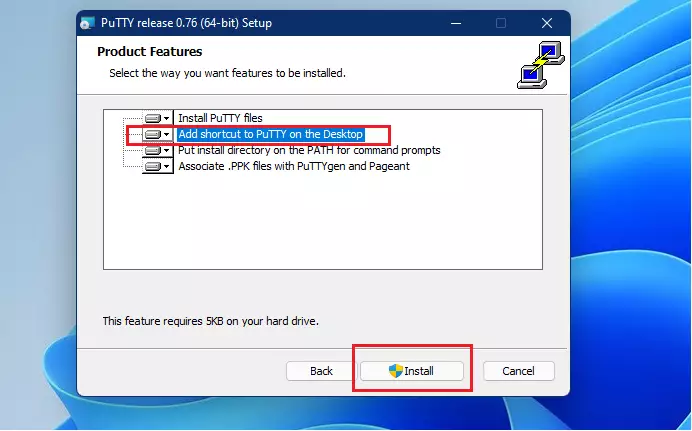
Follow the steps on the screen. When you reach the options page, make sure to select “Add shortcut to PuTTY on the Desktop” and click Install. Note: This step requires admin privileges.
How to generate a PuTTY SSH key pair
Before you can connect, you need a key pair. You will need a tool called PuTTYgen. Download it from the same link you used for PuTTY.

Find the downloaded file in your Downloads folder and open it.
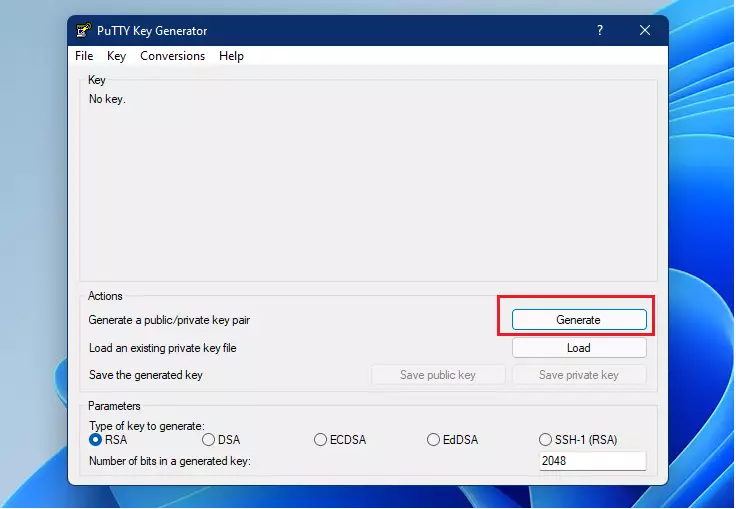
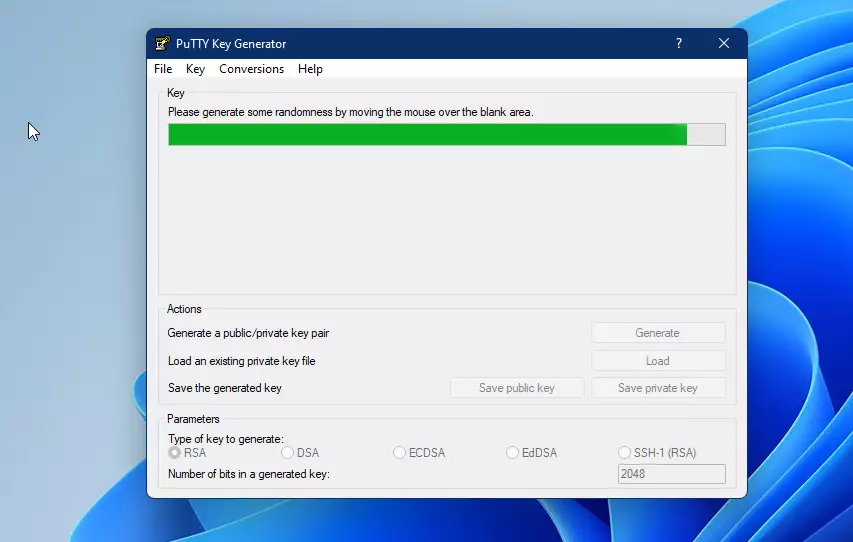
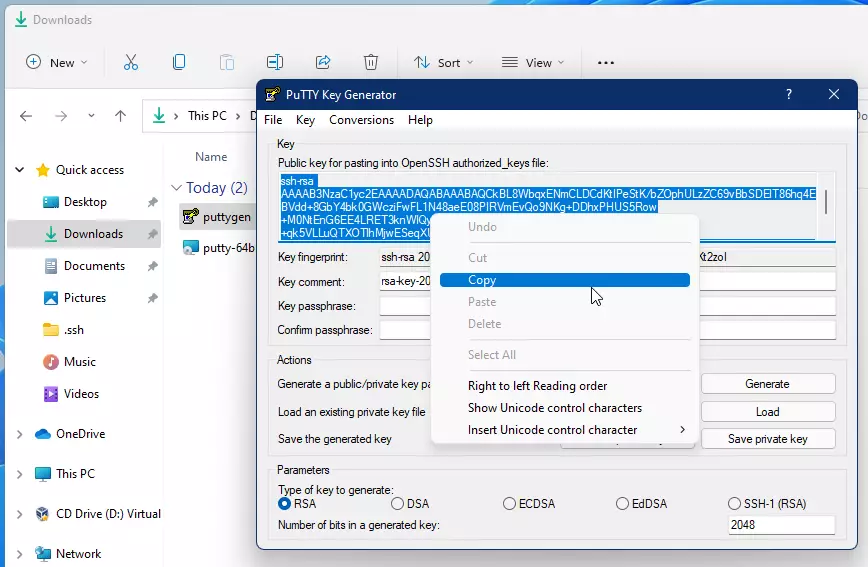
Click the Generate button. Move your mouse cursor randomly around the empty space in the window. Keep moving it until the green progress bar is full.
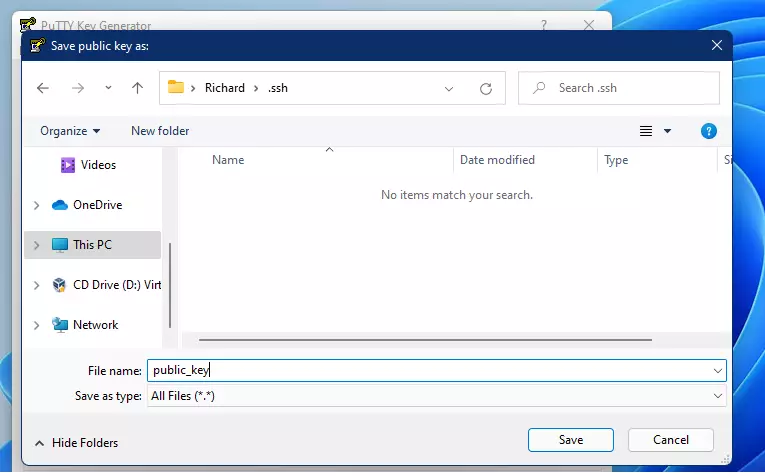
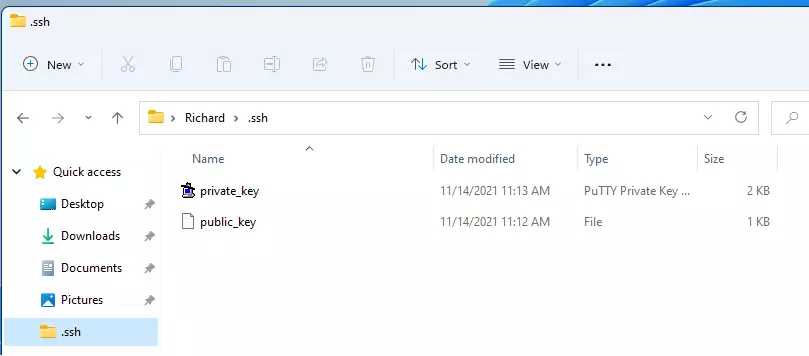
Once the keys appear, add a comment to identify them. Save both the Public and Private keys in a safe place on your computer.
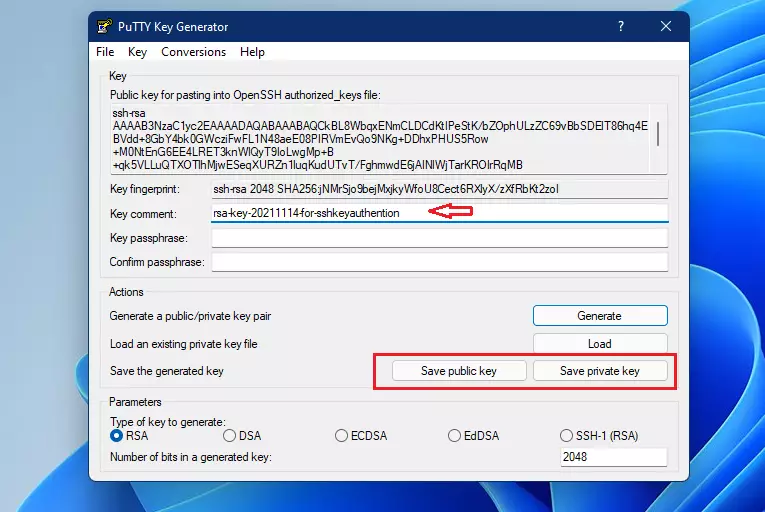
It is best to save these in your home folder at this path: C:\Users\username\.ssh (Replace “username” with your actual Windows account name).
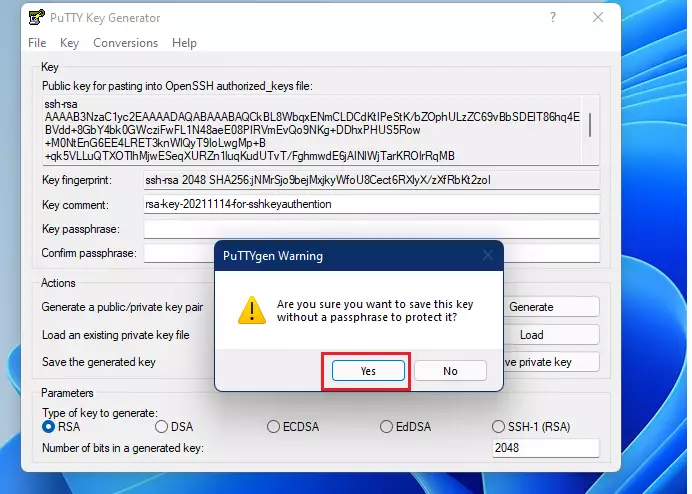
When you save the Private Key, you might see a warning about not having a passphrase. Click Yes to proceed.
Make sure both files are saved in your chosen folder.
How to copy your public key to the server
Now you must put your public key on the server you want to connect to. Log in to your remote server and run these commands to create a place for the key:
cd ~/
mkdir .ssh
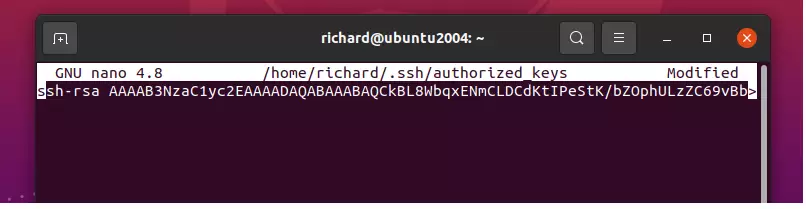
nano ~/.ssh/authorized_keys
Copy your public key from the PuTTYgen app, paste it into the file, and save it.
How to turn off password login
To make your server safer, turn off standard password logins. Note: This step requires admin privileges.
On your server, open the configuration file:
sudo nano /etc/ssh/sshd_configFind these lines and make sure they look like this:
PasswordAuthentication no

ChallengeResponseAuthentication no

UsePAM no
Save the file and restart the SSH service:
sudo systemctl restart sshHow to set up PuTTY for your connection
Open PuTTY on your desktop. Go to SSH and then Auth. Click Browse and select the private key file you saved earlier.
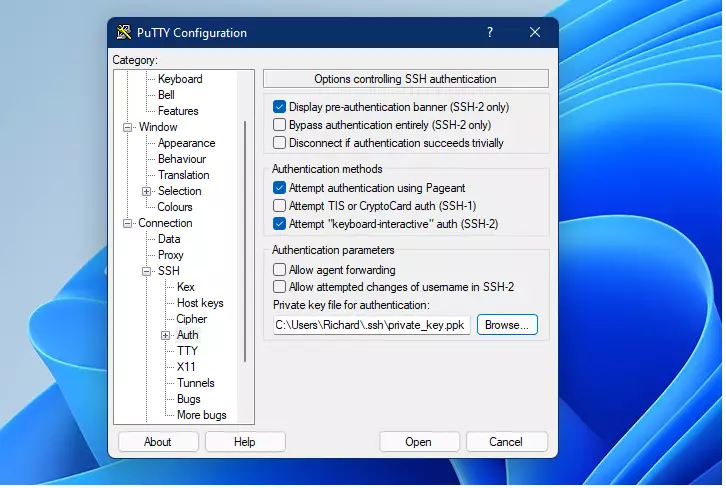
Go back to the Session tab. Type your username and server IP address (e.g., username@10.0.2.19). Give it a name and click Save.
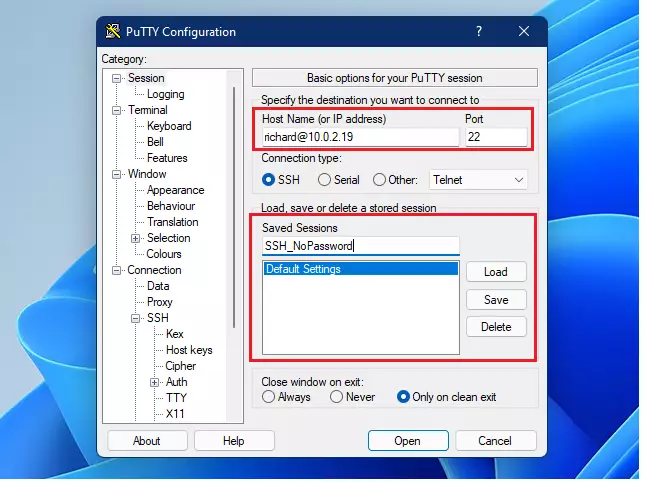
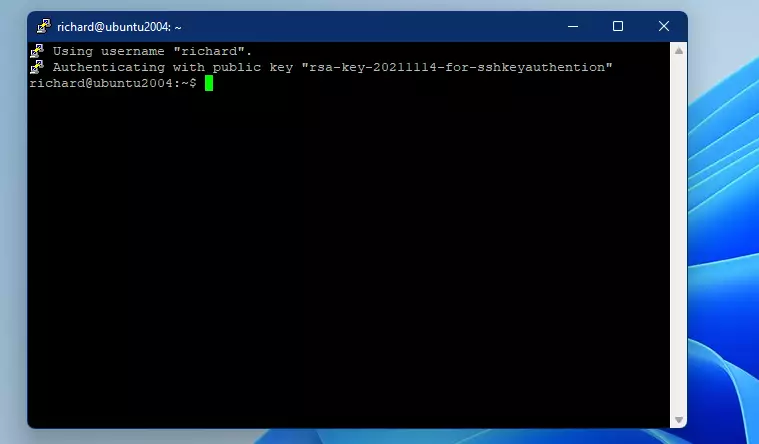
You can now use this saved session to log in securely without a password.
Summary
Setting up PuTTY with SSH keys makes your server connections more secure and faster. By following these steps, you have installed the necessary software, created a secure key pair, updated your server settings, and configured PuTTY for easy, password-free access.
Was this guide helpful?

About the Author
Richard
Tech Writer, IT Professional
Richard, a writer for Geek Rewind, is a tech enthusiast who loves breaking down complex IT topics into simple, easy-to-understand ideas. With years of hands-on experience in system administration and enterprise IT operations, he’s developed a knack for offering practical tips and solutions. Richard aims to make technology more accessible and actionable. He's deeply committed to the Geek Rewind community, always ready to answer questions and engage in discussions.


No comments yet — be the first to share your thoughts!