

This article explains how to change the screen recordings folder for the Snipping tool app in Windows 11.
The Snipping Tool is a built-in screenshot tool in Windows that lets you capture screenshots of any part of your screen, including full-screen captures, individual windows, or user-defined capture areas.
With the Snipping Tool, you can redact text, disable screen capture and recording, including system audio and microphone when recording, disable automatically saving screenshots, change screenshots folder, and more.
Starting with the Snipping Tool app version 11.2408.13.0, Microsoft added a feature to change the default folder used for screen recordings. Users can adjust the folder using the settings.
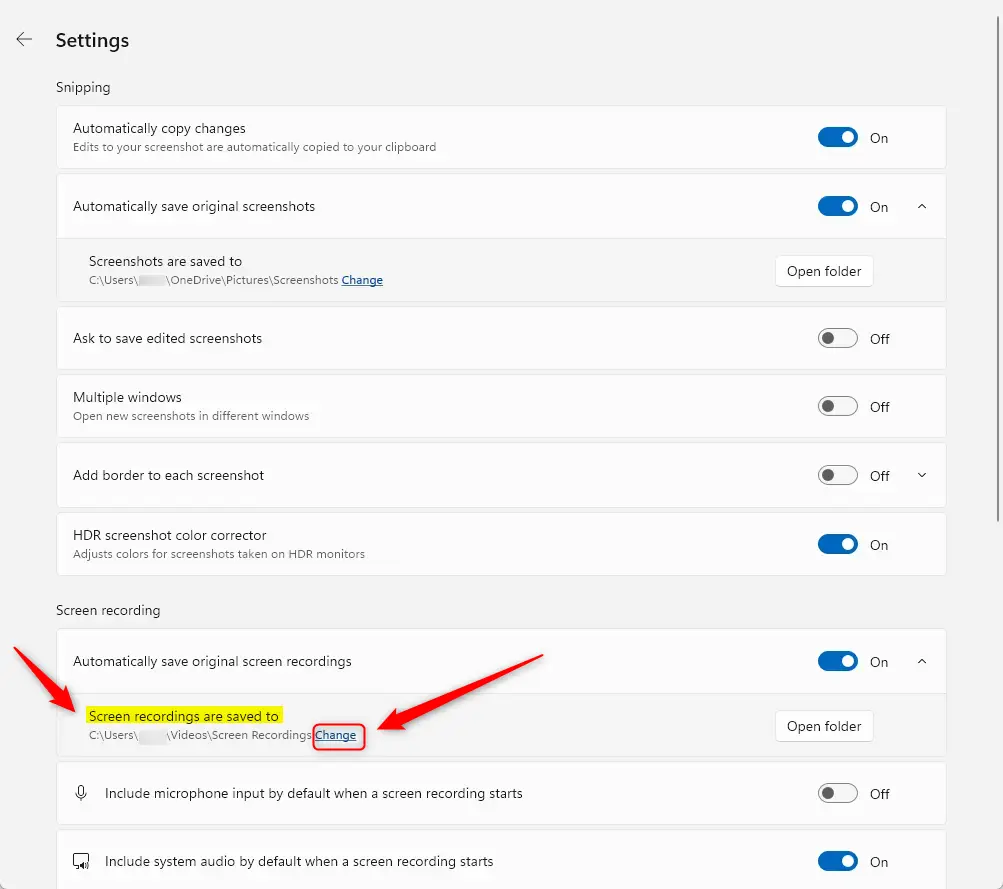
Screenshots by the Snipping Tool are automatically saved to the C:Users<username>VideosScreen Recordings folder for your account by default. You can change to another location now.
Change screen recordings folders for Snipping Tools
As mentioned, starting with the most recent version, users can change the default location to save screen recordings with the Snipping Tool app.
Here’s how to do it.
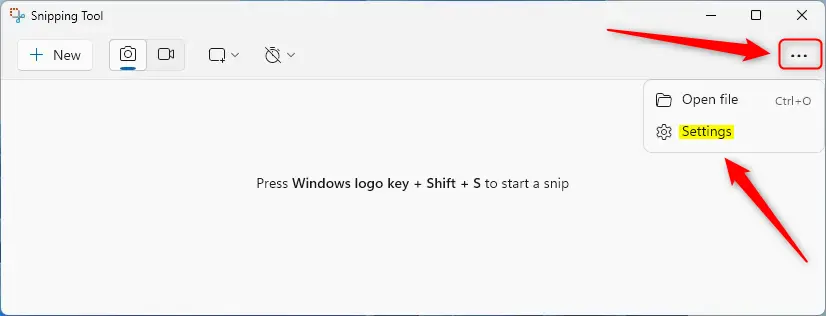
First, open the Snipping Tool.
Then, click the See more (three dots) button and select Settings.
Select the “Screen recordings are saved to” tile on the Settings pane. Then click the “Change” link to select a new folder.
A new File Explorer window will open. Select the folder where you want to save your screen recordings and changes.
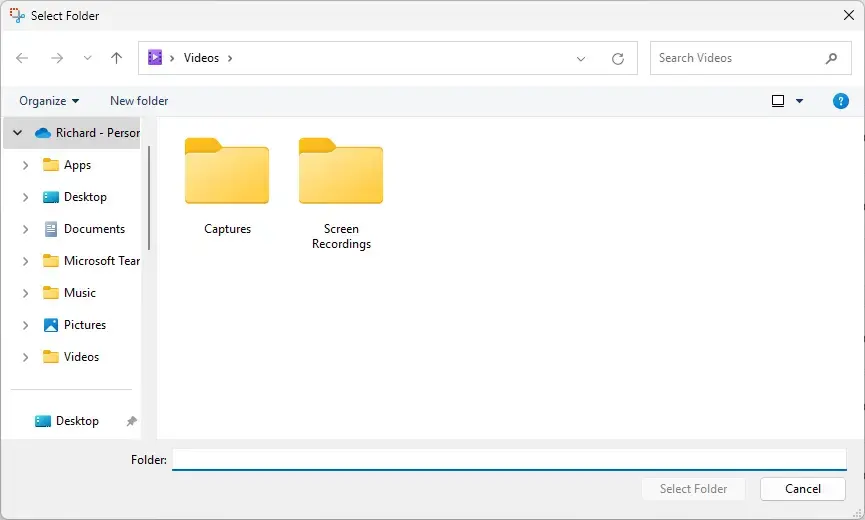
Close the app when you are done.
That should do it!
Conclusion
In summary, changing the screen recordings folder for the Snipping Tool in Windows 11 is a straightforward process. Here are the key points to remember:
- The Snipping Tool allows you to capture screenshots and screen recordings easily.
- Users can customize the default folder for screen recordings starting with version 11.2408.13.0.
- To change the folder, open the Snipping Tool, access Settings, and select the desired location.
- This feature enhances organization by allowing you to save recordings in a location of your choice.
- Remember to close the app after making changes to ensure they are appropriately saved.
Following these simple steps, you can manage your recordings efficiently and keep your files organized.


Leave a Reply