How to Hide and Unhide Files and Folders in Windows 11
Want to hide some files or folders on your Windows 11 PC so others don’t see them? Or maybe you want to show hidden ones? This simple guide will help you do that step-by-step.
What Are Hidden Files and Folders?
Hidden files and folders are special items that Windows keeps out of sight by default. They’re marked with a “hidden” tag so you don’t see them unless you want to.
Sometimes, important system files are also hidden to avoid accidental changes.
If you choose to show hidden files, their icons will look a bit faded in File Explorer.
How to Hide or Unhide Files Using File Properties
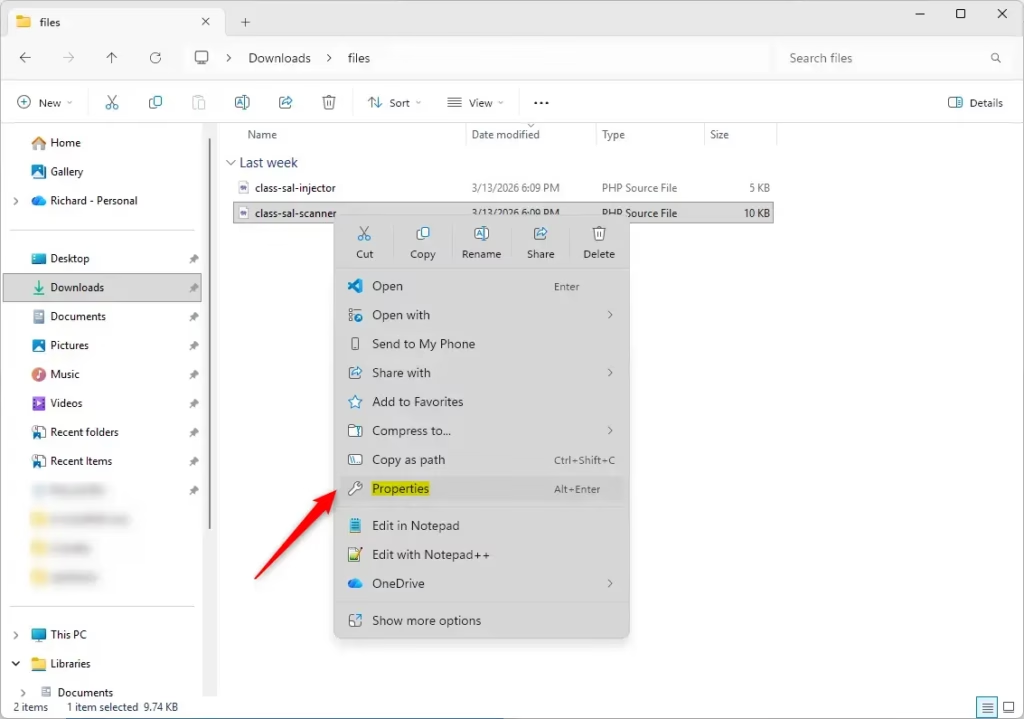
- Find the file(s) you want to hide or unhide.
- Right-click the file and choose Properties.
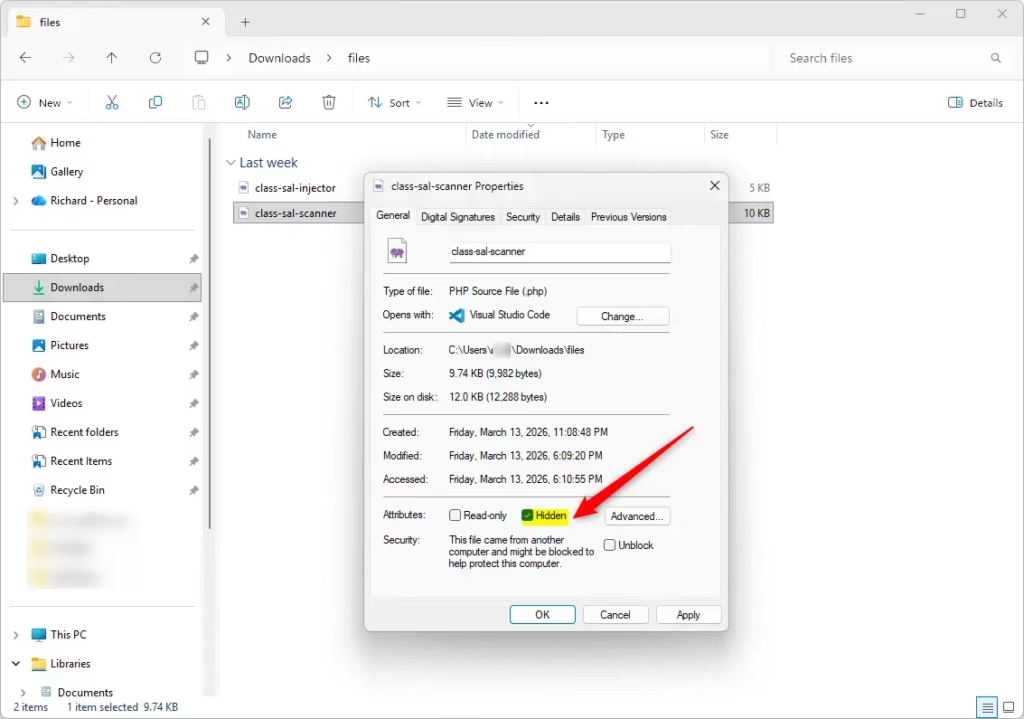
- In the General tab, look for the checkbox labeled Hidden.
- To hide the file, check the box. To unhide, uncheck it.
- Click OK to save.
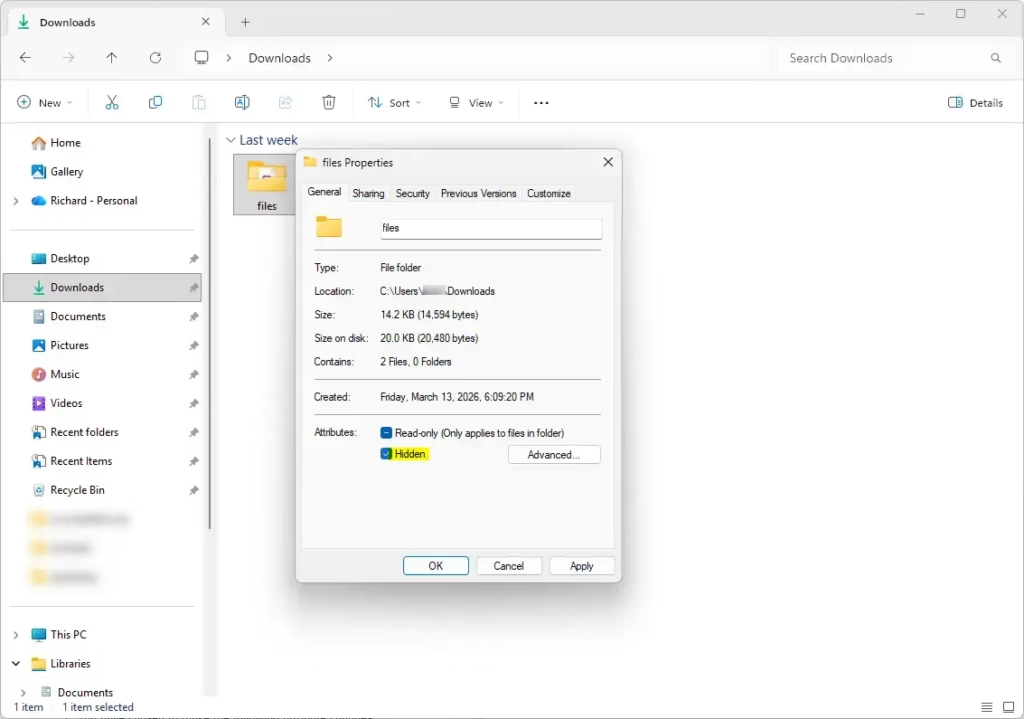
How to Hide or Unhide Folders Using File Properties
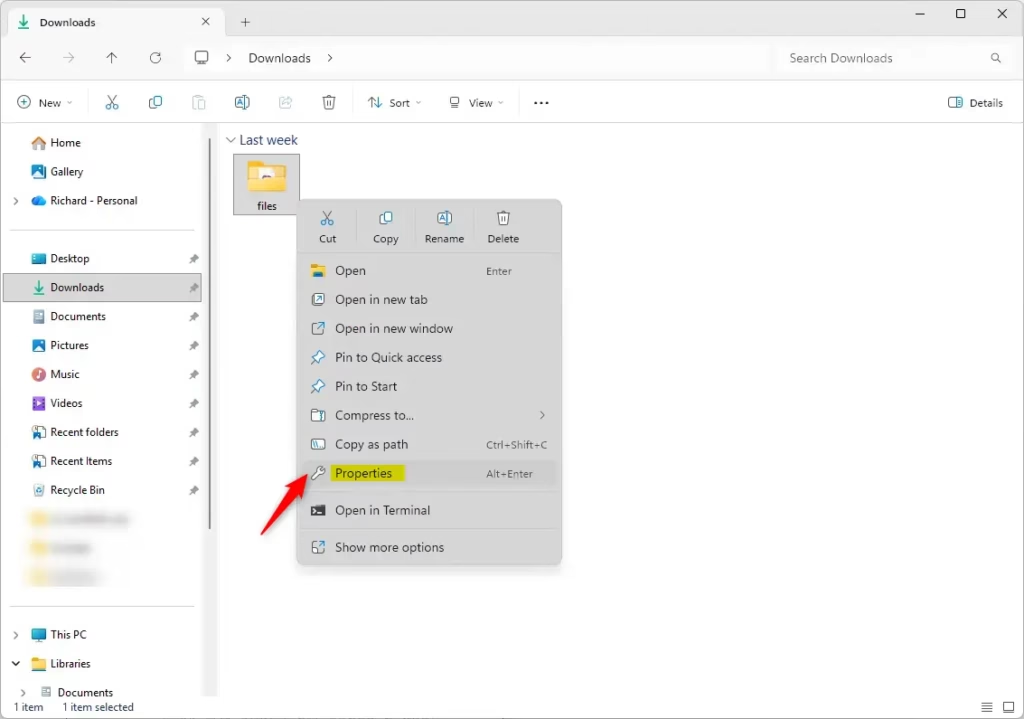
- Find the folder(s) you want to hide or unhide.
- Right-click the folder and select Properties.
- In the General tab, check or uncheck the Hidden box.
- Click OK. If the folder has files inside, you’ll see options:
- Apply changes to this folder only – Only the folder itself will be hidden/unhidden.
- Apply changes to this folder, subfolders and files – Everything inside will be hidden/unhidden.
- Choose what you want and click OK.
How to Hide or Unhide Files Using Commands
If you like using the keyboard and command lines, you can hide or unhide files using Windows Terminal or Command Prompt.
- Open Windows Terminal or Command Prompt. You can search for it in the Start menu.
- Type the command below and press Enter.
To hide a file:
attrib +h "full_path_to_file"To unhide a file:
attrib -s -h "full_path_to_file"Replace full_path_to_file with the actual file location, including the name and extension.
Example:
attrib +h "C:UsersYourNameDesktopsecret.txt"attrib -s -h "C:UsersYourNameDesktopsecret.txt"
How to Hide or Unhide Folders Using Commands
- Open Windows Terminal or Command Prompt.
- Type the command and press Enter.
Hide or unhide only the folder:
Hide:
attrib +h "full_path_to_folder"Unhide:
attrib -s -h "full_path_to_folder"Hide or unhide the folder and everything inside it (subfolders and files):
Hide:
attrib +h "full_path_to_folder" | attrib +h "full_path_to_folder*" /s /dUnhide:
attrib -s -h "full_path_to_folder" | attrib -s -h "full_path_to_folder*" /s /dExample:
attrib +h "C:UsersYourNameDesktopMyFolder" | attrib +h "C:UsersYourNameDesktopMyFolder*" /s /dattrib -s -h "C:UsersYourNameDesktopMyFolder" | attrib -s -h "C:UsersYourNameDesktopMyFolder*" /s /d
How to Show Hidden Files and Folders in File Explorer
- Open File Explorer (press Windows + E).
- Click the View menu at the top.
- Hover over Show and click Hidden items.
Now you’ll see hidden files and folders, but their icons will look faded.
To hide them again, just uncheck Hidden items.
Summary
- Hidden files and folders don’t show up by default to keep things tidy.
- You can hide or unhide files and folders easily from their Properties or by using commands.
- When visible, hidden items appear a bit faded in File Explorer.
- Using commands is faster if you want to hide/unhide many files or folders at once.
Now you can keep your files private or show them whenever you need. Happy organizing!
More help and info: Microsoft Support: Show hidden files and folders
Was this guide helpful?

Leave a Reply