How to Show or Hide Drive Letters in Windows 11 File Explorer
Ever wish File Explorer looked a bit cleaner? You can show or hide drive letters in Windows 11 to customize how your drives appear.
Drive letters, like C: for your system drive or D: for a secondary partition, are the familiar labels for your storage devices. Hiding them can declutter your File Explorer view, while showing them helps you quickly identify each drive.
This setting changes how your drives are displayed in File Explorer’s navigation pane. For instance, without drive letters, your drives might show up with only their volume names, like “Windows” or “Data.”
Open File Explorer Options, go to the View tab, and then check or uncheck “Show drive letters” to control their visibility. Click OK to apply your selection.
What Are Drive Letters?
In Windows, every storage drive gets a letter from A to Z. Your main hard drive is typically C:. External drives and USB sticks are assigned other letters. These letters are how Windows and you keep track of which drive is which.
Where Do You See Drive Letters?
When you open File Explorer, you’ll see drive letters listed next to your drives under “This PC.” However, Windows sometimes hides these letters to simplify the view.
How to Show or Hide Drive Letters Using File Explorer Settings
You can quickly show or hide drive letters in Windows 11 File Explorer right from its settings menu, making it easy to clean up your view if you don’t want to see drive letters like C: or D:.
- Press
Windows + Son your keyboard. - Type
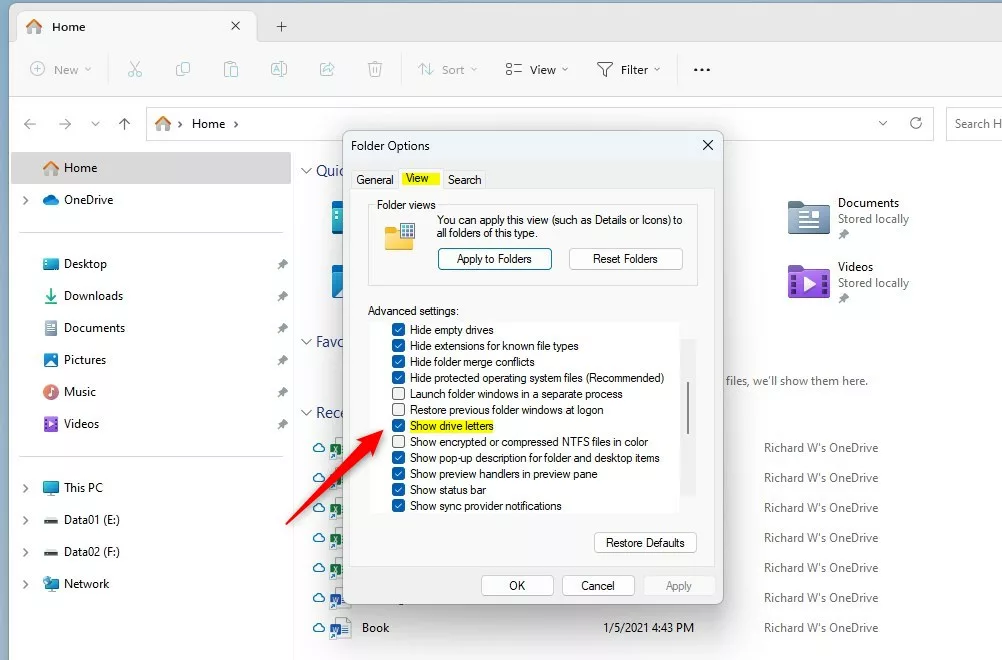
File Explorer Optionsand click on it when it appears. Learn more about opening File Explorer Options - In the File Explorer Options window, click the View tab at the top.
- Look for “Show drive letters” in the list.
- To show drive letters, check the box . To hide drive letters, uncheck the box .
- Click OK to save your changes.
Here’s what the setting looks like:
How to Show or Hide Drive Letters Using the Windows Registry (Advanced)
Advanced users can hide or show drive letters in Windows 11 using the Registry Editor for more control, but you’ll need admin rights and must be careful when changing system files.
- ⚠️ Requires admin privileges – Press
Windows + Rto open the Run box. - Type
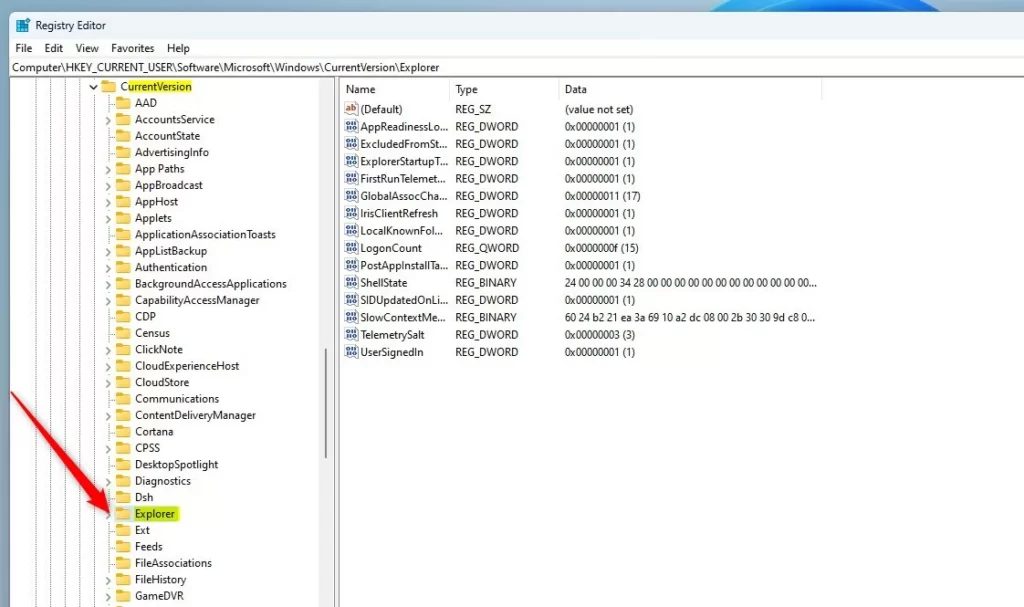
regeditand pressEnterto open the Registry Editor. - In the Registry Editor, go to this folder path:
HKEY_CURRENT_USER\Software\Microsoft\Windows\CurrentVersion\Explorer - If you don’t see the Explorer folder, right-click on
CurrentVersion. ChooseNew > Key. Name itExplorer. - Click on the
Explorerfolder. - In the right pane, right-click and select
New > DWORD (32-bit) Value. - Name the new value
ShowDriveLettersFirst. - Double-click
ShowDriveLettersFirstand set its value:- Enter
0to show drive letters. - Enter
2to hide drive letters.
- Enter
- Click
OKand close the Registry Editor. - Restart your computer to apply the changes.
Here’s an example of the Registry Editor window:
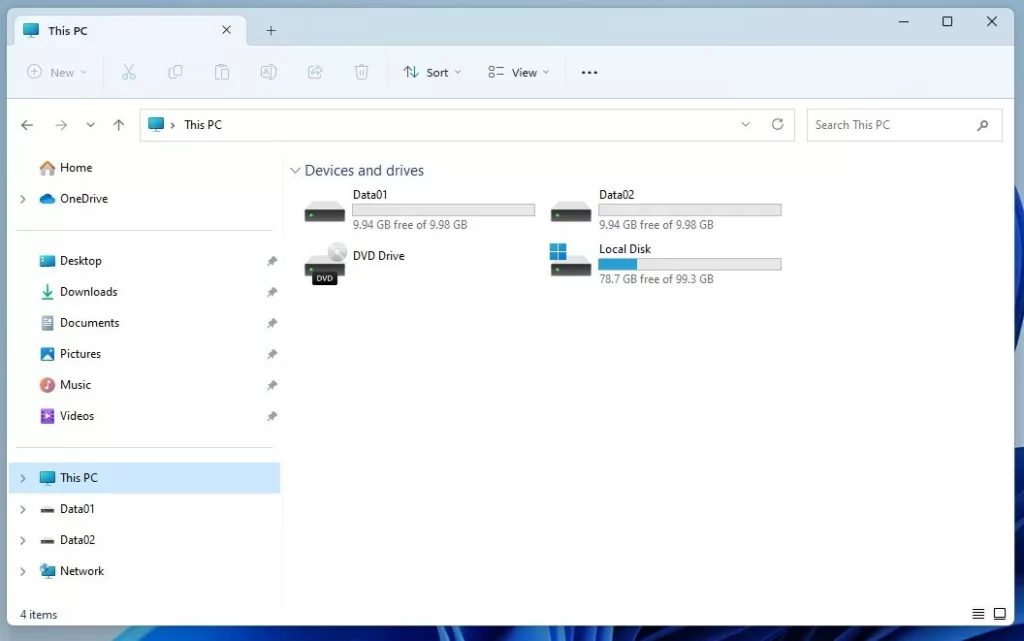
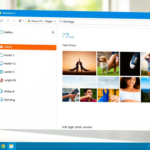
What It Looks Like Without Drive Letters
Summary
Choosing to show or hide drive letters in Windows 11 is up to you, depending on whether you like a cleaner look or want to see all the details, and you can easily switch between them using File Explorer Options or the Registry Editor.
What happens when you’re done? Your File Explorer will then display or hide drive letters according to your selection.
- The simplest way is through File Explorer Options under the View tab.
- For more control, you can use the Registry Editor. But be careful when making changes.
- After changing settings, restart your PC if the changes don’t appear right away.
- Now you know how to customize your drive letters display! If you want to explore more tips about Windows 11, check out this page.
How to hide drive C?
Right-click the Start button and select Run. In the Run dialog, type gpedit.msc and click OK. Navigate to User Configuration, then Administrative Templates, then Windows Components.
How do I remove drive letters from 🪟 Windows 11?
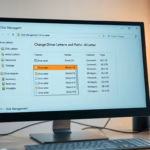
To remove a drive letter in Windows 11, head to Settings, then System, then Storage. From there, go to Advanced storage settings, and then Disks & volumes. Open the properties for the specific disk, click “Change Drive Letter,” and select “None.”
Was this guide helpful?

About the Author
Richard
Tech Writer, IT Professional
Richard, a writer for Geek Rewind, is a tech enthusiast who loves breaking down complex IT topics into simple, easy-to-understand ideas. With years of hands-on experience in system administration and enterprise IT operations, he’s developed a knack for offering practical tips and solutions. Richard aims to make technology more accessible and actionable. He's deeply committed to the Geek Rewind community, always ready to answer questions and engage in discussions.

No comments yet — be the first to share your thoughts!