How to Add or Remove the Hibernate Button in Windows 11
Do you want to add or remove the hibernate button from your Windows 11 power menu? This guide shows you easy steps to do that.
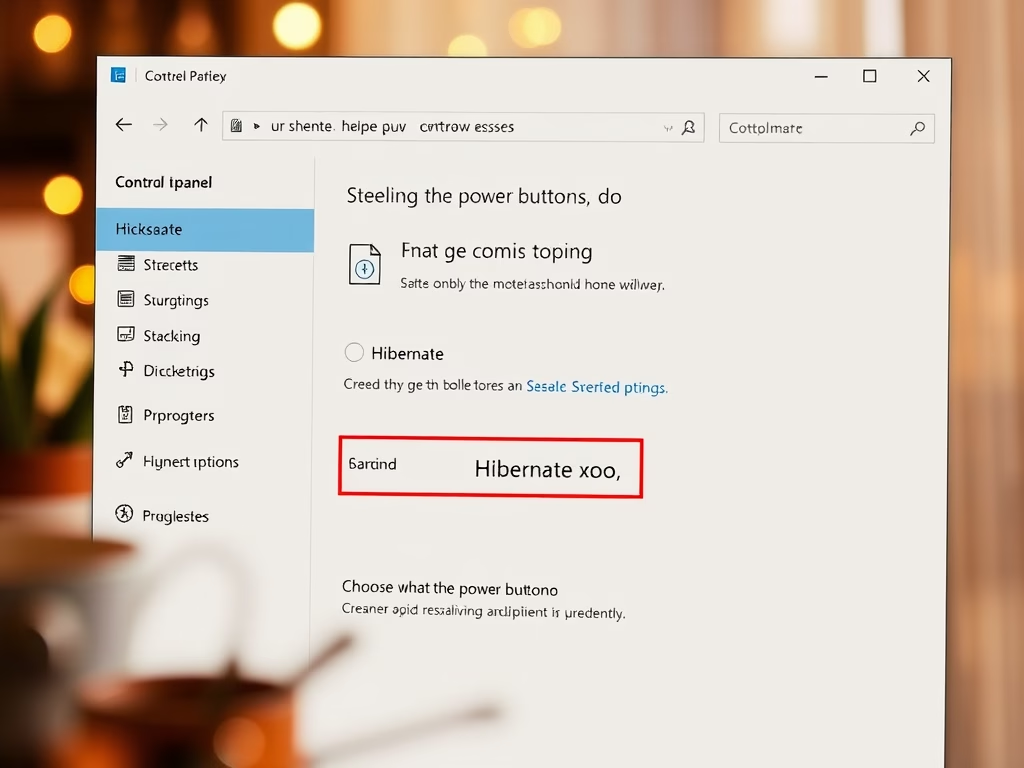
What is the Hibernate Button?
The hibernate button lets your computer save all your work to the hard drive. Then it turns completely off. When you turn it back on, everything is just how you left it.
This works differently from sleep mode. Sleep mode saves your work in your computer’s memory but doesn’t fully turn off. Sleep wakes up faster, but hibernate uses much less power.
Sometimes Windows hides the hibernate button from your power menu. Here’s how to bring it back—or remove it permanently if you never use it.
Method 1Add or Remove Hibernate Button Using Control Panel
This is the easiest way to show or hide the hibernate button.
- Open Control Panel. Click the Start button, type
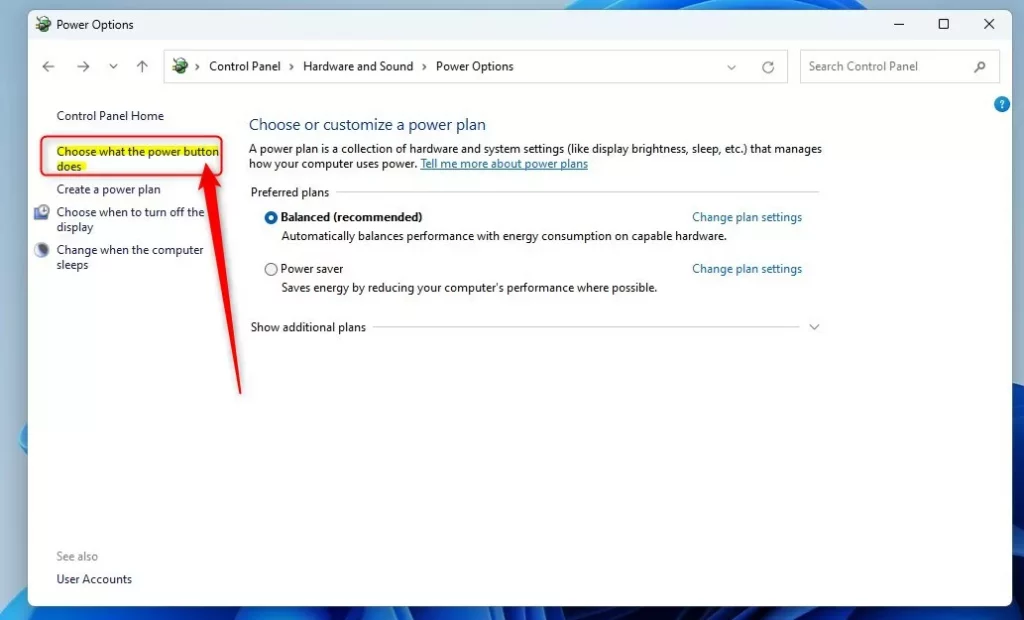
Control Panel, and press Enter. Learn more about Control Panel - Go to Hardware and Sound > Power Options.
- Click on “Choose what the power buttons do” on the left menu.
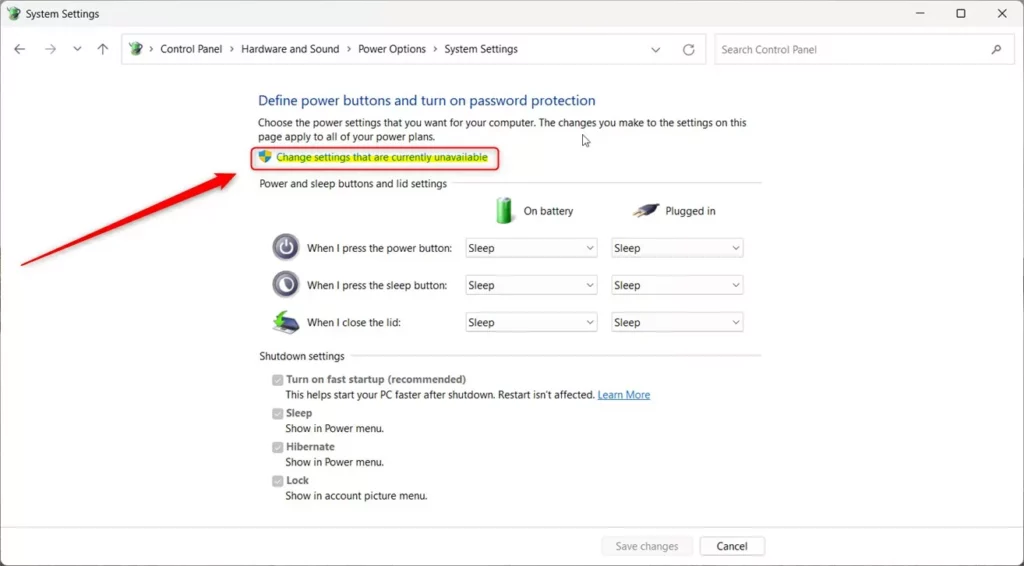
- Click “Change settings that are currently unavailable” at the top. This unlocks the options.
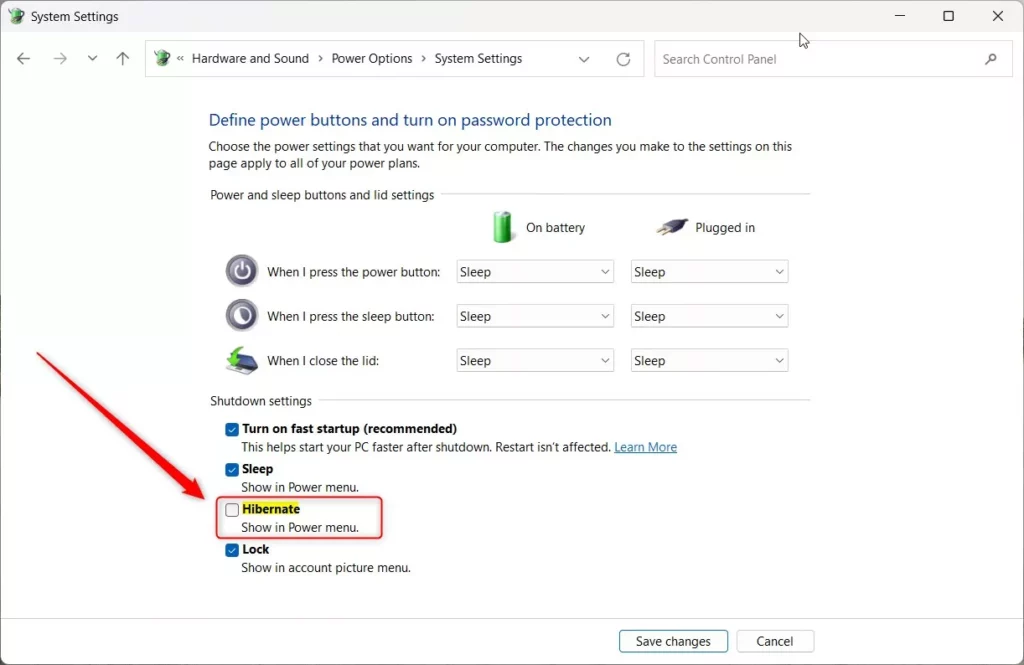
- Look under Shutdown settings. Check the Hibernate box to show it. Uncheck it to hide it.
- Click Save changes.
Here’s what it looks like:
Method 2Use Windows Registry Editor to Show or Hide Hibernate Button
If you feel comfortable with advanced steps, you can use the Windows Registry Editor. ⚠️ Admin privileges required
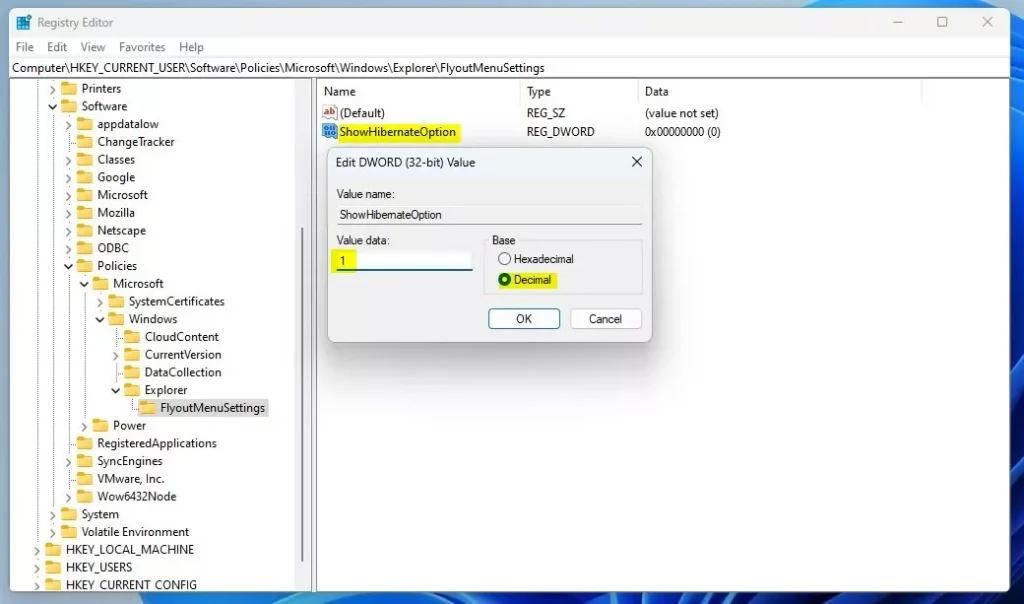
- Open Registry Editor. Press Windows key + R, type
regedit, and press Enter. More info on opening Registry Editor - Go to this folder path:
HKEY_LOCAL_MACHINE\SOFTWARE\Microsoft\Windows\CurrentVersion\Explorer\FlyoutMenuSettings - If you don’t see FlyoutMenuSettings, right-click on Explorer. Choose New > Key, and name it
FlyoutMenuSettings. - In FlyoutMenuSettings, right-click on the right side. Select New > DWORD (32-bit) Value, and name it
ShowHibernateOption. - Double-click
ShowHibernateOptionand set the value to:1to show the hibernate button
0to hide the hibernate button- Click OK and close Registry Editor.
- Restart your computer to see the changes.
Example:
Method 3Use Local Group Policy Editor
This method only works on Windows 11 Pro or Enterprise editions—Home edition doesn’t include the Group Policy Editor. ⚠️ Admin privileges required
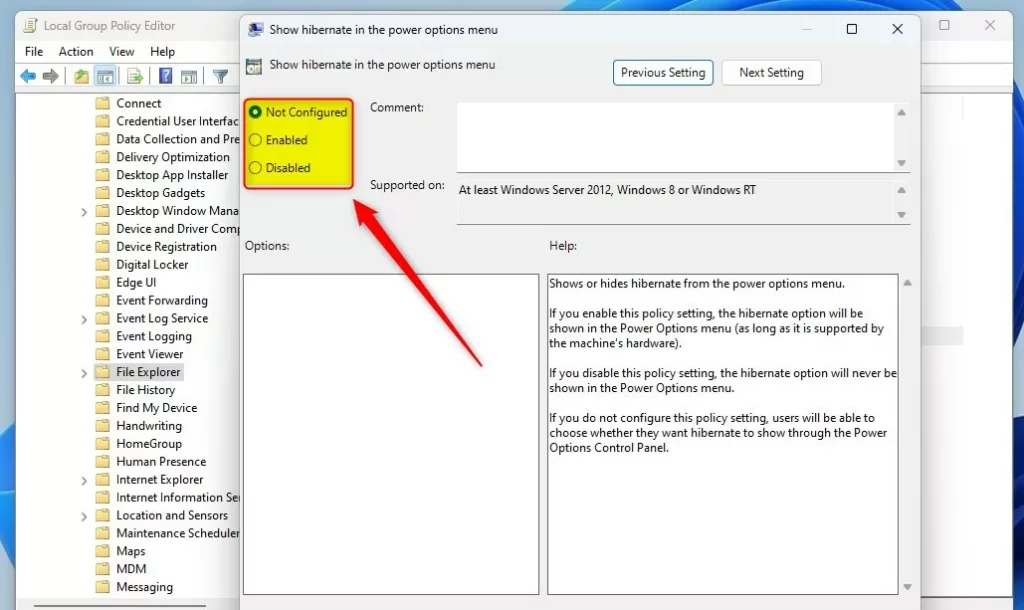
- Click Start. Type
Edit group policy, and open it. - In the left panel, go to:
Computer Configuration > Administrative Templates > Windows Components > File Explorer - In the right panel, find and double-click “Show hibernate in the power options menu”.
- Choose one of these options:
- Not Configured – This is the default setting. Windows shows the hibernate button.
- Enabled – Shows the hibernate button.
- Disabled – Hides the hibernate button.
- Click OK, close the editor, and restart your PC.
Screenshot:
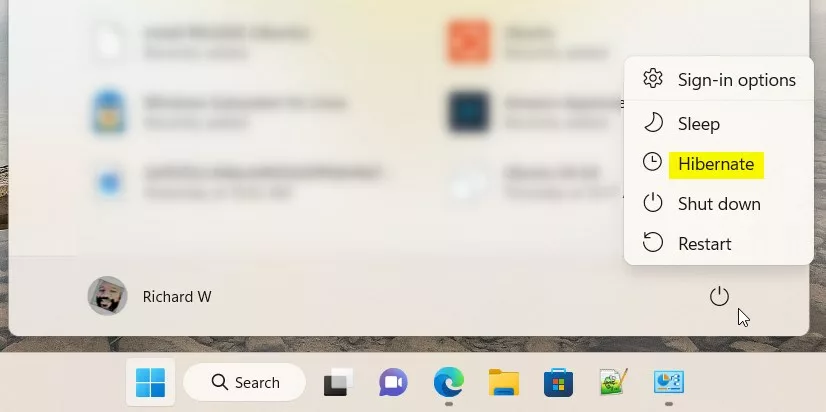
What Does the Hibernate Button Look Like?
Hibernate button shown in power menu:
Hibernate button hidden from power menu:

Summary
You can add or remove the hibernate button on Windows 11’s power menu using different methods. The easiest way is through Control Panel’s Power Options settings. For advanced users, changing the Windows Registry or Local Group Policy Editor gives more control. Pick the method you feel comfortable with, and you can customize your power menu easily.
Now you know how to control the hibernate button on your Windows 11 PC!
Was this guide helpful?

About the Author
Richard
Tech Writer, IT Professional
Richard, a writer for Geek Rewind, is a tech enthusiast who loves breaking down complex IT topics into simple, easy-to-understand ideas. With years of hands-on experience in system administration and enterprise IT operations, he’s developed a knack for offering practical tips and solutions. Richard aims to make technology more accessible and actionable. He's deeply committed to the Geek Rewind community, always ready to answer questions and engage in discussions.


No comments yet — be the first to share your thoughts!