How to Add or Remove the Hibernate Button in Windows 11

The hibernate button in Windows 11 saves your open apps and documents to your hard drive, then turns off your PC completely so it draws zero power. Standard sleep keeps your session in active memory. Hibernation writes it to permanent storage instead, which protects your work if your laptop battery runs out entirely.
Most Windows 11 computers hide this option by default to keep the power menu short. You can bring it back through the classic Control Panel , the Registry Editor, or the Local Group Policy Editor. This guide covers all three, plus how to hide the button again.
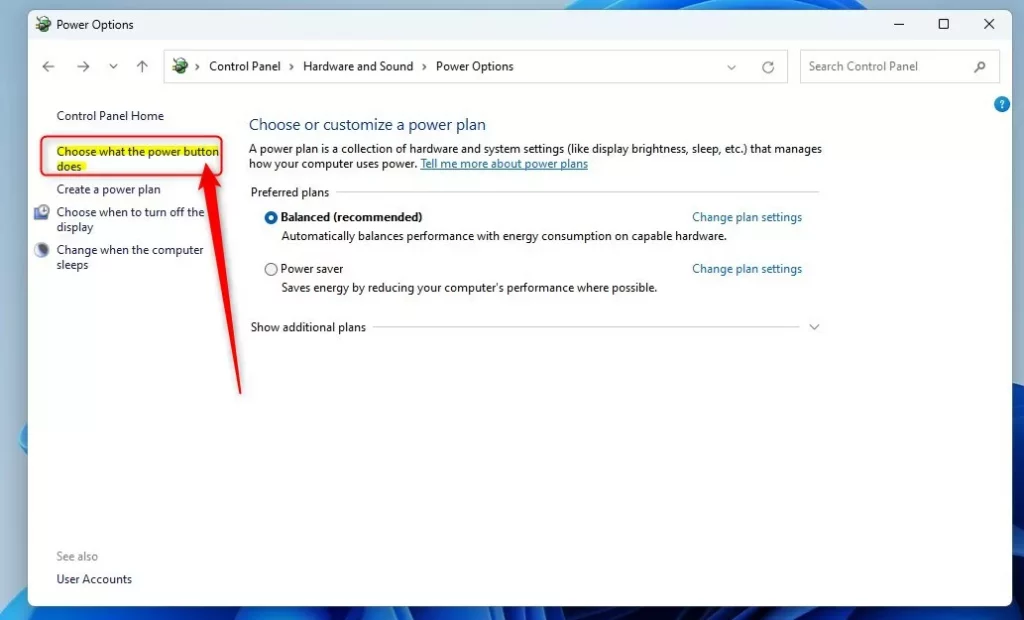
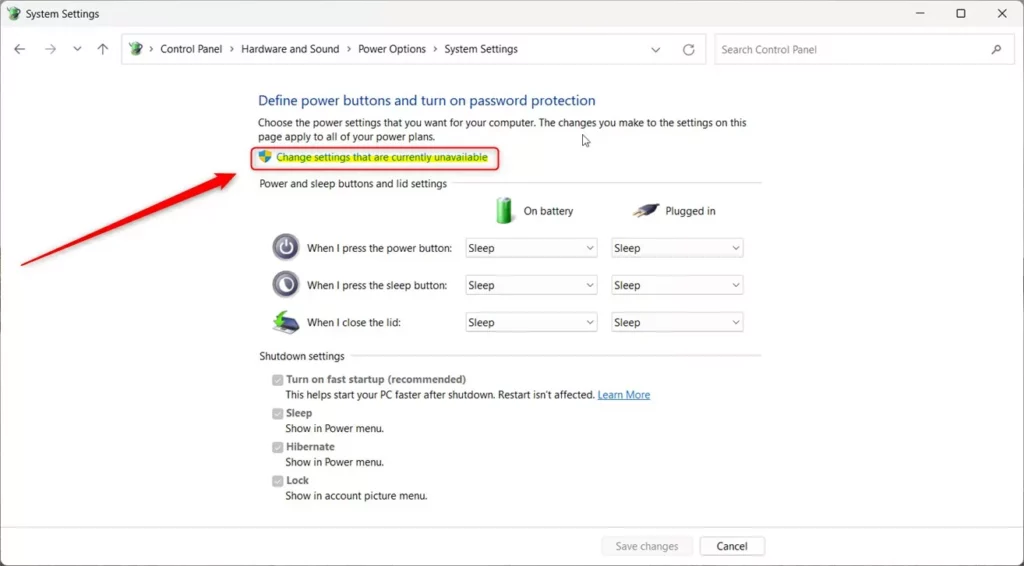
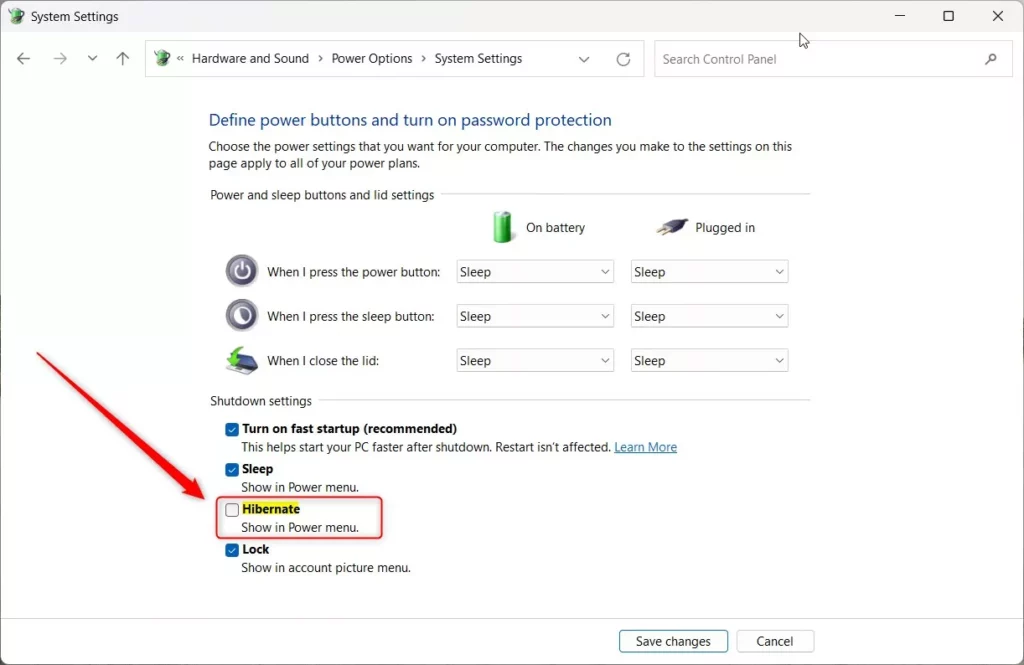
Open Control Panel , go to Hardware and Sound Power Options, click Choose what the power buttons do, then click Change settings that are currently unavailable. Check the Hibernate box under Shutdown settings and click Save changes. The hibernate button now appears in your power menu.
What is the Hibernate Button?
Hibernate saves all your open apps and documents to your hard drive before it shuts the computer down completely. It uses no power while off. Sleep keeps your memory powered, so it still drains the battery slowly. That makes hibernate the better choice when you are leaving your PC for a long time.
Sleep saves your open work to memory and keeps the system in a low-power state. Resuming is nearly instant, but the battery keeps draining. Hibernate goes a step further. It writes the same data to your drive and cuts power completely. Resuming takes a little longer, but nothing is lost if the battery dies or the power goes out. Hibernation also reserves some space on your system drive to hold the saved session, so keep that in mind on a small SSD.
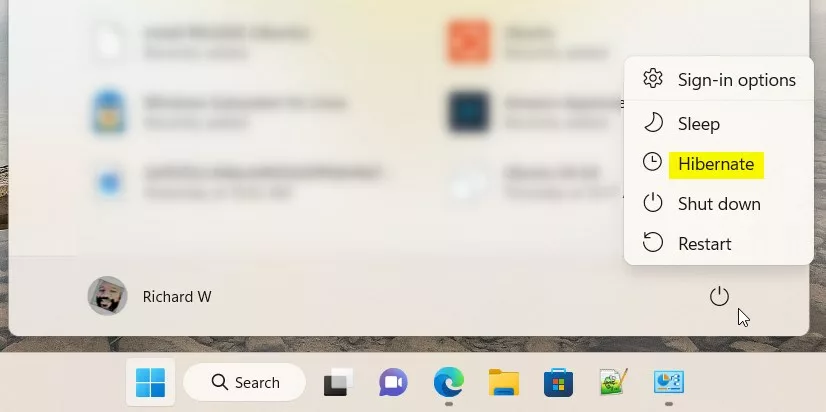
Windows 11 often hides the hibernate button from the power menu. You can add it back, or remove it if you don’t need it. Either way, you will find the button by clicking Start, then the Power icon.
Method 1Add or Remove Hibernate Button Using Control Panel
Control Panel is the easiest method. You change the power button settings, and the change applies to your power menu straight away. You need administrator rights, because the options you need are locked until you confirm with an admin account. This works on Windows 11 Home, Pro, Enterprise, and Education.
- Open Control Panel. Click the Start button, type
Control Panel, and press Enter. Learn more about Control Panel The Control Panel window opens. - Go to Hardware and Sound Power Options. If your Control Panel is in Icons view, click Power Options directly.
- Click Choose what the power buttons do in the left menu. The System Settings page opens.
- Click Change settings that are currently unavailable near the top. Approve the prompt if one appears. The options under Shutdown settings, which were greyed out, are now clickable.
- Look under Shutdown settings. Check the Hibernate box to show the button. Uncheck it to hide the button.
- Click Save changes.
Open Start Power to confirm. Hibernate should now appear in the list, or be gone if you unchecked it. To undo the change, repeat the steps and set the box the other way.
If the Hibernate box is missing from Shutdown settings, hibernation is probably turned off at the system level. Some PCs and drivers also don't support it. In that case, try the Registry or Group Policy method below, and check whether a work or school policy manages the PC.
Here's what it looks like:
Method 2Use Windows Registry Editor to Show or Hide Hibernate Button
You can use it to force the hibernate button to show or hide, which helps when the Control Panel method doesn't work. Mistakes here can cause system problems, so follow the steps carefully. Before you start, consider exporting a backup with File Export so you can restore it later. This method works on all editions, including Home.
- Open Registry Editor. Press Windows key + R, type
regedit, and press Enter. More info on opening Registry Editor Approve the User Account Control prompt if it appears. Registry Editor opens. - Go to this folder path, using the tree in the left pane:
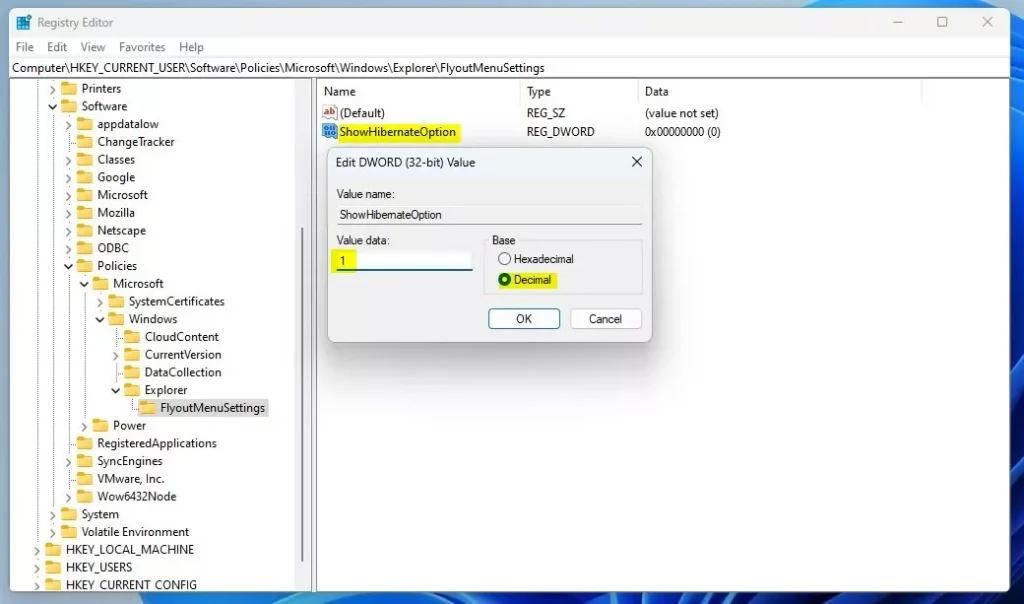
HKEY_LOCAL_MACHINE\SOFTWARE\Microsoft\Windows\CurrentVersion\Explorer\FlyoutMenuSettings - If you don't see FlyoutMenuSettings, right-click Explorer. Choose New Key, and name it
FlyoutMenuSettings. The new key appears under Explorer. - Select FlyoutMenuSettings, then right-click an empty area on the right side. Select New DWORD (32-bit) Value, and name it
ShowHibernateOption. - Double-click
ShowHibernateOptionand set the Value data to:1to show the hibernate button0to hide the hibernate button
- Click OK and close Registry Editor.
- Restart your computer to see the changes.
To undo the change, open the same value and switch it to the other setting, then restart. Or import the backup you exported earlier.
Example:
Method 3Use Local Group Policy Editor
Local Group Policy Editor is a tool for managing system rules. It lets you control the hibernate button across the whole system. This method only works on Windows 11 Pro, Enterprise, or Education. Windows 11 Home does not include this editor, so Home users should use Control Panel or Registry Editor instead.
- Click Start. Type
Edit group policy, and open it. The Local Group Policy Editor window opens. - In the left panel, go to:
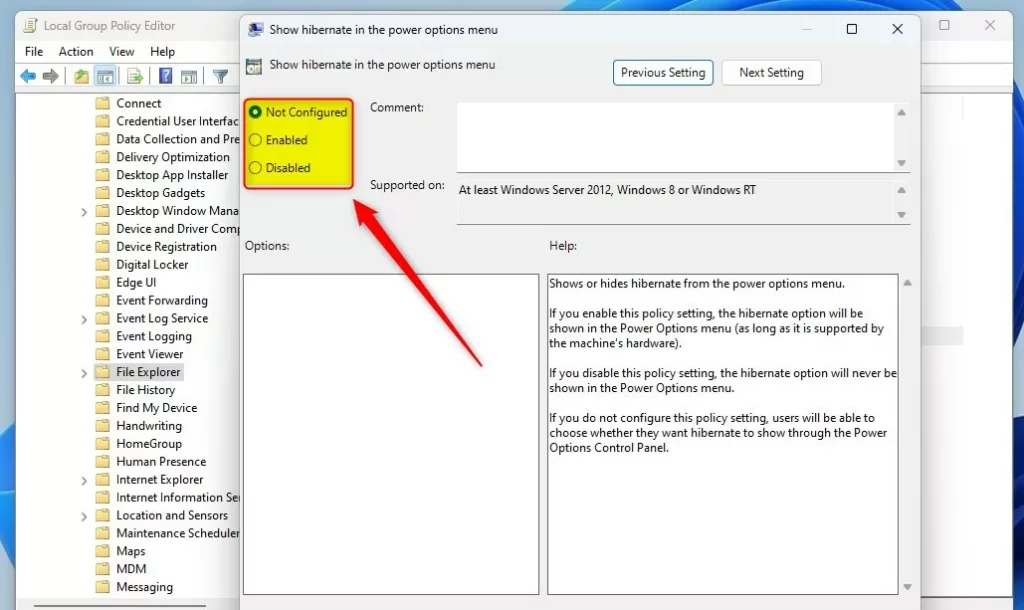
Computer Configuration > Administrative Templates > Windows Components > File Explorer - In the right panel, find and double-click Show hibernate in the power options menu. A settings window opens.
- Choose one of these options:
- Not Configured – This is the default setting. Windows shows the hibernate button.
- Enabled – Shows the hibernate button.
- Disabled – Hides the hibernate button.
- Click OK, close the editor, and restart your PC.
If your PC belongs to a work or school domain, an administrator may enforce this policy. Your change may then be overwritten.
Screenshot:
What Does the Hibernate Button Look Like?
Hibernate button shown in power menu:
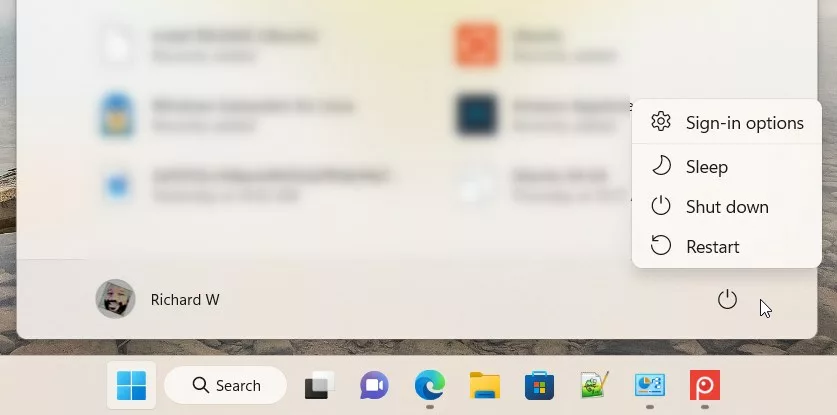
Hibernate button hidden from power menu:
Summary
You can manage the hibernate button in Windows 11 through Control Panel, Registry Editor, or Group Policy Editor. Control Panel is the quickest and works on every edition. Use the Registry if the checkbox is missing. Use Group Policy on Pro, Enterprise, or Education when you want to set it as a system rule.
You now have the hibernate button on your shutdown menu, and you know how to remove it again.
Was this guide helpful?

About the Author
Richard
Tech Writer, IT Professional
Richard is a writer at Geek Rewind who turns complex IT tasks into clear, step-by-step guides. He draws on years of hands-on experience in system administration and enterprise IT operations, focusing on Windows, Linux and WordPress: the problems people actually run into, and the fixes that work. His server and WordPress guides come from systems he runs himself. Richard builds and maintains the platform behind Geek Rewind, from its Ubuntu servers and Nginx configuration to its custom WordPress plugins. Many new tutorials start with readers' questions, and he's always glad to answer them in the comments.


No comments yet — be the first to share your thoughts!