How to Install VirtualBox on Ubuntu 24.04

VirtualBox 7.x lets you run other operating systems, such as Windows, inside Ubuntu 24.04 without restarting your computer. Each guest system runs in its own window. That makes it handy for testing new software, trying a different Linux distribution, or running an app built for another platform next to your usual Ubuntu apps.
Adding the official Oracle repository (a server that holds software packages) to your system means VirtualBox updates arrive through the normal Ubuntu update process. You get security fixes along with everything else, with no manual downloads.
Open a terminal and run sudo apt update && sudo apt install virtualbox virtualbox-ext-pack to install VirtualBox 7.x and its extension pack on Ubuntu 24.04. Accept the extension pack license when prompted, using Tab and Enter. Check that Hardware virtualization (Intel VT-x or AMD-V) is turned on in your BIOS/UEFI settings, or your virtual machines will not start.
Install VirtualBox
You can install VirtualBox on Ubuntu 24.04 from the terminal with one command. It sets up the main program and the extension pack together. The extension pack adds features such as USB 2.0 and 3.0 support and disk image encryption. Because the packages come from the package manager, you do not need to download anything from a website by hand.
Before you start, check three things:
- Your user account can run commands with sudo.
- Your computer is online.
- Hardware virtualization (Intel VT-x or AMD-V) is turned on in your BIOS/UEFI settings. It is off by default on some machines. If it is off, VirtualBox installs fine but your virtual machines will not start properly.
- Open a terminal. Press Ctrl+Alt+T, or search for “Terminal” in the Activities overview.
- Run the command below. It installs VirtualBox and its extension pack. Enter your password when asked. Nothing shows on screen while you type it, which is normal.
sudo apt update && sudo apt install virtualbox virtualbox-ext-pack
The installation will not finish until you answer it.
- Read the agreement. The mouse does not work in this prompt, so use the keyboard.
- Press Tab to highlight Ok, then press Enter.
- When asked whether you accept the license terms, press Tab to highlight Yes, then press Enter.
When you get your prompt back, the core installation is done. If your computer uses Secure Boot, you may also be asked to set a password for a kernel module. Set one and remember it, because you will need it at the next reboot to enroll the key.
Next, check that the extension pack is really installed. Run the command below. It shows the extension package details, and your output should look similar to the sample that follows.
VBoxManage list extpacks
You should see the package name and its version in the output, along with a status that shows it is installed. The output should resemble this format. Exact version numbers will differ depending on the release you received.
Extension Packs: 2
Pack no. 0:   VNC
Version:        7.0.16
Revision:       162802
Edition:
Description:    VNC plugin module
VRDE Module:    VBoxVNC
Crypto Module:
Usable:         true
Why unusable:

Pack no. 1:   Oracle VM VirtualBox Extension Pack
Version:        7.0.16
Revision:       162802
Edition:
Description:    Oracle Cloud Infrastructure integration, Host Webcam, VirtualBox RDP, PXE ROM, Disk Encryption, NVMe, full VM encryption.
VRDE Module:    VBoxVRDP
Crypto Module:  VBoxPuelCrypto
Usable:         true
Why unusable:
VirtualBox is now installed and ready for you to build virtual machines. Open it from the Activities overview by searching for "VirtualBox". The VirtualBox Manager window should open with an empty list of machines. If you want to remove it later, uninstall the packages through the package manager. Any virtual machines you created stay in your home folder until you delete them.
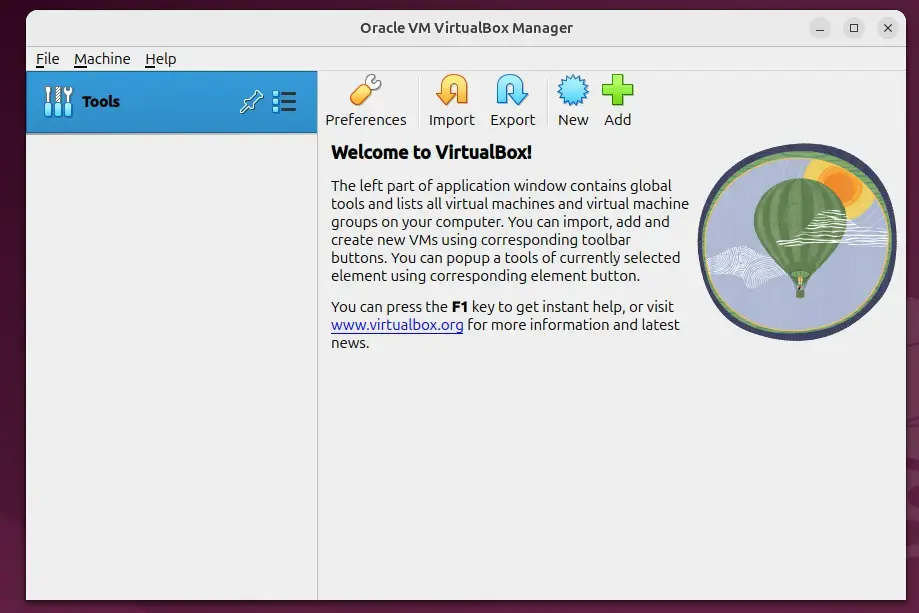
That completes the setup. To create your first virtual machine, click New in the VirtualBox Manager and follow the wizard. You will need an ISO file for the operating system you want to install.
Conclusion:
Setting up virtualization tools on Ubuntu has several practical advantages:
- Easy Installation: One command in the terminal installs VirtualBox and its extension pack, and the only prompt you need to answer is the license agreement.
- Isolation for Testing: Create isolated environments for testing applications across different operating systems without additional physical hardware. If a test goes wrong, your main Ubuntu system is not affected.
- Legacy Support: Run legacy applications by replicating the specific operating environment they need inside a virtual machine.
- Versatile Applications: Use VirtualBox for development, testing, and running several operating systems at the same time.
- User-Friendly Management: Manage your virtual machines from one window and check details of the installed extension pack whenever you need them.
With VirtualBox installed, your Ubuntu system is ready to run virtual machines.
Did this guide fix your problem?

About the Author
Richard
Tech Writer, IT Professional
Richard is a writer at Geek Rewind who turns complex IT tasks into clear, step-by-step guides. He draws on years of hands-on experience in system administration and enterprise IT operations, focusing on Windows, Linux and WordPress: the problems people actually run into, and the fixes that work. His server and WordPress guides come from systems he runs himself. Richard builds and maintains the platform behind Geek Rewind, from its Ubuntu servers and Nginx configuration to its custom WordPress plugins. Many new tutorials start with readers' questions, and he's always glad to answer them in the comments.
[…] VirtualBox is a free and open-source virtualization software that lets you create and manage virtual machines (VMs) on your computer. You can run multiple operating systems like Windows, macOS, and various Linux distributions simultaneously within your Ubuntu environment. […]