How to Use the Pen to Erase Ink in Windows 11
You can set up your digital pen’s eraser end to clear ink and drawings in Windows 11.
This feature lets you quickly remove digital ink without needing to select an eraser tool on your screen. It uses the physical eraser on your stylus directly.
For example, with a pen like the Microsoft Surface Pen, you can flip it over to erase your strokes in apps like Microsoft Whiteboard or OneNote.
The Windows 11 pen's eraser end functionality allows users to control the eraser's behavior. This guide explains how to turn the eraser end on or off, ensuring the pen's eraser end works as the user wants.
Before You Start: Pair Your Pen with 🪟 Windows 11
Make sure your pen is paired with your Windows 11 device via Bluetooth. If you haven’t paired your pen yet, follow this guide: How to Pair Pen with Windows 11.
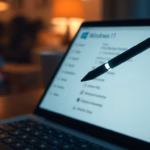
Step 1Open Windows Settings
You can open the Settings app in two ways:
- Click the Start menu button (Windows icon at the bottom left), then click Settings.
- Or press Windows key + I on your keyboard at the same time.
Here’s what the Settings icon looks like:
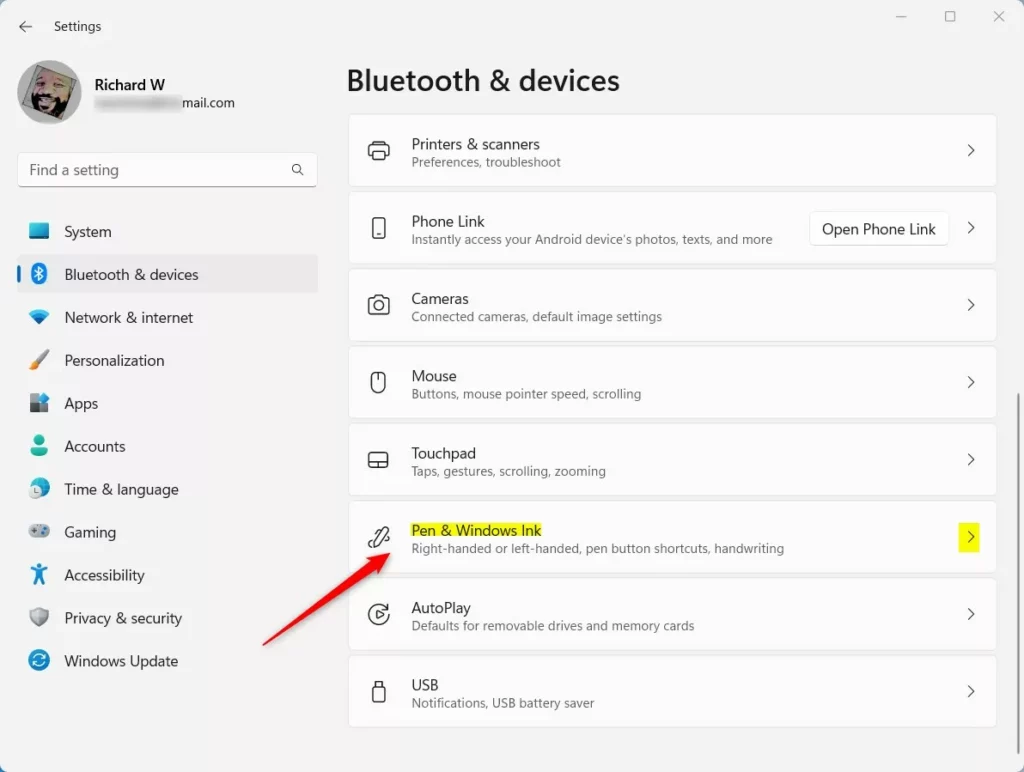
Step 2Go to Pen & Windows Ink Settings
Once inside Settings, do the following:
- On the left menu, click Bluetooth & devices.
- On the right side, find and click Pen & Windows Ink.
Step 3Enable “Use the top of the pen to erase ink”
You can make the top of your pen work as an eraser in Windows 11 so you can quickly fix mistakes. Just look for the setting called ‘Use the top of the pen to erase ink’ and put a check in the box. This lets the eraser end of your pen erase digital writing.
Find the setting that says ‘Use the top of the pen to erase ink (when this option is available)’.
Check the box next to it to turn the feature on.
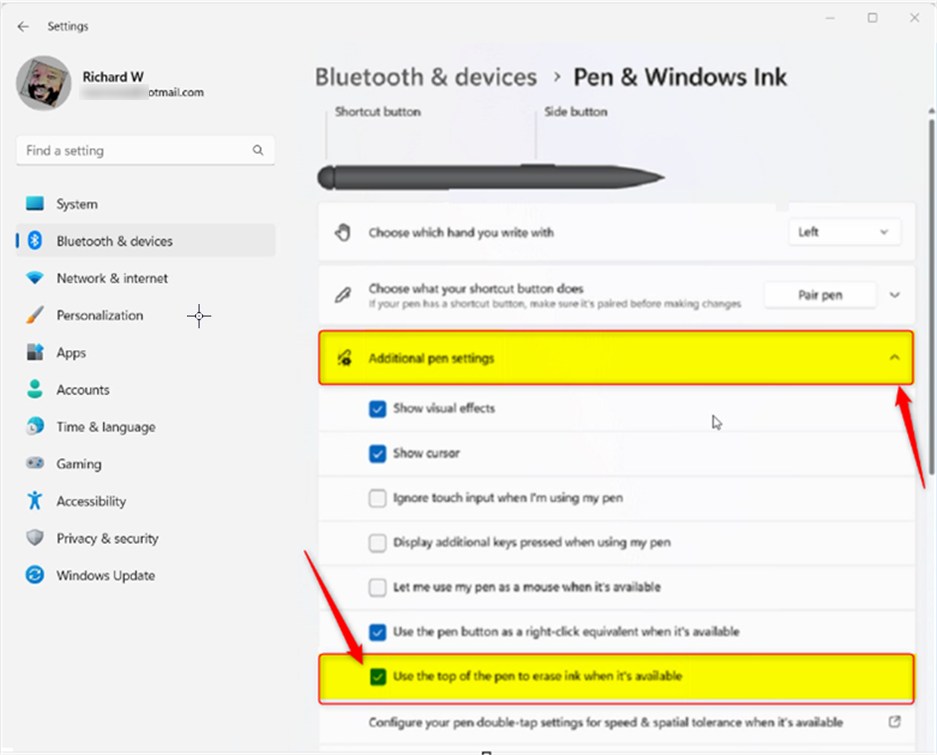
To turn it off later, uncheck the box .
When you’re done, you can close the Settings app.
Optional: Use Windows Registry Editor to Turn This Feature On or Off
Windows Registry Editor users can adjust this setting. The Registry Editor is an advanced tool that requires careful steps. Modifying the Windows Registry Editor allows users to change system settings for enhanced control.
How to Open Registry Editor
To open the Registry Editor in Windows 11, press the Windows key and R together on your keyboard. Then, type ‘regedit’ into the box that appears and press Enter. You’ll need to be an administrator to open this tool, and be careful because changing the wrong things can cause problems.
Press the Windows key and R together, type ‘regedit’, and then press Enter.
Navigate to this folder (which is called a ‘key’ in the Registry Editor):
HKEY_CURRENT_USER\Software\Microsoft\Wisp\Pen\SysEventParametersIf you don’t see the SysEventParameters folder, here’s how to create it:
- Right-click on the Pen folder.
- Select New > Key.
- Name the new key SysEventParameters.
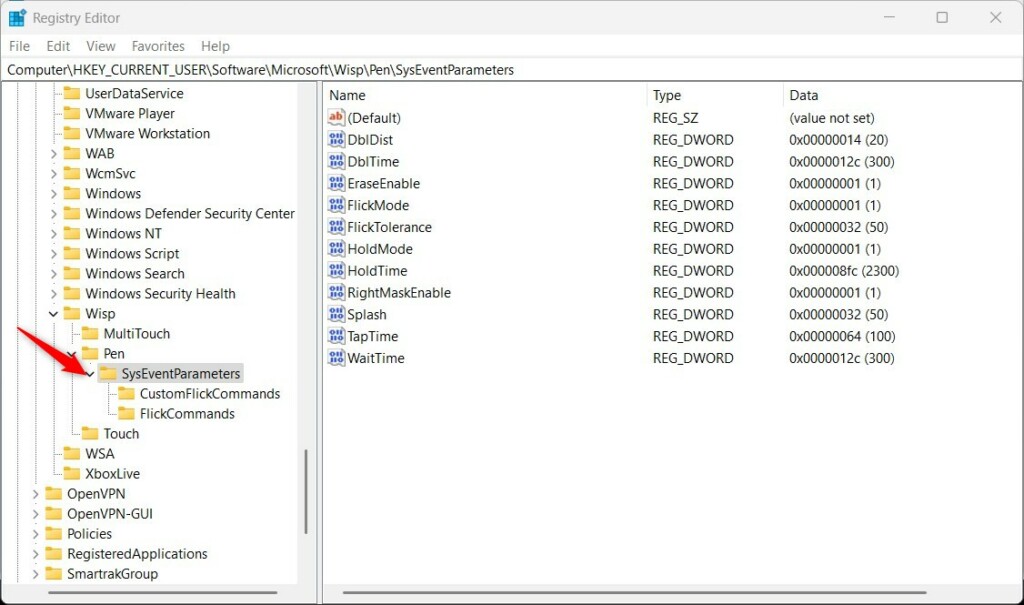
Next, inside the SysEventParameters folder:
- Right-click on the right side area.
- Choose New > DWORD (32-bit) Value.
- Name it EraseEnable.
- Double-click EraseEnable, set the Base to Decimal, and enter:
1to turn ON the erase feature.0to turn OFF the erase feature.

The DigitalPen.UsePenInputService setting in the Windows Registry controls pen input. Changing this setting to 0 turns off the pen input service, preventing the pen from drawing ink. After you change this setting, restarting your computer allows the pen to erase ink in Windows 11.
Summary
In summary, Windows 11 lets you easily use the top of your pen as an eraser, offering a quick way to fix errors in your notes or drawings.
How to erase with Microsoft Pen?
To erase with your Microsoft Pen, simply turn the pen over and use the eraser end like you would a regular pencil eraser on your writing or drawing.
What is the shortcut for the S Pen eraser?
Tap-and-Hold the S Pen button. The current editing tool will switch to the Eraser tool. After using the Eraser tool, release the S Pen button to switch back to the previous tool.
Was this guide helpful?

About the Author
Richard
Tech Writer, IT Professional
Richard, a writer for Geek Rewind, is a tech enthusiast who loves breaking down complex IT topics into simple, easy-to-understand ideas. With years of hands-on experience in system administration and enterprise IT operations, he’s developed a knack for offering practical tips and solutions. Richard aims to make technology more accessible and actionable. He's deeply committed to the Geek Rewind community, always ready to answer questions and engage in discussions.


No comments yet — be the first to share your thoughts!