How to Turn On the Dictation Toolbar in Windows 11

- 18 steps
- Needs administrator rights
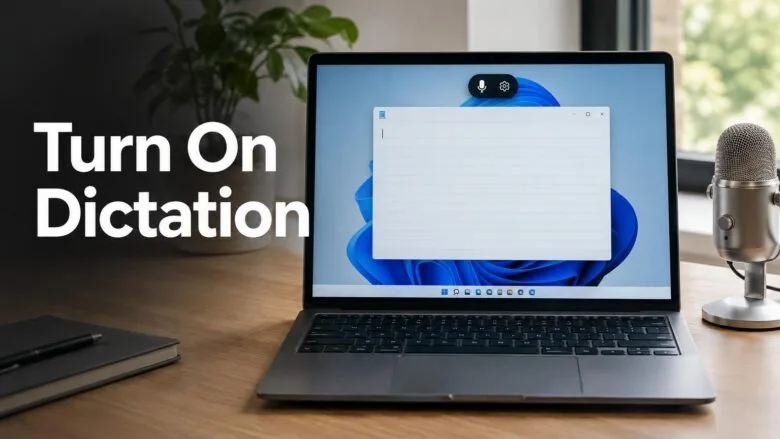
The dictation toolbar in Windows 11 is the small floating bar that turns your speech into typed text. The quickest way to open it is to click a text field and press Win+H. Windows 11 calls this feature voice typing, and Microsoft’s help pages use that name more than “dictation toolbar”.
The toolbar types wherever your cursor is: Notepad, Word, a browser form, an email. This guide shows how to open it, how to make it appear automatically, and what to check when it does not show up. None of the steps need administrator rights.
Press Win+H while your cursor is blinking in a text field, such as Notepad, Word or a browser form. The dictation toolbar, which Windows 11 calls voice typing, opens near the top of the screen. Select the microphone button to start listening, and your words appear at the cursor. Voice typing usually needs a microphone and an internet connection.
What the dictation toolbar is
The toolbar is a compact bar with a microphone button and a Settings (gear) button. It floats above your windows and sends what you say to whichever text box has the cursor. Drag it to move it out of the way.
It works only when a text field is active. If nothing can accept typing, the toolbar either does not open or has nowhere to put the words.
How to turn on the dictation toolbar in 🪟 Windows 11
These steps open the dictation toolbar and start dictating, using the Win+H keyboard shortcut.
- Open the app you want to type in. Notepad, Word, Outlook, a browser and most other apps with a text box work.
- Click inside the text field. A blinking cursor means the field is ready to receive text.
- Press Win+H. The dictation toolbar appears on screen, usually near the top center, with a microphone button.
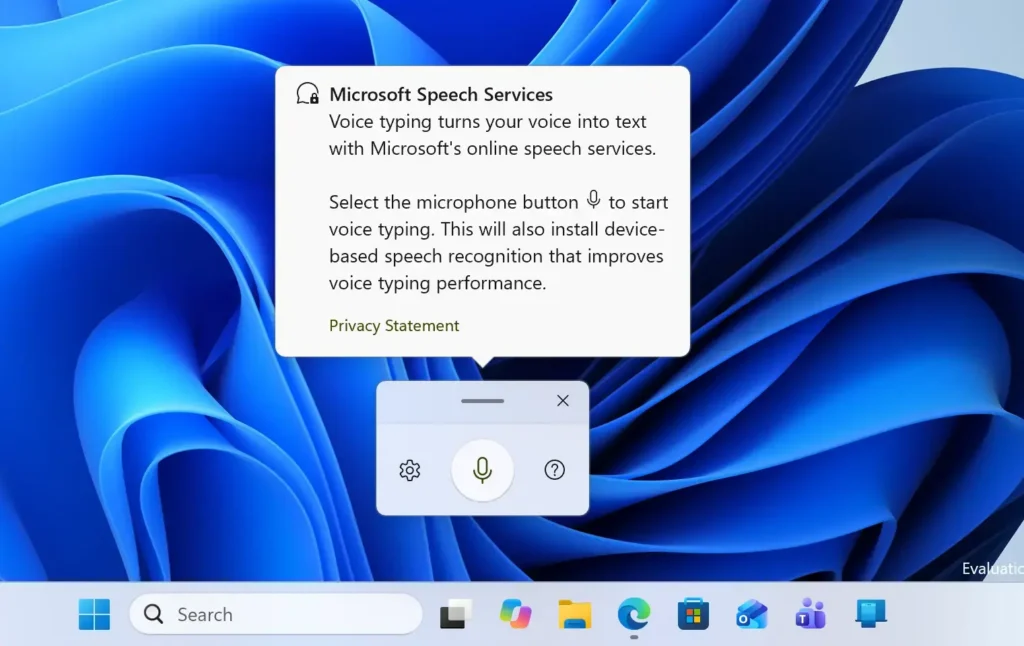
- Select the microphone button if the toolbar does not start listening on its own. The text Listening… appears and the microphone button changes to show it is active.
- Speak at a normal pace. Your words appear at the cursor a moment after you say them.
- Say punctuation out loud. Say “period”, “comma” or “question mark” where you want them. Windows also offers an Auto punctuation option, covered below.
- Select the microphone button again to stop. The toolbar stops listening but stays open, so you can resume later.
- Close the toolbar. Press Win+H again, or select the close button if your build shows one.
If the first press of Win+H does nothing, click the text field again and repeat step 3. The shortcut only works when a text box is active, meaning it has the blinking cursor and is ready for typing. Pressing it from the desktop or from a window with no text box has no effect.
Other ways to open voice typing
The keyboard shortcut is not the only route. Which one you use depends on whether you work with a keyboard, a touch screen or neither.
Use the touch keyboard
On a tablet or a touch screen, tap a text field to bring up the touch keyboard, then tap the microphone (dictation) key. Newer Windows 11 preview updates changed how this looks. Voice typing on the touch keyboard no longer covers the screen with a full-screen overlay, and the listening animation now plays on the dictation key itself. If your PC has not received that update, you may still see the older layout.
Use the voice typing launcher
The voice typing launcher is a small microphone button that appears next to a text field when you click in it. Selecting it opens the full toolbar. This is the closest thing to having the toolbar “on” all the time, and the next section covers how to enable it.
Make the toolbar appear automatically
- Click inside any text field. Notepad works well for this.
- Press Win+H. The dictation toolbar opens.
- Select the Settings (gear) button on the toolbar. A short list of voice typing options opens.
- Turn on Voice typing launcher. The toggle moves to the on position.
- Select the Settings (gear) button again to close the options, then close the toolbar.
- Click inside a text field. A small microphone button should now appear near the field. Select it to open the toolbar.
Menu wording can differ slightly between Windows 11 builds, so the names above may not match your screen exactly. Open the toolbar with Win+H, select the Settings (gear) button, and turn on the option for the voice typing launcher.
Auto punctuation is in the same list. It adds periods and question marks as you talk. If your dictated text comes out without punctuation, check that this option is on.
Check the language and microphone
Dictation quality depends on two things: the language voice typing listens for, and the microphone it hears you through. Check both before you blame the toolbar.
Set the voice typing language
Voice typing follows the language you have installed and selected in Windows. To review or add a language, open Settings Time & language Language & region. Add the language you want to speak, and install any speech options Windows offers for it.
Not every language supports voice typing. If yours does not, the toolbar may open but stay unresponsive or show an error. Microsoft publishes a list of supported languages on its voice typing help page.
Allow microphone access
Windows can block apps from using the microphone. Open Settings Privacy & security Microphone and confirm that microphone access is on. If it is off, the toolbar opens but hears nothing.
Also check that the right input device is selected. Windows can keep a headset you unplugged earlier as the default input device. Speak a few words after you fix the setting and watch for text to appear.
About Fluid dictation
Fluid dictation is a voice typing feature that tidies up grammar and punctuation as you speak. Recent updates changed its default: it is now off for new users, and a teaching tip appears the first time you use it.
If you set up Windows before that change, your setting may differ from a freshly installed PC. If dictated text looks rougher than you expect, or you see a tip you have not seen before, this change is the likely reason. Your Windows 11 version and your PC’s hardware can affect whether you get Fluid dictation. Microsoft’s current voice typing page is the place to confirm what your device supports.
If the toolbar does not appear
A missing toolbar usually has one of a few causes. Work through these in order.
- No active text field. Click inside a box that accepts typing, then press Win+H again. Some fields, such as password boxes, will not take dictation.
- Launcher turned off. If you expect a microphone button to appear next to fields and it does not, the voice typing launcher is off. Open the toolbar with Win+H and turn it back on from the Settings (gear) button.
- Toolbar hidden off-screen. This happens after you change monitors or display layout. Close it with Win+H, then open it again so it redraws.
- Unsupported or missing language. Check Settings Time & language Language & region and make sure your language is installed.
- Microphone blocked. Check Settings Privacy & security Microphone, as described earlier.
- No internet connection. Voice typing normally needs one. Reconnect, then try again.
- Pending updates. Features and menu names change between Windows 11 versions, which Microsoft calls builds. Open Settings Windows Update and install any waiting updates, then restart.
Windows Search changed in newer updates too. If a Start menu search for dictation or voice typing finds nothing useful, press Win+H instead. The Start menu search still uses the older experience for now.
Turn off the voice typing launcher
If the microphone button next to text fields gets in the way, turn it off. This does not remove voice typing. Win+H still opens the toolbar.
- Press Win+H. The dictation toolbar opens.
- Select the Settings (gear) button. The options list opens.
- Turn off Voice typing launcher. The toggle moves to the off position.
- Close the toolbar. The microphone button no longer appears when you click in a text field.
Turn the same toggle on again at any time to bring the launcher back. If the launcher button shows a three-dot menu, you can turn it off from there too.
What to do next
Practice with a short note in Notepad, then move on to email or documents once the words land where you expect. If you spend much of your day in a browser, the Edge toolbar is a different bar worth tuning. See how to add or remove buttons on the toolbar in Microsoft Edge, and how to show or hide the Copilot button on the Edge toolbar.
Have a question about this guide?
Answered by AI from this guide. Good questions may be added to this page — please don't include personal details.
Did this guide fix your problem?

About the Author
Richard
Tech Writer, IT Professional
Richard is a writer at Geek Rewind who turns complex IT tasks into clear, step-by-step guides. He draws on years of hands-on experience in system administration and enterprise IT operations, focusing on Windows, Linux and WordPress: the problems people actually run into, and the fixes that work. His server and WordPress guides come from systems he runs himself. Richard builds and maintains the platform behind Geek Rewind, from its Ubuntu servers and Nginx configuration to its custom WordPress plugins. Many new tutorials start with readers' questions, and he's always glad to answer them in the comments.
No comments yet — be the first to share your thoughts!