

This post shows students and new users how to disable or enable sending diagnostics data to Microsoft in Windows 11.
Why This Matters
Microsoft collects diagnostics and feedback from your Windows device. When you send diagnostic data, Microsoft uses it to keep Windows secure and up to date, fix problems, and improve the product.
Windows sends two types of diagnostic data to Microsoft:
- Required diagnostic data – This is basic information about your device, including device details, quality information, app compatibility, and Microsoft Store data.
- Optional diagnostic data – This includes extra details about your device settings, capabilities, and health.
If you want to turn off sending diagnostic data to Microsoft for privacy reasons, follow the steps below.
Method 1: Using the Settings App
What happens: You’ll control what diagnostic data Microsoft collects from your device.
- Open the Settings app. Windows Settings app
- Click System on the left side.
- Click the Clipboard tile on the right to expand it.
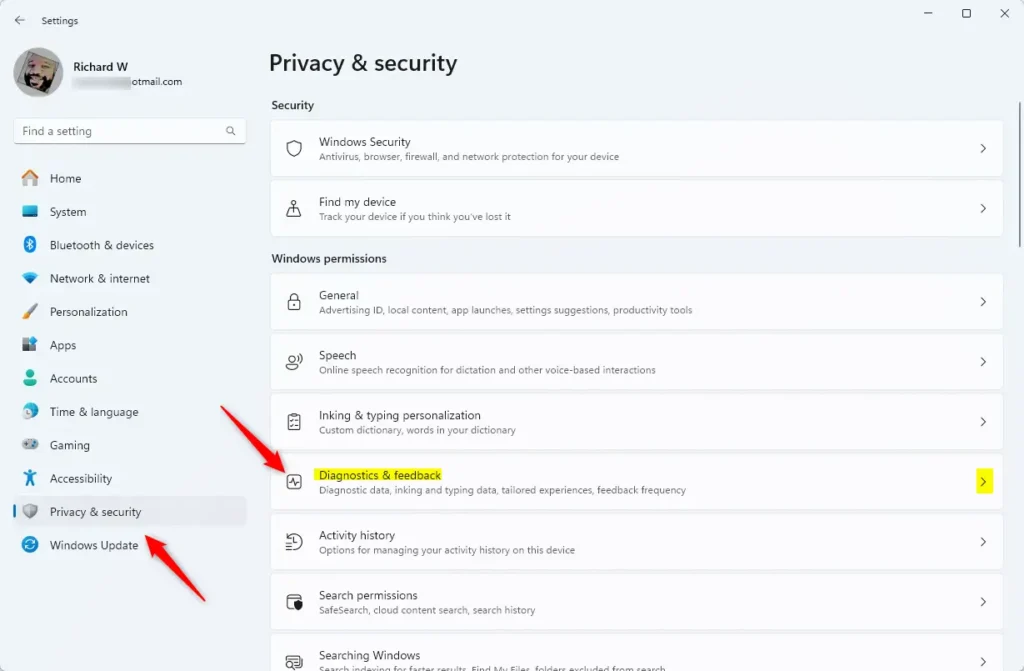
- Click the Diagnostic data tile to expand it.
- Toggle the switch to the On position to send required and optional data to Microsoft.
- Toggle the switch to the Off position to disable sending diagnostic data.
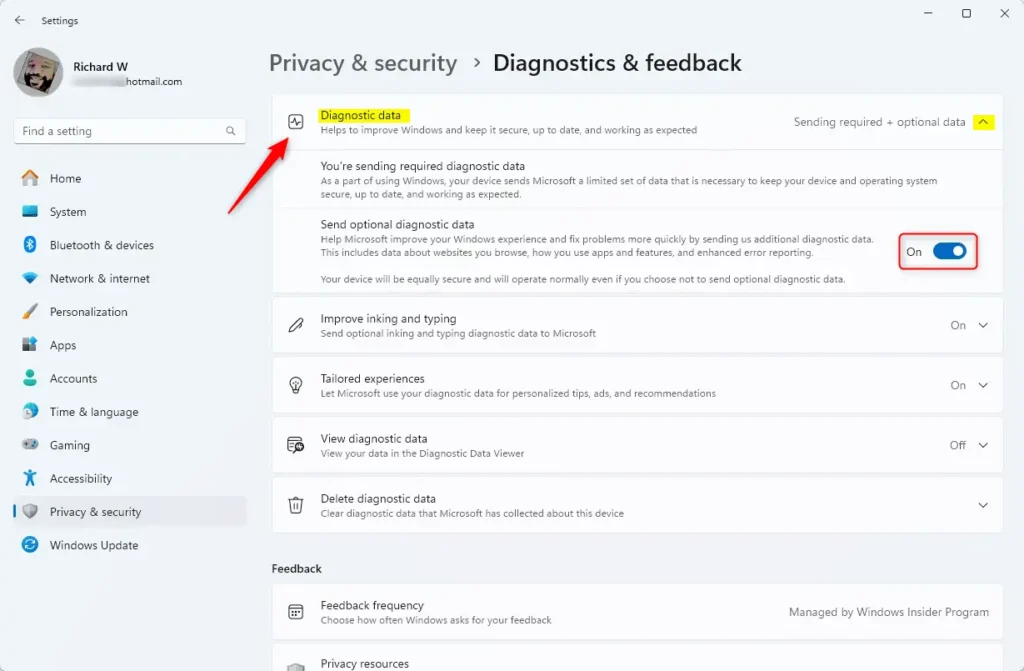
- Close the Settings app when finished.
Method 2: Using Group Policy Editor
What happens: You’ll use an advanced Windows tool to control diagnostic data settings.
⚠️ Admin privileges required for this method
- Open the Local Group Policy Editor. Search for “Edit group policy” on the Start menu.
- Navigate to these folders in order:
- Computer Configuration
- Administrative Templates
- Windows Components
- Data Collection and Preview Builds
- On the right side, find and double-click Allow Diagnostic Data.
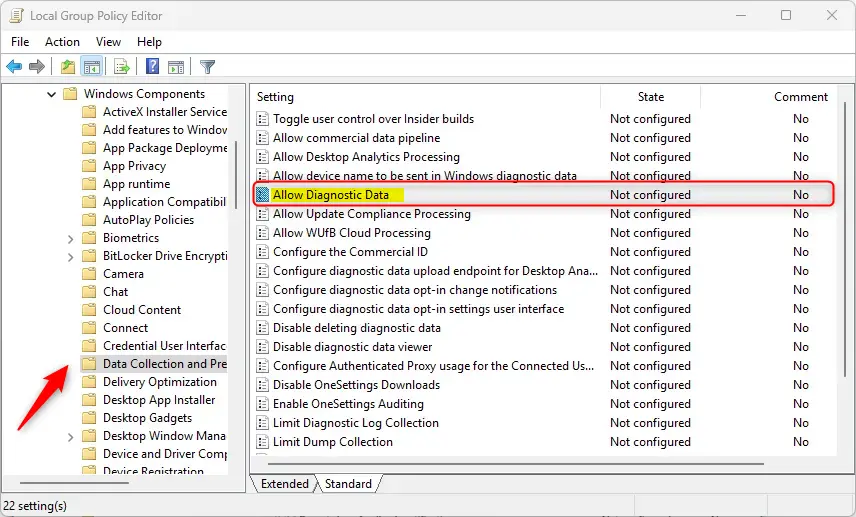
- Choose one of these options in the window that opens:
- Not Configured (default) – Windows decides what to send.
- Enabled – Choose one:
- Diagnostic data off (not recommended) – No diagnostic data is sent.
- Send required diagnostic data – Only the minimum data needed to keep Windows secure and working properly. This turns off the optional data choice in Settings.
- Send optional diagnostic data – Microsoft collects extra data to find and fix problems and improve products.
- Disabled – Required diagnostic data is always sent. You can choose optional data in Settings.

- Click OK to save.
- Restart your computer for changes to take effect.
Method 3: Using Windows Registry Editor
What happens: You’ll edit Windows system files directly to control diagnostic data.
⚠️ Admin privileges required for this method
- Open the Registry Editor. Windows Registry Search for “regedit” on the Start menu.
- Navigate to this location:
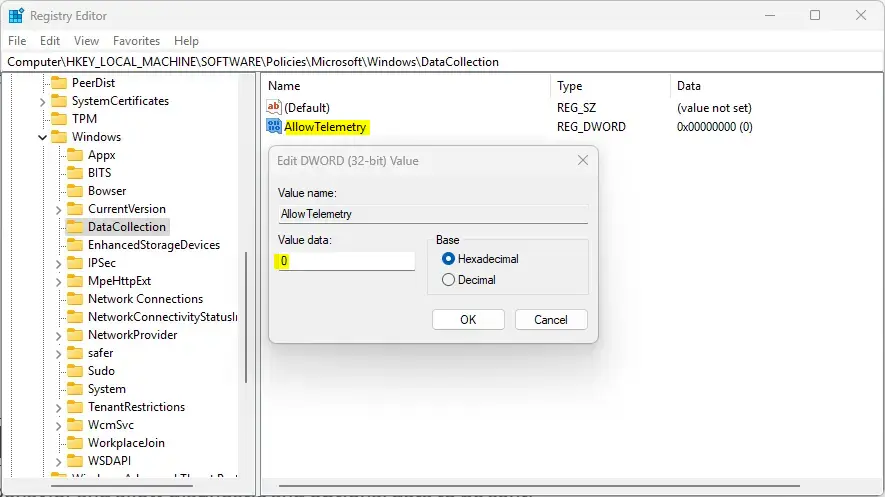
HKEY_LOCAL_MACHINE\SOFTWARE\Policies\Microsoft\Windows\DataCollection - On the right side, double-click AllowTelemetry (REG_DWORD).
- Enter one of these values:
- 0 – Disable sending diagnostic data
- 1 – Send required diagnostic data
- 3 – Send optional diagnostic data
If you don’t see AllowTelemetry, right-click a blank area and create a new DWORD (32-bit) item. Name it “AllowTelemetry” and enter the value you want.
- Click OK to save.
- Restart your computer.
To restore default settings: Delete the “AllowTelemetry” item you created, then restart your computer.
Summary
You now know three ways to control diagnostic data in Windows 11:
- Settings app – The easiest method for most users.
- Group Policy Editor – An advanced option for IT professionals and experienced users.
- Registry Editor – The most direct way to edit system settings.
Choose the method that works best for you. Remember, disabling diagnostic data may prevent Microsoft from fixing problems and keeping Windows secure. Make your choice based on your privacy preferences.

Leave a Reply