How to Enable or Disable Voice Clips in Windows 11


Voice clips in Windows 11 are short audio recordings of your speech that Microsoft collects to improve its speech recognition and typing tools. By default, Windows 11 saves these voice samples and sends them to Microsoft servers for product updates.
You can turn off voice clips at any time in your privacy settings to stop Microsoft from saving your spoken audio.
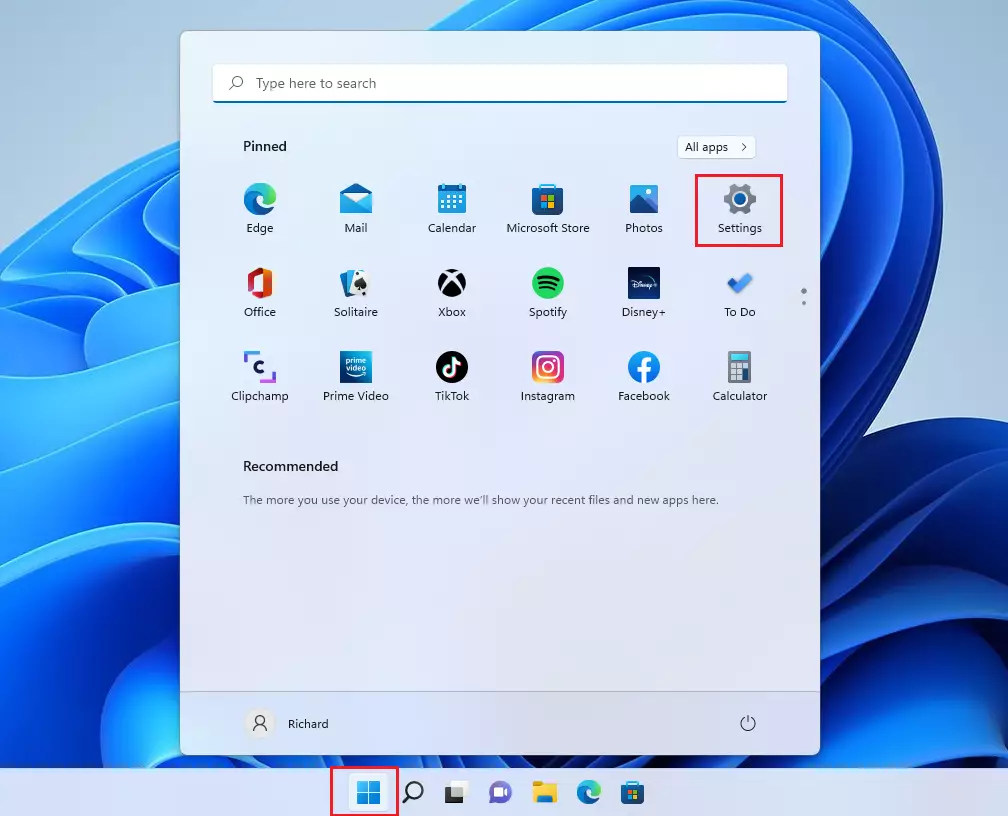
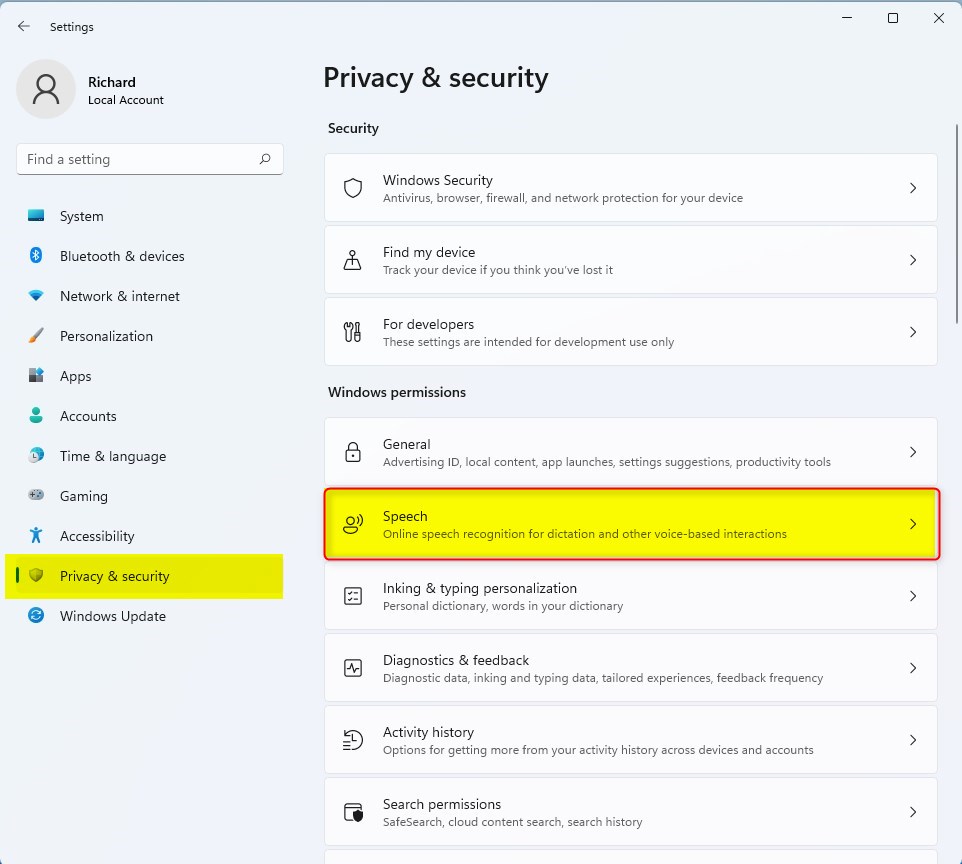
To stop Windows from sending voice data to Microsoft, go to Settings Privacy & security Speech and toggle off Online speech recognition. This prevents audio clips from being uploaded to Microsoft servers for analysis.
Why manage voice clips and dictation?
Windows 11 includes tools like voice typing to help you write text using your microphone. Sometimes, these tools collect audio data to improve accuracy. Protecting your privacy or stopping the voice typing overlay from appearing unexpectedly provides a good reason to disable these features.
What happens when you disable these features?
When you disable dictation, the Win+H shortcut will no longer trigger the listening interface, preventing accidental activation.
Understanding Speech Recognition Types
| Feature | Description |
|---|---|
| Online Speech Recognition | Uses Microsoft cloud servers to process your voice. Requires an internet connection. |
| Device-based Speech Recognition | Processes your voice locally on your computer. Does not send audio to the cloud. |
How to disable voice typing overlay and dictation
The voice typing overlay often appears when you press the Win+H shortcut. Disabling the feature entirely stops this behavior.
- Open Settings by pressing Win+I.
- Click Time & language in the left sidebar.
- Select Speech.
- Toggle off Online speech recognition to stop cloud processing.
Advanced: Permanently disable dictation via Registry Editor
You can permanently disable voice clips and dictation across Windows 11 by using the Registry Editor to turn off the cloud speech privacy setting. This method stops your computer from sending voice data to Microsoft servers. Backing up your registry before you start helps protect your system if something goes wrong.
- Press Windows + R, type regedit, and press Enter.
- Navigate to HKEY_CURRENT_USER\Software\Microsoft\Speech_OneCore\Settings\OnlineSpeechPrivacy.
- If the key does not exist, right-click the parent folder to create it.
- Set the HasUserAccepted value to 0.
Using Group Policy to disable speech services
Note that this step requires administrator rights and only works on Pro or Enterprise editions of Windows.
- Press Windows + R, type gpedit.msc, and press Enter.
- Go to Computer Configuration\Administrative Templates\Windows Components\App Privacy.
- Find Let Windows apps access Speech Recognition and set it to Disabled.
Summary
Managing voice data in Windows 11 remains essential for maintaining control over your privacy. Adjusting your Speech settings, using the Registry Editor, or applying Group Policy effectively disables voice clips and dictation. For more information on how Microsoft handles data, visit the official Microsoft Privacy documentation.
Was this guide helpful?

About the Author
Richard
Tech Writer, IT Professional
Richard is a writer at Geek Rewind who turns complex IT tasks into clear, step-by-step guides. He draws on years of hands-on experience in system administration and enterprise IT operations, focusing on Windows, Linux and WordPress: the problems people actually run into, and the fixes that work. His server and WordPress guides come from systems he runs himself. Richard builds and maintains the platform behind Geek Rewind, from its Ubuntu servers and Nginx configuration to its custom WordPress plugins. Many new tutorials start with readers' questions, and he's always glad to answer them in the comments.




No comments yet — be the first to share your thoughts!