How to Reset Recall Feature in Windows 11
Resetting the Recall feature in Windows 11 deletes all saved snapshots of your screen activity and reverts its settings to how they were when you first got your PC.
Recall is a new tool for Copilot+ PCs that keeps a history of what you do on your computer by taking pictures of your screen. This helps you find things you looked at before.
Recall is designed to store all its data locally on your device. It does not upload your activity history or screenshots to the cloud. This is a key privacy consideration.
Reset Recall by opening Settings, navigating to Privacy & Security, then Recall & Snapshots, clicking Advanced settings, and selecting Reset Recall. Confirm the action to delete all stored snapshots and restore default settings.
Latest Update
Recall is an optional feature that is not enabled by default. You choose whether to turn it on during the setup of a new user account on a Copilot+ PC.
Snapshots are saved every few seconds. Resetting Recall gets rid of this history, giving you a fresh start to record new activity.
You would reset Recall if it’s not working right, if you want to clear out old data and start fresh, or if you are concerned about the privacy of your past activity. Resetting gives you a clean slate for Recall’s recording.
How to Reset Recall in 🪟 Windows 11
You can reset the Recall feature in Windows 11 right from the Settings app to clear old data or fix any problems. To reset Recall, first open Windows Settings by clicking the Start menu and then Settings, or by pressing the Windows key and I together on your keyboard. This will take you to the main settings window where you can find the Recall options.
- Open Windows Settings: Click the Start menu (the Windows icon at the bottom left), then click Settings. Or press Windows key + I on your keyboard to open Settings directly.
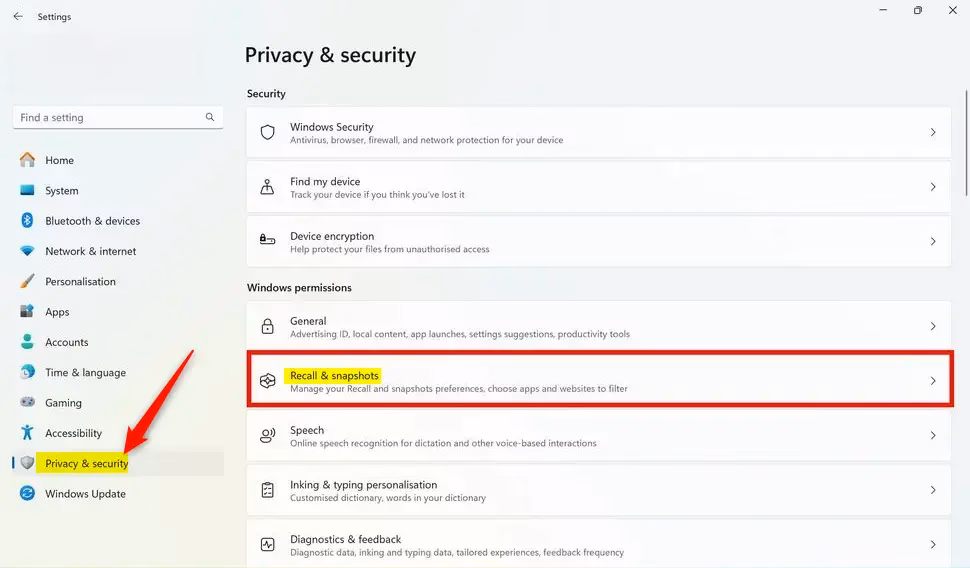
- Go to Privacy & Security: In the Settings window, look at the menu on the left side and click Privacy & security.
- Select Recall & Snapshots: On the right side, find and click on the Recall & snapshots section.
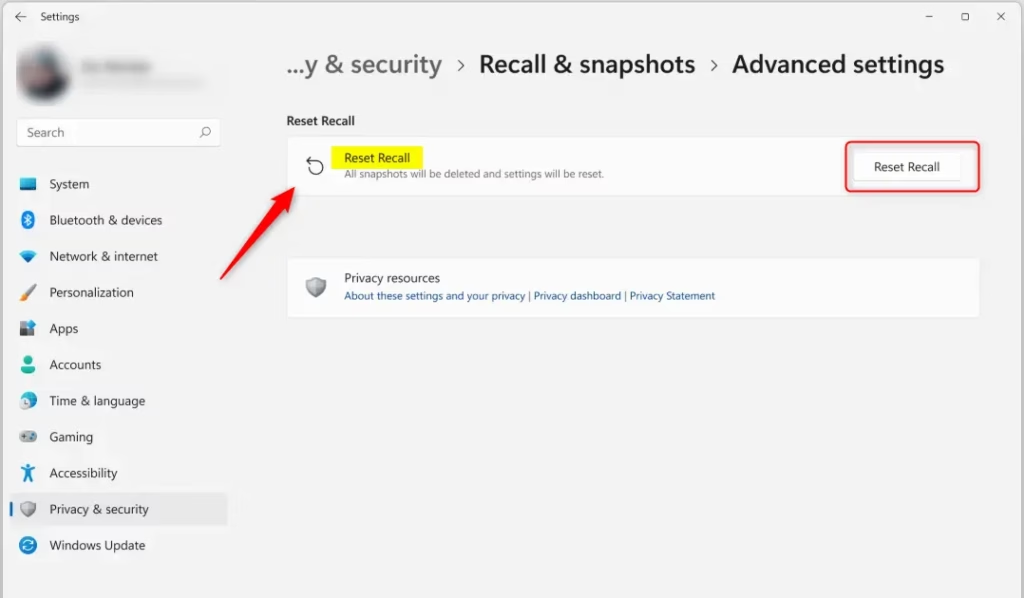
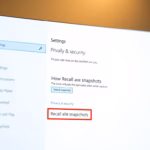
- Open Advanced Settings: Inside the Recall & snapshots page, click on Advanced settings to see more options.
- Click Reset Recall: Find and click the Reset Recall button.
- Confirm the Reset: A prompt will appear asking if you want to reset. Click Reset to finish.
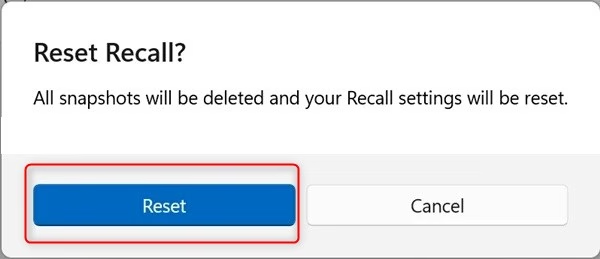
Your Recall feature will be reset. You can then close the Settings app. This process concludes the reset.
Summary
- Open Settings: Use Start menu or press ⊞ Win+I.
- Go to Privacy & Security: Find Recall & snapshots settings.
- Reset Recall: Click Advanced settings then Reset Recall.
- Confirm: Click Reset when asked.
- Manage Snapshots: After reset, you can start using Recall fresh or pause it anytime.
To reset Recall in Windows 11, open Settings using the Start menu or by pressing Windows key + I. Then, go to Privacy & Security and find Recall & snapshots. Click on Advanced settings and select Reset Recall, confirming the action when prompted. This process allows you to start fresh with the Recall feature.
If you want to stop using Recall entirely, you can disable it. Go to Settings > Privacy & security > Recall & snapshots and toggle the switch to Off. This stops Recall from taking new snapshots and saves storage space. You can also choose to delete existing snapshots from this menu.
Latest Update
To manage Recall more granularly, you can access additional settings. These settings allow you to control snapshot storage and potentially filter sensitive information. Look for options related to ‘Snapshot Management’ and ‘Sensitive Information Filtering’ within the Recall settings.
Is Microsoft recall on 🪟 Windows 11 by default?
Microsoft Recall isn’t on by default in Windows 11; it’s a feature you choose to turn on for each new user. If you don’t opt in when setting up a new user account, Recall and its snapshot saving will remain off.
System Requirements
Recall requires a Copilot+ PC.
What is Recall?
Recall is a new feature for certain Windows 11 PCs, called Copilot+ PCs. It works by taking screenshots of your activity on the computer at regular intervals. The goal is to help you easily find things you’ve seen or done on your PC before, like a searchable history of your screen. Think of it as a memory aid for your computer.
Was this guide helpful?

About the Author
Richard
Tech Writer, IT Professional
Richard, a writer for Geek Rewind, is a tech enthusiast who loves breaking down complex IT topics into simple, easy-to-understand ideas. With years of hands-on experience in system administration and enterprise IT operations, he’s developed a knack for offering practical tips and solutions. Richard aims to make technology more accessible and actionable. He's deeply committed to the Geek Rewind community, always ready to answer questions and engage in discussions.

No comments yet — be the first to share your thoughts!