This article explains how to publish a calendar in the new Outlook app on Windows 11.
This article explains how to change the Language, Date, and Time format in the new Outlook app in Windows 11.
The new Outlook for Windows brings the latest features and a modern and simplified design with support for Exchange-backed Microsoft 365 work or school, Outlook.com, Hotmail, and Gmail accounts.
The app has many features, including support for subscription management, email forwarding, setting default From address, backing up your mailbox, changing the reading pane, opening a new window for a message, language translations, turning text predictions on or off, switch primary account, sharing a calendar, changing language, date and time format, and more.
The Outlook app also lets you publish a calendar. You can publish a calendar and share a link with other people to let them view it online. Users can use an HTML link if they want recipients to view the calendar in a browser or an ICS link if you want them to subscribe.
Publishing your calendar in Outlook can be useful for sharing your schedule with others, whether for work or personal purposes. This can be useful for coordinating meetings, scheduling events, or simply keeping family and friends up-to-date with your availability.
Additionally, publishing your calendar can help you stay organized by allowing you to view your schedule from any device with internet access.
Publish your calendar in Outlook
As mentioned above, users can publish their calendar in Outlook with others to view online from any device with internet access using an HTML link.
If sharing a calendar isn’t an option, or if you want anyone with internet access to view your calendar, then publishing is the correct choice.
Here’s how to do it.
First, open the new Outlook app on Windows 11.
You can do that by clicking Start -> All app -> Outlook app. Or use the Start menu search box to search for Outlook and open it.

When the app opens, click the Settings button (gear on the top right) to proceed.

On the Settings page, click the Calendar tab on the left sidebar and select Shared calendars on the right.
Next, select the email account you want to apply message format settings if you have multiple accounts in Outlook.
This is an account-level setting that will apply only to the selected account. Please do this for each account you want it to apply.

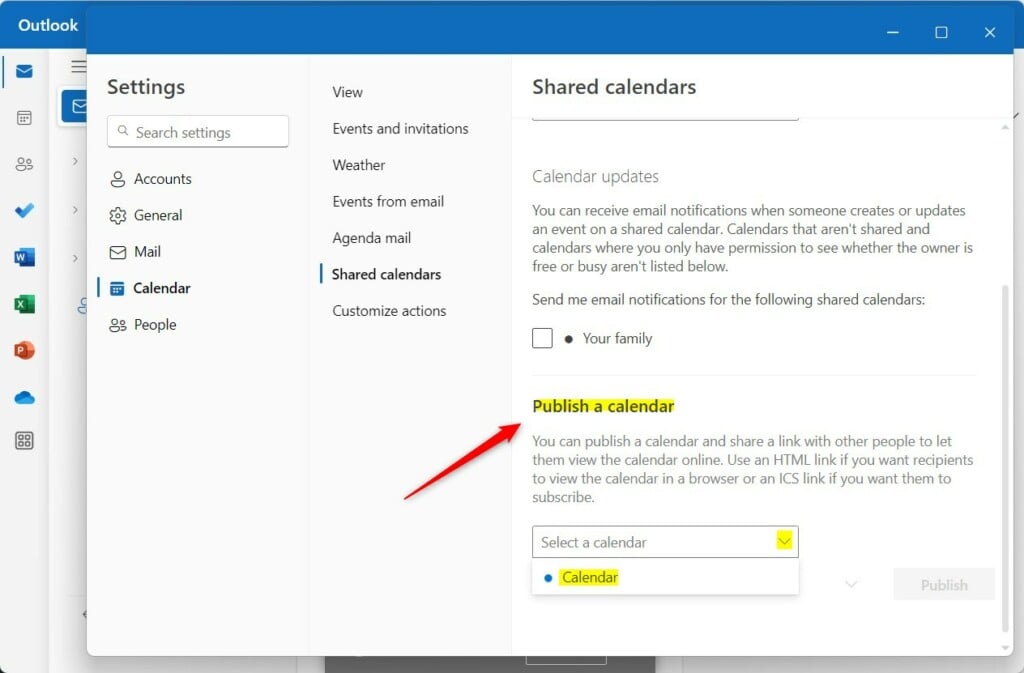
On the Shared calendars setting page, under “Publish a calendar,” select the calendar you want to share with others using the drop-down caret.
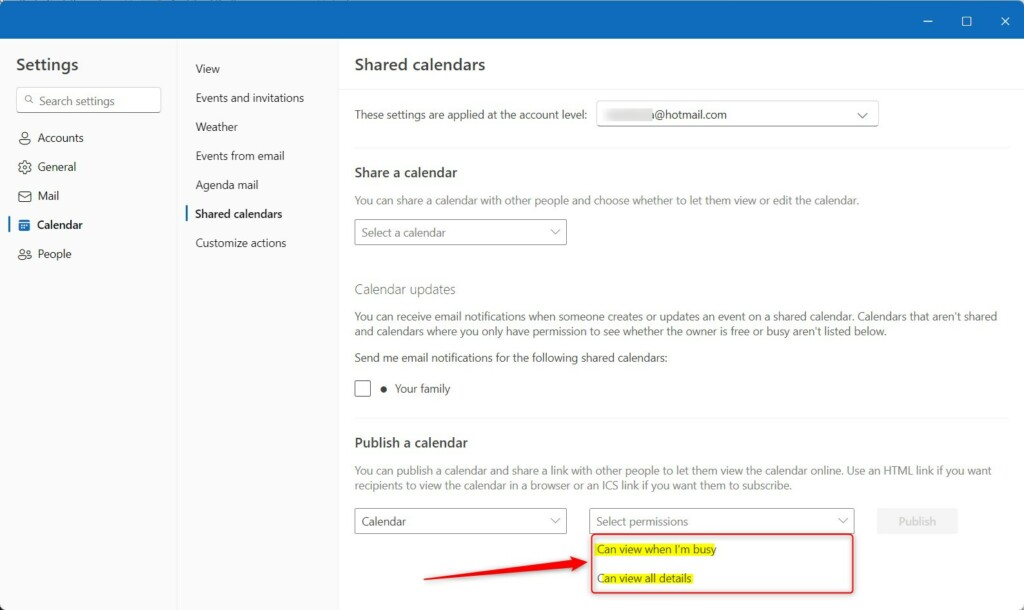
Under permissions, choose what the receipt can see on your calendar.
- Can view when I’m busy
- Can view all details
Make your selection and publish. You can choose how much access to allow and change view settings anytime.
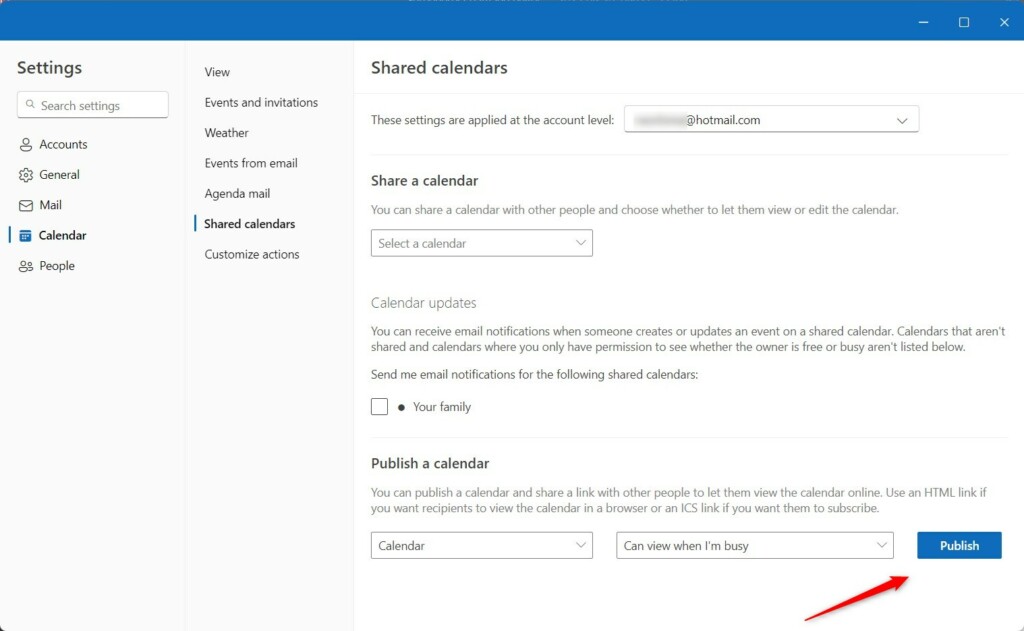
When you’re done, click the “Publish” button to create a shared link to the recipients.
After publishing, you will see HTML and ICS links that you can send to others who want to view your calendar online.
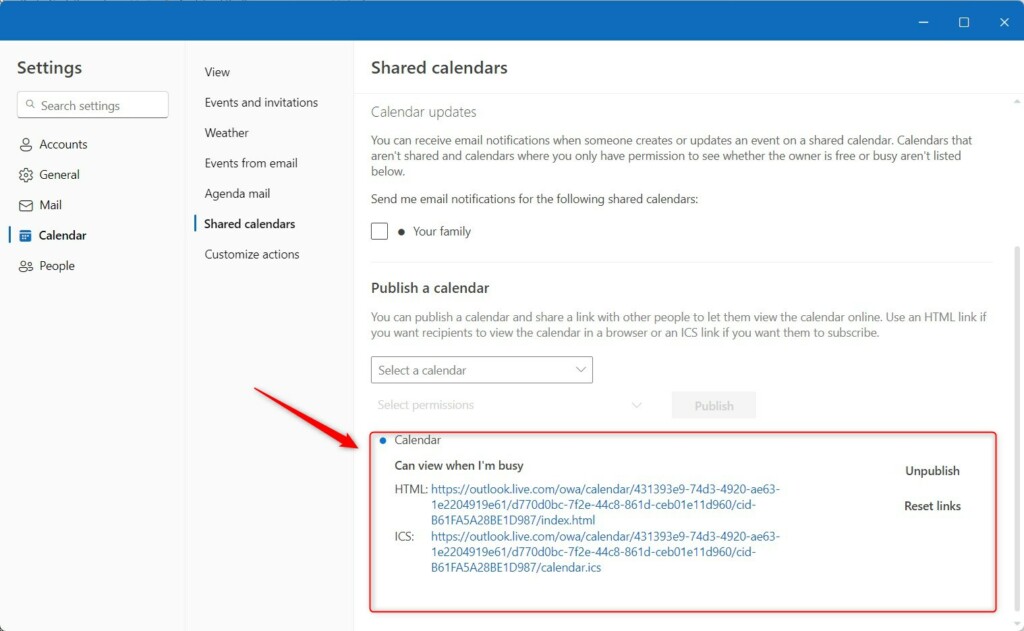
Grab the links, copy (CTRL + C), and send them to recipients you want to view your calendar.
Reset or Unpublish a calendar
Return to the Outlook Settings pane to change the view settings or unpublish a shared calendar. Then click Publish calendar and select the calendar.
Next, click the Reset links to change the view permissions or Unpublish to unpublish the calendar.
That should do it!
Conclusion:
- This tutorial provided a detailed guide on publishing a calendar in the new Outlook app on Windows 11.
- By following these steps, users can effortlessly share their schedules with others and keep track of their appointments from any internet-connected device.
- Please utilize the comment section below the post for further clarifications or contributions.

Leave a Reply Cancel reply