How to Add or Remove Lock Screen Widgets on Windows 11
Windows 11 lock screen widgets let you customize the information you see before logging in.
These widgets are like small display boxes that show helpful details at a glance. You can add widgets for things like the weather, your calendar appointments, or sports scores directly to your lock screen.
This means you get important updates without needing to fully unlock your PC, saving you time. For example, you can see the current temperature for your area right away.
Windows 11 supports up to four widgets on the lock screen. Learning how to add or remove them ensures your lock screen shows exactly what you find most useful.
Open Settings, navigate to Bluetooth & devices, then select Lock screen. In the “Your widgets” section, click “Add widget” to choose new ones or click the X next to an existing widget to remove it.
Step 1Turn On Lock Screen Widgets
Turning on Windows 11 lock screen widgets lets you see important info like weather or your calendar at a glance, even before you unlock your PC.
Step 2Open Windows Settings
To add or remove Windows 11 lock screen widgets, you first need to open the Settings app.
- Click the Start button and then click Settings.
- Or press
Windows key + Ion your keyboard.
Step 3Go to Lock Screen Settings
In the Settings window, follow these steps:
- Click on Bluetooth & devices in the left menu.
- On the right side, find and click Lock screen.


Step 4Add or Remove Widgets
The Widgets settings section in Windows 11 helps you manage what information is displayed. Scroll down to the “Your widgets” area and click it. This opens an expandable list of available widgets for your lock screen.
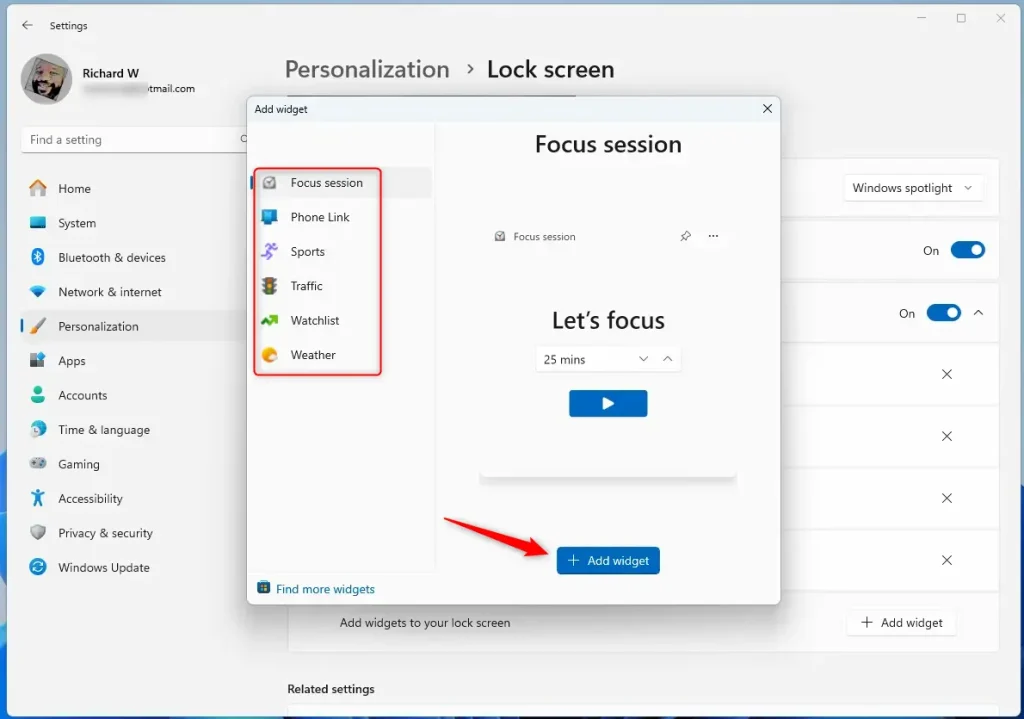
To Add Widgets:
- Click the Add widget button.
- Choose the widgets you want from the list (such as Weather or Calendar).
- Click Add widget again to confirm your choice.

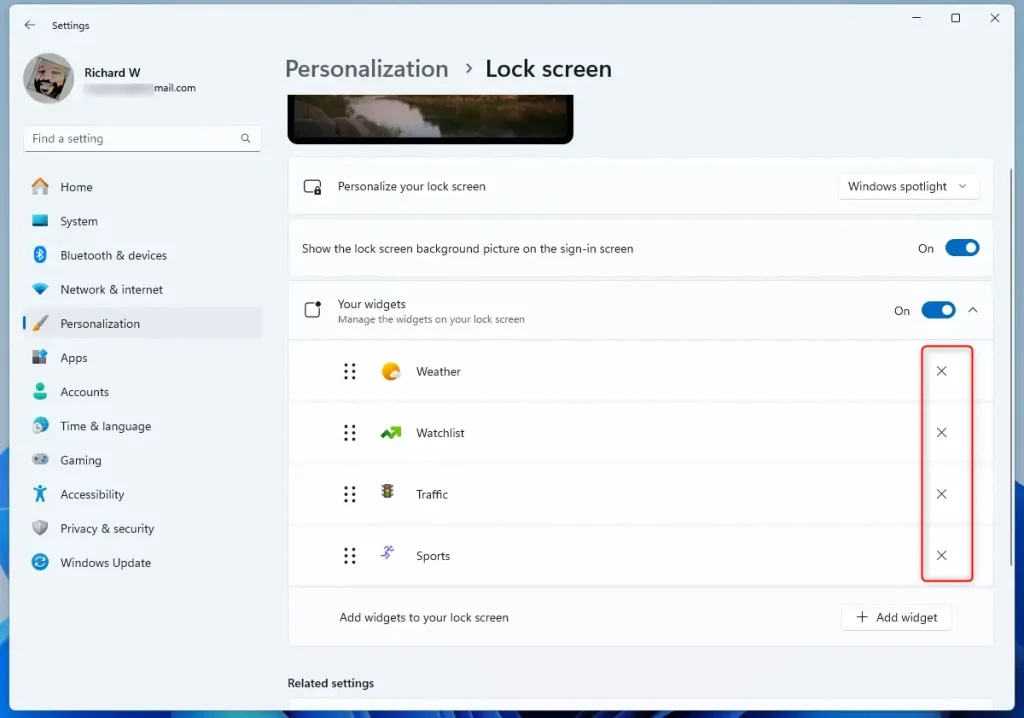
To Remove a Widget:
- Look at the list of your added widgets under Your widgets.
- Click the X button next to the widget you want to delete.
Step 5Close Settings
When you’re finished adding or removing widgets, close the Settings app. Your Lock screen will now display your chosen widgets.
Why Use Lock Screen Widgets?
Windows 11 lock screen widgets let you see important updates at a glance without needing to unlock your PC. You can quickly check things like the weather forecast or your next calendar appointment right from the lock screen. This makes your lock screen more useful by showing you key information instantly.- Quick Info: See important information like the weather or your calendar without unlocking your PC.
- Easy to Change: Add or remove widgets anytime through Settings.
- Make It Yours: Customize what information you want to see.
- Stay Updated: Keep Windows updated to get the newest widget features.
- Simple Interface: The Settings app makes managing widgets easy to understand.
Summary
Managing Windows 11 lock screen widgets is straightforward: open Settings, go to ‘Lock screen,’ and add or remove what you need.
Was this guide helpful?

About the Author
Richard
Tech Writer, IT Professional
Richard, a writer for Geek Rewind, is a tech enthusiast who loves breaking down complex IT topics into simple, easy-to-understand ideas. With years of hands-on experience in system administration and enterprise IT operations, he’s developed a knack for offering practical tips and solutions. Richard aims to make technology more accessible and actionable. He's deeply committed to the Geek Rewind community, always ready to answer questions and engage in discussions.

No comments yet — be the first to share your thoughts!