How to Install the LEMP Stack on Windows WSL
You install the LEMP stack on Windows WSL by setting up Linux, Nginx, MySQL, and PHP within your Windows Subsystem for Linux environment.
The LEMP web server stack, a group of software components powering dynamic websites and applications, can be installed using Ubuntu 22.04 LTS on Windows 10 or 11.
This setup allows you to run robust web server technology directly on your Windows PC, leveraging the power of Linux distributions.
Install Ubuntu from the Microsoft Store, enable WSL and Virtual Machine Platform features in PowerShell, and set WSL 2 as the default. Run the command dism.exe /online /enable-feature /featurename:Microsoft-Windows-Subsystem-Linux /all /norestart in an administrator PowerShell.
What is LEMP?
LEMP, a common software bundle for web servers, stands for Linux (Ubuntu), Nginx HTTP Server, MariaDB or MySQL Database Server, and PHP Scripting Language. These are free, open-source programs that function together to power many websites and content management systems, such as WordPress, as of today.
Why Install LEMP on Windows?
Installing the LEMP stack on Windows WSL lets you run Linux web development tools right on your Windows computer. This setup is great for developers who want to test websites in a Linux environment without leaving Windows, making the process much more convenient. WSL 2 is the newest version and runs faster.
WSL 2 is the newest version. It runs faster and works better than the old version. It lets you run a complete Linux operating system inside Windows.
What You Need
You’ll need Windows 10 version 2004 or newer. If you have that, you’re ready to start.
Step 1Enable WSL in Windows
To set up the LEMP stack on Windows WSL, you must first enable the Windows Subsystem for Linux. This feature lets your Windows computer run Linux environments alongside your regular apps, which is essential for installing the LEMP stack. Open PowerShell as an administrator to begin.
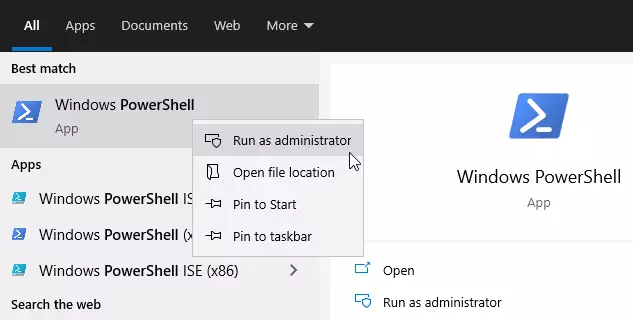
First, open PowerShell as an administrator. Click on Start and type “PowerShell.”
Right-click Windows PowerShell and choose “Run as administrator.”
Copy and paste this command into PowerShell:
dism.exe /online /enable-feature /featurename:Microsoft-Windows-Subsystem-Linux /all /norestartYou should see a success message like this:
Deployment Image Servicing and Management tool
Version: 10.0.19041.844

Image Version: 10.0.19042.844

Enabling feature(s)
[==========================100.0%==========================]
The operation completed successfully.
Step 2Enable Virtual Machine Platform
For the LEMP stack on Windows WSL to work correctly, especially with WSL 2, you need to turn on the Virtual Machine Platform. This feature is crucial for running Linux distributions within Windows and ensures WSL 2 operates as intended. Run the provided command in PowerShell.
WSL 2 needs the Virtual Machine Platform feature turned on. This is different from Hyper-V. Run this command in the same PowerShell window:
dism.exe /online /enable-feature /featurename:VirtualMachinePlatform /all /norestartIf you’re on a Windows 10 version older than 2004, use this command instead:
Enable-WindowsOptionalFeature -Online -FeatureName VirtualMachinePlatform -NoRestartAfter restarting your computer, open PowerShell as administrator again. Run the command `wsl –set-default-version 2` to set WSL 2 as your default version. This ensures that all future WSL distributions use the more advanced WSL 2 architecture for improved performance.
wsl --set-default-version 2Step 3Install Ubuntu on 🪟 Windows 10
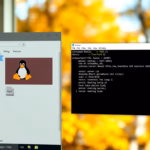
With WSL 2 set up on your Windows computer, the next vital step for your LEMP stack is to install Ubuntu. You can easily get this popular Linux operating system directly from the Microsoft Store, providing the foundation for your web server environment. Search for ‘Ubuntu 20.04 LTS’ in the store.
Get Ubuntu 20.04 LTS – Microsoft Store
Ubuntu 20.04 LTS gives you access to Ubuntu’s terminal and command line tools, such as bash (a command interpreter), ssh (for secure remote login), git (for version control), and apt (a package manager).
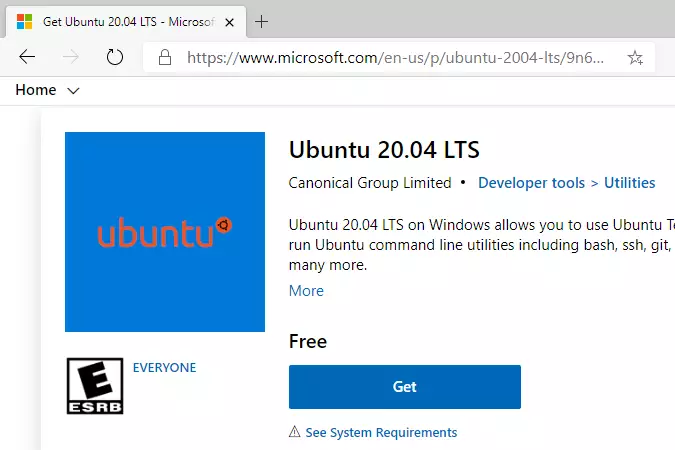
Click the "Get" button in the Microsoft Store to install Ubuntu on your Windows Subsystem for Linux (WSL). This download typically takes 5 minutes and allows you to run Linux applications directly on Windows. After the installation completes, you can launch Ubuntu from WSL.
Ubuntu asks you to create a username and password when you first launch Ubuntu. This username and password are required to log in and perform administrative tasks on your Ubuntu system within WSL.
Installing, this may take a few minutes.
Please create a default UNIX user account. The username does not need to match your Windows username.
For more information visit: https://aka.ms/wslusers
Enter new UNIX username: user1
New password:
Retype new password:
passwd: password updated successfully
Installation successful!
To run a command as administrator (user "root"), use "sudo <command>".
See "man sudo_root" for details.

Welcome to Ubuntu 20.04.2 LTS (GNU/Linux 4.4.0-19041-Microsoft x86_64)

 * Documentation:  https://help.ubuntu.com
 * Management:     https://landscape.canonical.com
 * Support:        https://ubuntu.com/advantage

  System information as of Mon Apr 12 17:57:37 CDT 2021

  System load:    0.52      Processes:             7
  Usage of /home: unknown   Users logged in:       0
  Memory usage:   26%       IPv4 address for eth0: 192.168.1.100
  Swap usage:     0%

1 update can be installed immediately.
0 of these updates are security updates.
To see these additional updates run: apt list --upgradable
Great! Ubuntu is now installed. If you have trouble, try these commands:
wsl --set-default-version 1
bcdedit /set hypervisorlaunchtype auto start
Now you’re ready to install the rest of LEMP.
Step 4Update Ubuntu Linux
After installing Ubuntu for your LEMP stack on Windows WSL, it’s important to update your Linux system. Running updates ensures you have the latest software packages and security fixes, which is crucial for a stable and secure web server environment. Use the provided commands to update Ubuntu.
The "L" in LEMP stands for Linux. You have installed Ubuntu, a popular Linux distribution, and now it is time to update Ubuntu to the latest version.
Run these commands:
sudo apt update
sudo apt upgrade
sudo apt autoremove
The sudo command runs things with administrator access. Ubuntu will ask for your password.
Step 5Install Nginx Web Server
The ‘N’ in LEMP stands for Nginx, a fast and popular web server. Installing Nginx on your Windows WSL Ubuntu system is the next step, allowing you to host websites directly from your computer and serve web content efficiently. Run the following commands in your Ubuntu terminal to install Nginx.
The “E” in LEMP stands for Nginx [engine x]. Nginx is a fast, popular web server that powers many websites.
Run these commands to install Nginx:
When you install Nginx, it becomes a web server that can display web pages on your computer. For example, Nginx can serve a basic HTML file located at `/var/www/html/index.html` to anyone who visits your IP address.
Use these commands to control Nginx:
sudo service nginx stop
sudo service nginx start
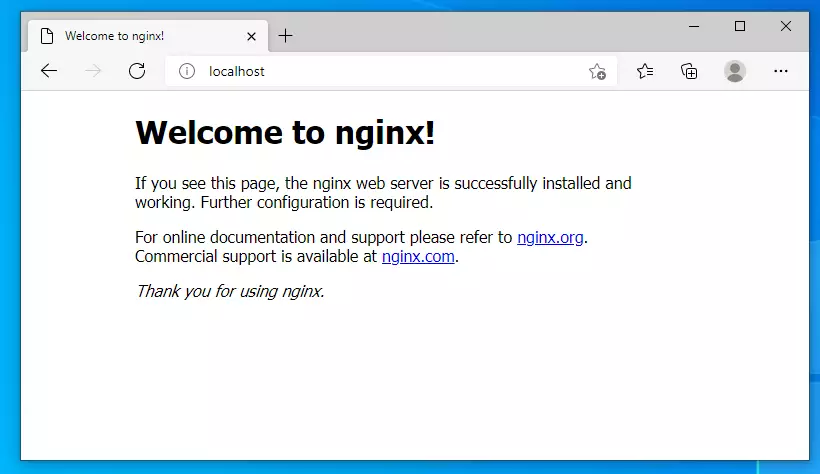
sudo service nginx restartTo check if Nginx is working, open your web browser and go to:
http://localhostYou should see a test page that says “Welcome to nginx!”
Step 6Install MariaDB Database Server
To complete the LEMP stack on Windows WSL, you need a database server to store website data. Installing MariaDB provides a dependable and fast way to manage your website’s information, serving as the ‘M’ in your LEMP setup. Run these commands to install MariaDB.
The "M" in LEMP represents MariaDB or MySQL, which are database servers. Database servers like MariaDB and MySQL store all the important data for your websites, such as user information and content.
MariaDB is a free, open-source database known for its speed and security. Most Linux systems use MariaDB because it efficiently manages data for applications.
Run these commands to install MariaDB:
sudo apt-get install mariadb-server mariadb-clientWhat happens when you install MariaDB? Your computer now has a database system that can store information for websites.
Use these commands to control MariaDB:
sudo service mysql stop
sudo service mysql start
sudo service mysql restartsudo mysql_secure_installationAnswer the questions like this:
Enter current password for root (enter for none): Press Enter
Set root password? [Y/n]: Y
New password: Type a strong password
Re-enter new password: Type it again
Remove anonymous users? [Y/n]: Y
Disallow root login remotely? [Y/n]: Y
Remove test database and access to it? [Y/n]: Y
Reload privilege tables now? [Y/n]: Y
To check if MariaDB is working, log into the database. Run this command:
sudo mysql -u root -pType your root password when asked. If you see this, MariaDB is installed correctly:
Welcome to the MariaDB monitor.  Commands end with ; or g.
Your MariaDB connection id is 46
Server version: 10.3.29-MariaDB-0ubuntu0.20.04.1 Ubuntu 20.04
Copyright (c) 2000, 2018, Oracle, MariaDB Corporation Ab and others.
Type 'help;' or 'h' for help. Type 'c' to clear the current input statement.

MariaDB [(none)]>
Type exit to leave the database.
Step 7Install PHP-FPM and Modules
PHP is the scripting language that makes websites dynamic. Installing PHP-FPM along with its necessary modules is a key step for your LEMP stack on Windows WSL. This component handles the processing of your website’s code, acting as the ‘P’ in LEMP. Use the commands provided to install PHP.
The “P” in LEMP stands for PHP. PHP is a programming language that makes websites work. It connects all the parts of LEMP together.
Run this command to install PHP and helpful add-ons:
sudo apt install php-fpm php-common php-mysql php-gmp php-curl php-intl php7.4-mbstring php-xmlrpc php-gd php-xml php-cli php-zipWhat happens when you install PHP? Your web server can now run websites that use PHP code.
Use these commands to control PHP:
sudo service php7.4-fpm stop
sudo service php7.4-fpm start
sudo service php7.4-fpm restart
To check if PHP is installed, run:
php -vYou should see something like this:
PHP 7.4.3 (cli) (built: Oct  6 2020 15:47:56) ( NTS )
Copyright (c) The PHP Group
Zend Engine v3.4.0, Copyright (c) Zend Technologies
with Zend OPcache v7.4.3, Copyright (c), by Zend Technologies
Step 8Test PHP with Nginx
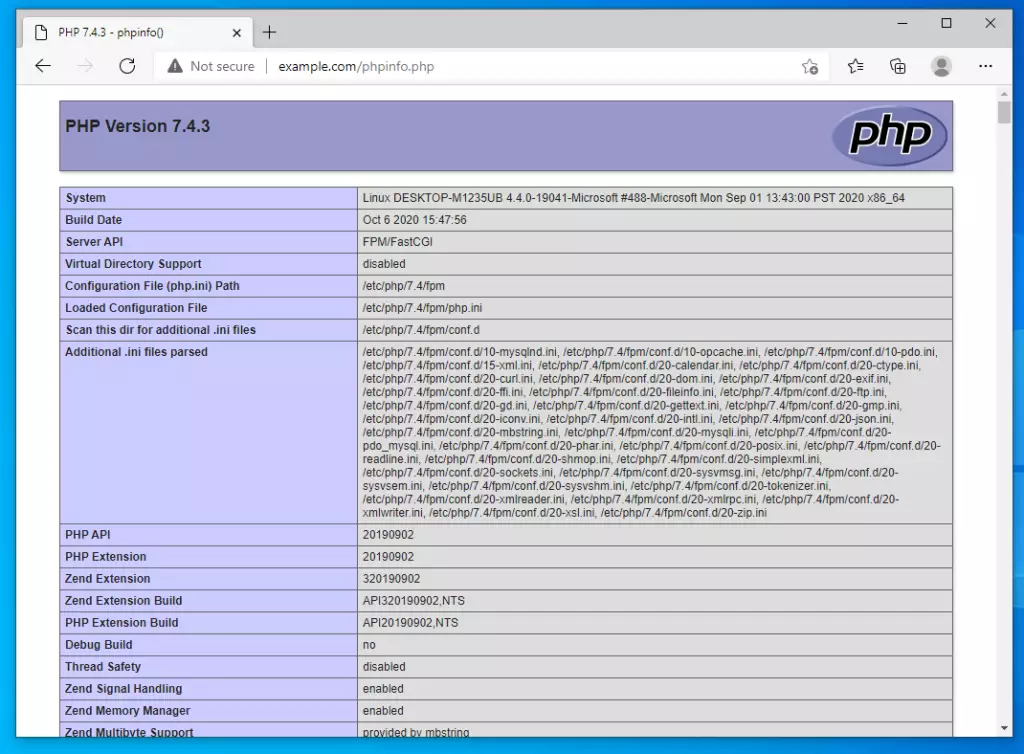
After installing all the necessary components for your LEMP stack on Windows WSL, it’s crucial to test that PHP works correctly with Nginx. Creating a simple PHP info file will confirm that your web server and scripting language are communicating properly. Run this command to create a test file.
Now let’s create a test file to make sure PHP and Nginx work together.
Run this command to create a PHP test file:
sudo nano /var/www/html/phpinfo.phpType this content:
<?php phpinfo( ); ?>Save the file by pressing Ctrl+X, then Y, then Enter.
Next, edit the Nginx settings. Run this command:
sudo nano /etc/nginx/sites-available/defaultFind and uncomment these lines (remove the # symbols):
# Default server configuration
#
server {
        listen 80 default_server;
        listen [::]:80 default_server;
        #
        # include snippets/snakeoil.conf;

        root /var/www/html;

        # Add index.php to the list if you are using PHP
        index index.php index.html index.htm index.nginx-debian.html;

        server_name _;

        location / {
                # First attempt to serve request as file, then
                # as directory, then fall back to displaying a 404.
                try_files $uri $uri/ =404;
        }

        # pass PHP scripts to FastCGI server
        #
        location ~ .php$ {
               include snippets/fastcgi-php.conf;
        #
        #       # With php-fpm (or other unix sockets):
                fastcgi_pass unix:/var/run/php/php7.4-fpm.sock;
        #       # With php-cgi (or other tcp sockets):
        #       fastcgi_pass 127.0.0.1:9000;
        }

        # deny access to .htaccess files, if Apache's document root
        # concurs with nginx's one
        #
        #location ~ /.ht {
}
Save the file. Then restart Nginx:
sudo service nginx restartOpen your web browser and go to:
The PHP information page confirms that PHP and Nginx are now working together correctly. You can verify this by opening the page in your web browser, which displays details about your PHP installation.
Summary
You have successfully set up the full LEMP stack on Windows 10 using WSL 2 and Ubuntu, creating a powerful Linux environment for web development directly on your Windows computer. Key steps included enabling WSL, installing Ubuntu, and then setting up Nginx, MariaDB, and PHP to complete your LEMP stack.
- Enabled WSL 2 on Windows
- Installed Ubuntu 20.04 inside WSL
- Installed Nginx web server
- Installed MariaDB database
- Installed PHP scripting language
- Tested that everything works together
Your Windows computer now has a complete Linux environment with all the tools needed to build and test websites. You can use this setup to develop websites locally before putting them on the internet.
If you run into any problems, check the troubleshooting commands earlier in this guide. Good luck with your web development!
How to install WSL file in Windows?
And run the command wsl-to. This lists all the Windows subsystem for Linux distros. I can in install directly from the command.
Was this guide helpful?

About the Author
Richard
Tech Writer, IT Professional
Richard, a writer for Geek Rewind, is a tech enthusiast who loves breaking down complex IT topics into simple, easy-to-understand ideas. With years of hands-on experience in system administration and enterprise IT operations, he’s developed a knack for offering practical tips and solutions. Richard aims to make technology more accessible and actionable. He's deeply committed to the Geek Rewind community, always ready to answer questions and engage in discussions.


No comments yet — be the first to share your thoughts!